I’ve seen this saying on kitchen printables all over Pinterest, so I decided I should embroider it! ♥
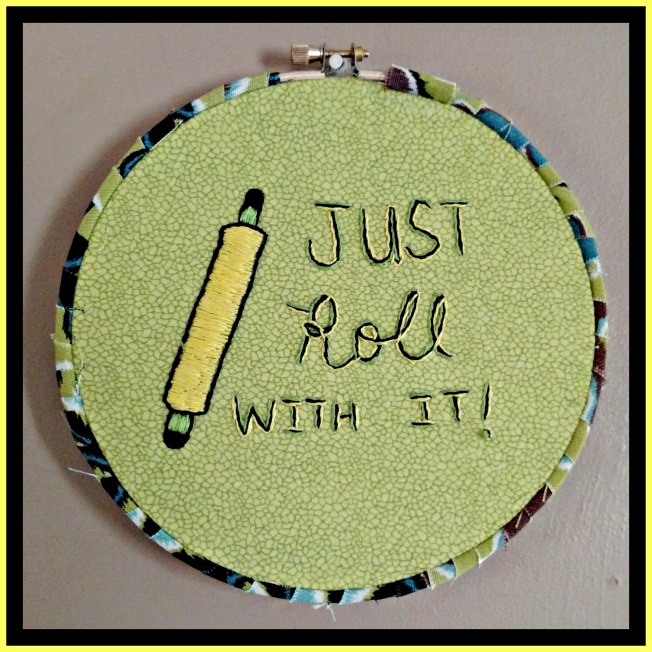
I’ve seen this saying on kitchen printables all over Pinterest, so I decided I should embroider it! ♥
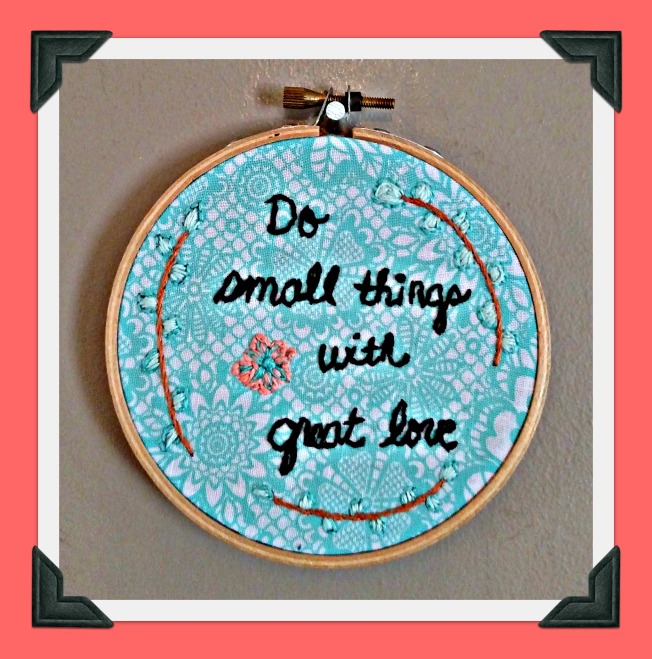
I found this design as a free printable on View Along the Way (thank you, Kelly!) and decided I must embroider it! It’s based on Colossians 3:12-14 . . . and a good reminder to start every day with love. ♥

I found this inspiring embroidery design at Nana Company. (Click here for the free pattern . . . thank you, Amy!) It’s so pretty! Even more, its message expresses how I hope to live my life. ♥
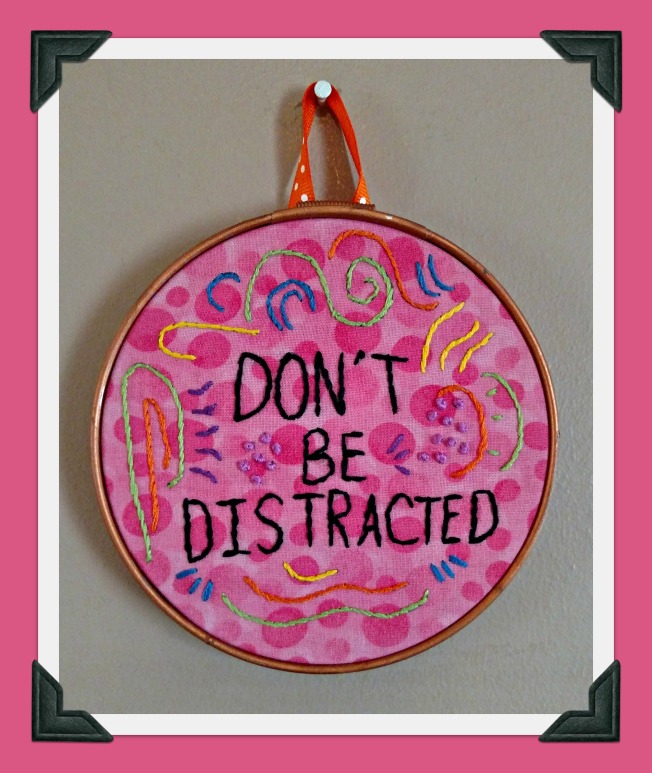
Another blog that has amazing embroidery patterns to share is Wild Olive. This one was so much fun to make! I especially love how the words and the design cancel each other out. Click here for the free pattern . . . thank you, Mollie! ♥
Yes, it’s another Flamingo Toes hoop art pattern . . . a housewarming gift for a loved one who just bought a new cottage (and loves purple!). ♥

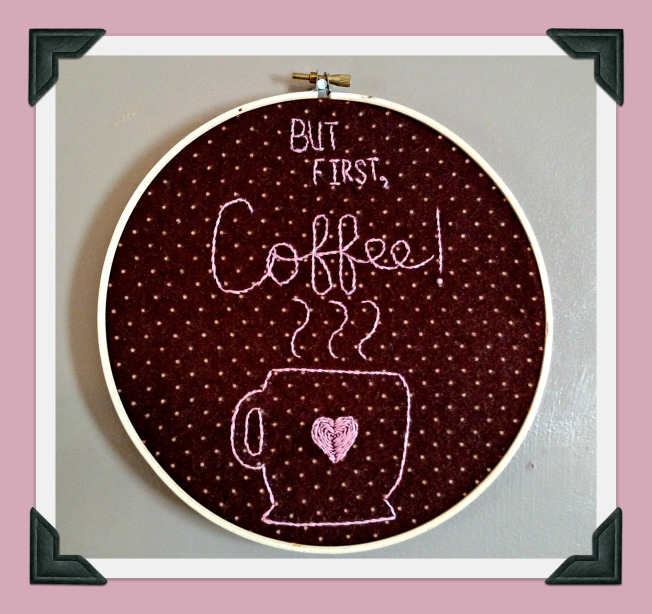
Have you checked out Flamingo Toes yet? Here is another piece of hoop art I made based on one of Bev’s fun embroidery projects. It’s sitting on an easel right beside my coffee pot where it brings a smile each morning. ♥ P.S. Bev also has a cute travel mug cozy with this same saying if you’re looking for a teacher gift!
If you ever need a fun embroidery idea, visit Flamingo Toes! Bev graciously shares this fun pattern here, and it made a perfect gift for a guest speaker at my writer’s group. More of Bev’s great ideas to come! ♥

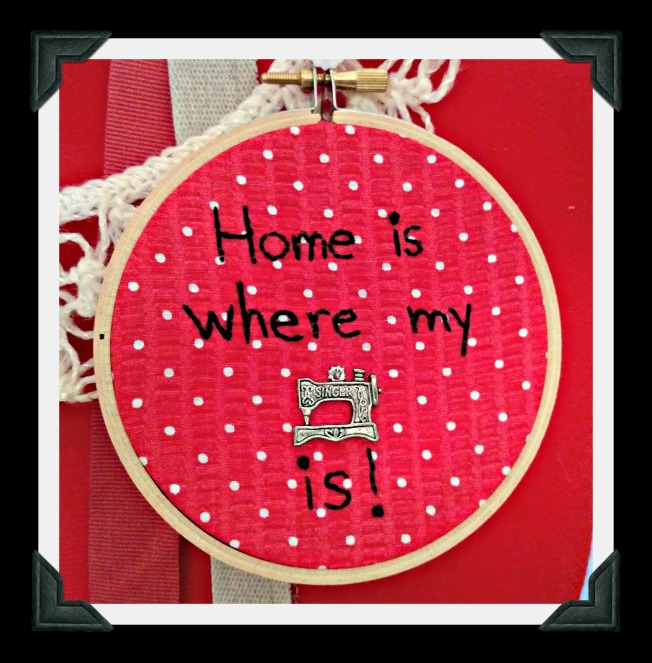
I won this charm in a blog giveaway a few years ago. I saw its twin on a cute card on the Facebook page of Michelle of SewMichelle . . . AND I have a Singer that my parents gave me in high school that I still use . . . so I just had to turn the saying into an embroidery project. ♥
My niece and her husband have a little one coming soon! I saw lots of cute elephant-themed items on their registry, so I purchased a couple and then bought some flannel to make some burp cloths. I had one little strip left over so dreamed up a pillow for the rocking chair, too. Can’t wait to meet the newest member of the family! ♥

More embroidery! I’ve always loved this upbeat saying, and it was perfect when we woke up to a surprise snow on Easter morning! ♥

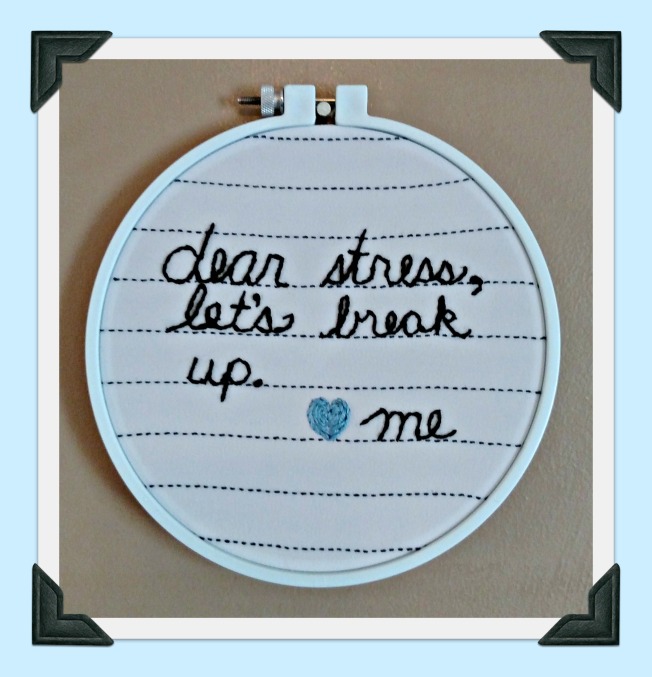
I have a little poster on my office bulletin board that says, “She believed she could, so she did.” That’s so empowering! It also matches my latest embroidery project, a reverse of the common pessimistic declaration “I’ll believe it when I see it.” It makes you think for a moment, but it’s true! ♥

I saw this on a poster, and it begged to become my next embroidery project. I hope it gives you a smile today! ♥
I’ve been embroidering lately since it fits in my here-and-there creative moments. This quote seemed the perfect choice when I found enough heart fabric to fit these two little hoops. After embroidering, I wrapped the outer hoops in red polka-dot fabric strips for a bit of extra color, and then I gathered the backs and covered them with circles of the same fabric to finish them off. I’m going to take this message to heart! ♥


I always love to get out my felt conversation heart garland when February rolls around! Remember to show extra love to everyone in your life this month, and have a fun Valentine’s Day! ♥
Other Valentine’s Day Craftiness:


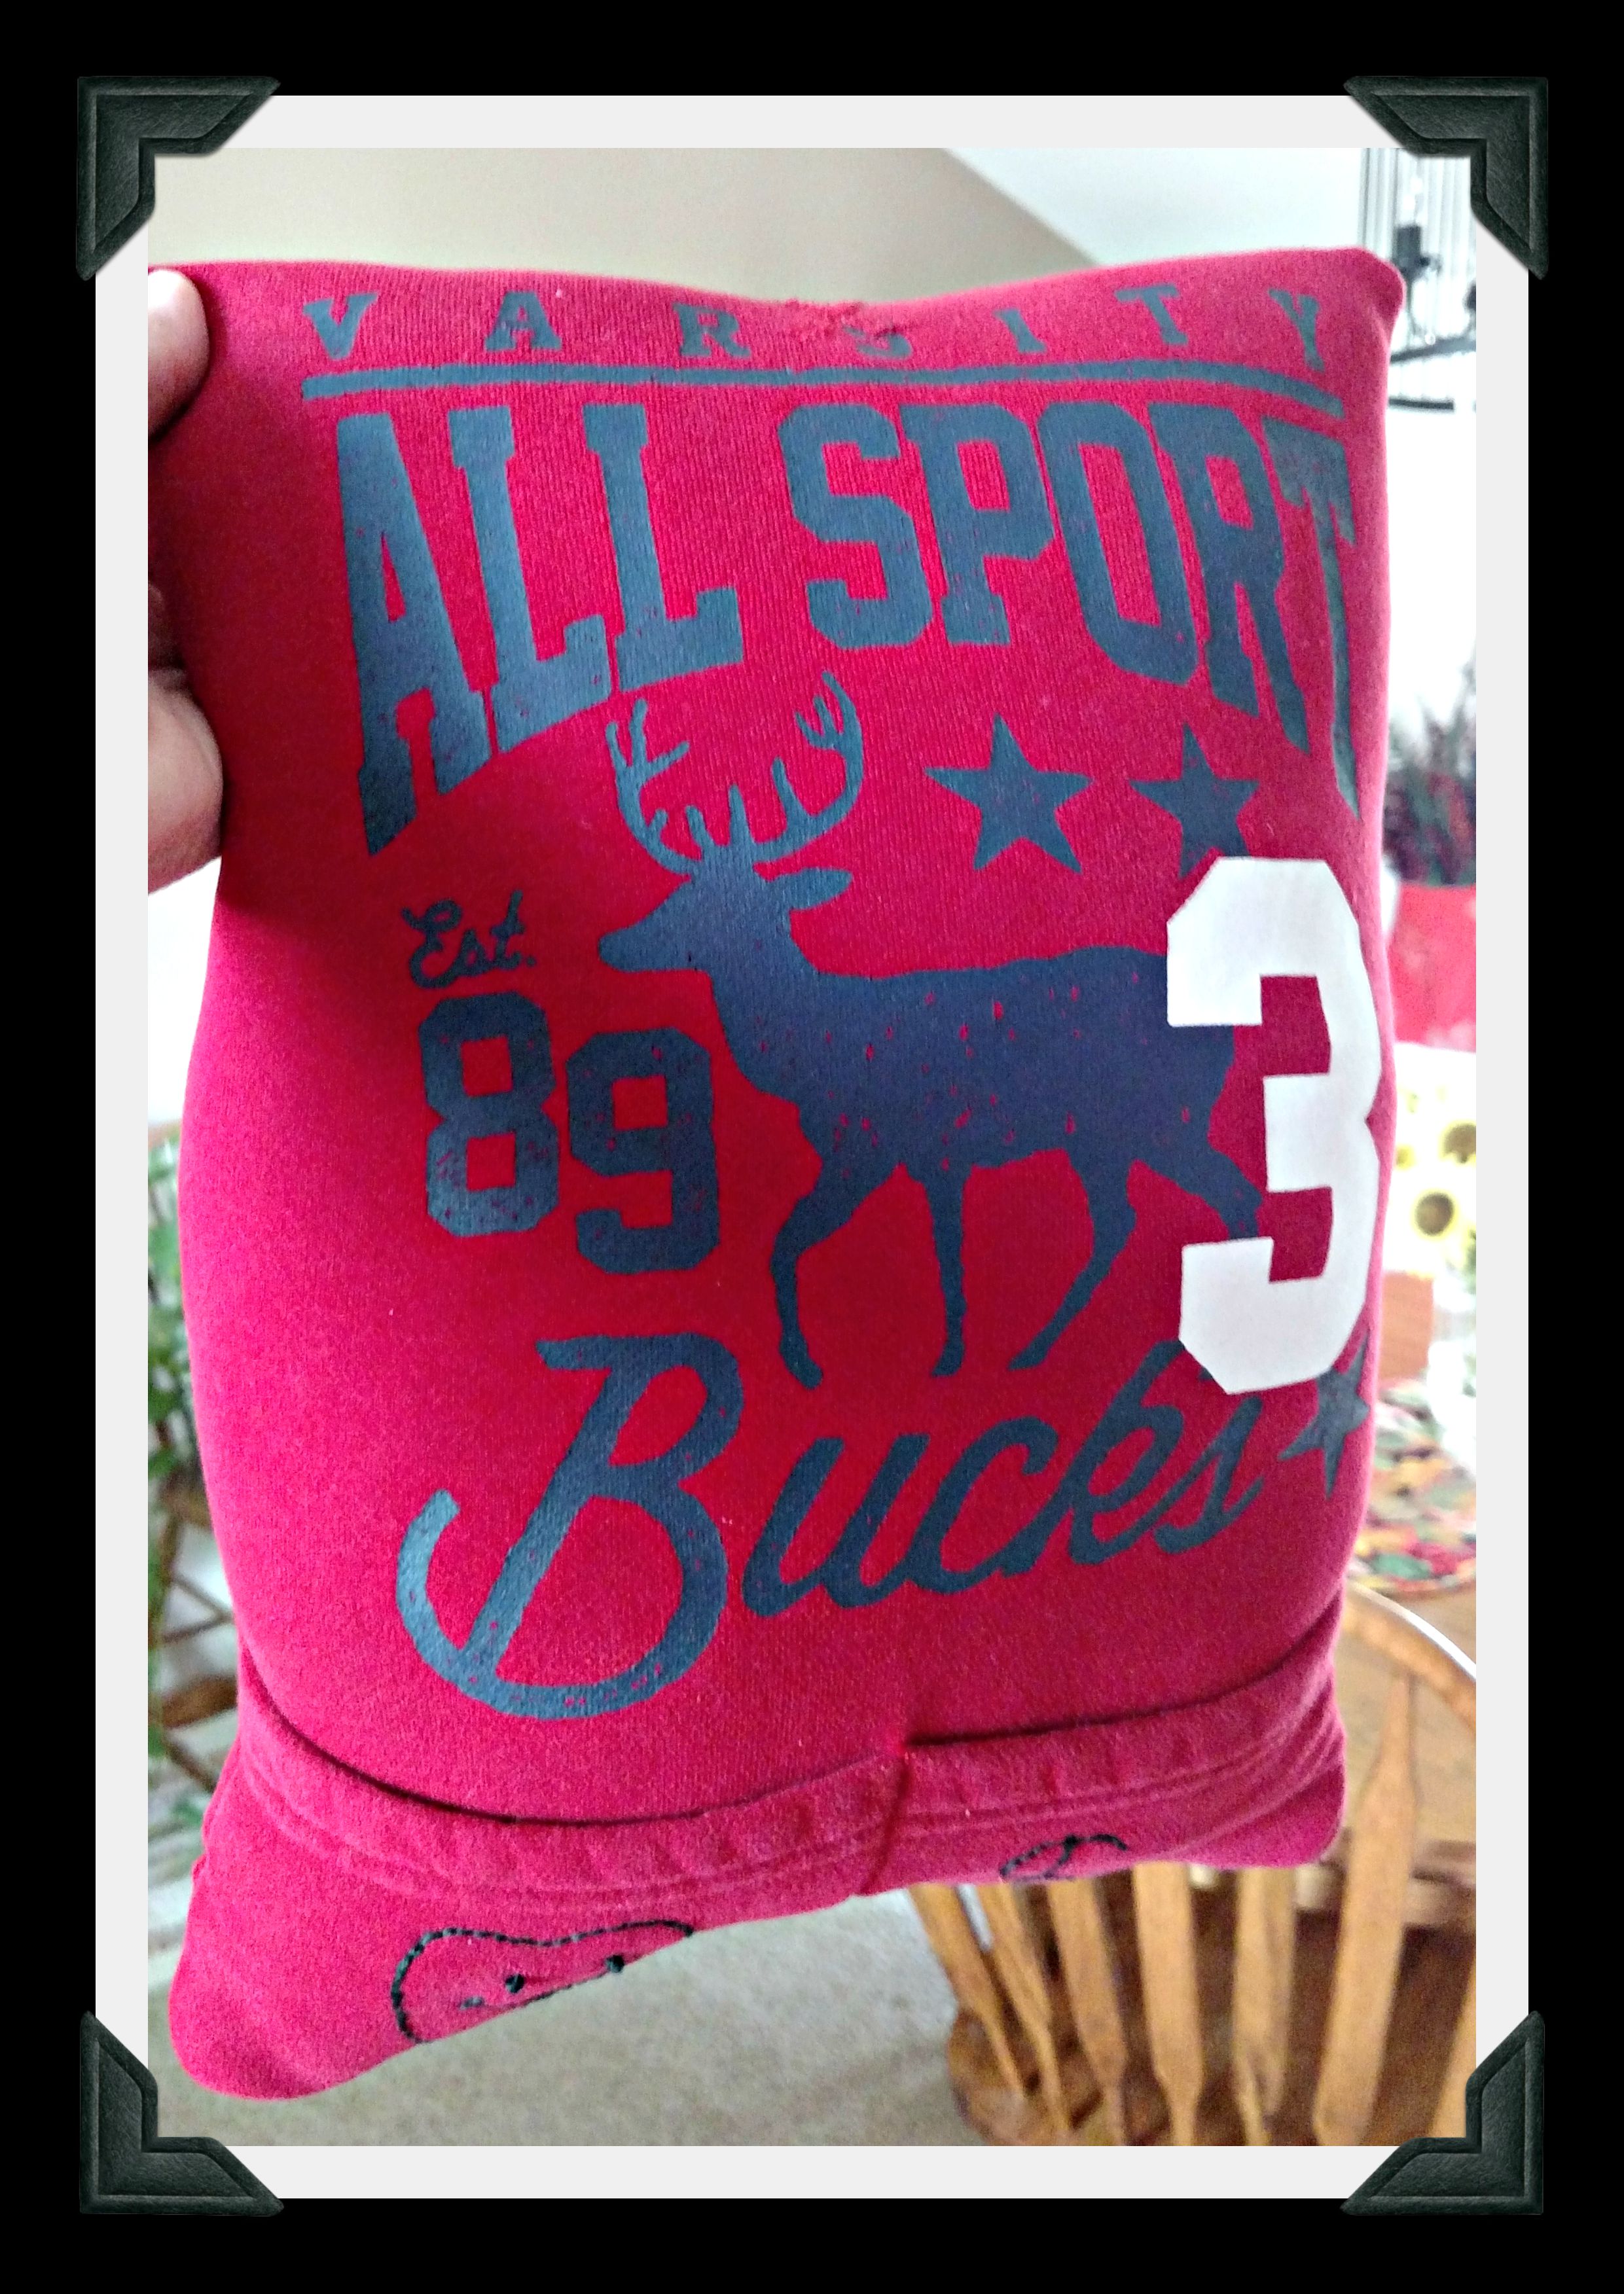
Our sweet little Mason is turning five, so it’s time for a tooth fairy pillow! I love making them from beloved outgrown garments, and Mason’s mom picked a hoodie. I design as I go along, trying to keep as many of the structural elements and as much as of the text as possible. Click here and here for two more hoodie versions. Happy birthday, Mason! ♥

A fun way to present a handmade or store-bought gift is in a bag made of a fabric design that fits the gift. Sometimes you can use a bit of fabric left over from the project itself, such as this bag for Katy’s superhero cape with a “K” logo for a-la-mode:

Other times, you can use a themed fabric, such as this beach-designed bag for the swimsuit cover-up I made for Danielle and bunny/carrot fabric for a carrot and book for a toddler Easter gift:


It’s also fun to find fabric that matches books. Here is some Mr. Men fabric for a drawstring bag for a set of books for Kira and some Nancy Drew fabric for a tote bag full of books for Ally and Miranda:


A final idea is to add embroidery to “regular” fabric to fit the theme, such as this bag for cookie cutters:

I love making drawstring bags and totes when I need a quick “sewing fix,” so this is definitely win-win. Thank you for checking them out! ♥
Brown and pink for girls . . . gray and chevron for boys . . . bunny pattern available from Positively Splendid . . . bunnies embroidered with names and attached with Heat n’ Bond and outline stitch . . . use any lined tote pattern . . . time for an Easter egg hunt! ♥

![pillow[1]](https://pillowsalamode.files.wordpress.com/2015/03/pillow1.jpg) It’s always fun to switch out the winter decorations for spring things! Here’s my favorite pillow (and the story behind it!) and links to some other handmade goodies. Enjoy! ♥
It’s always fun to switch out the winter decorations for spring things! Here’s my favorite pillow (and the story behind it!) and links to some other handmade goodies. Enjoy! ♥
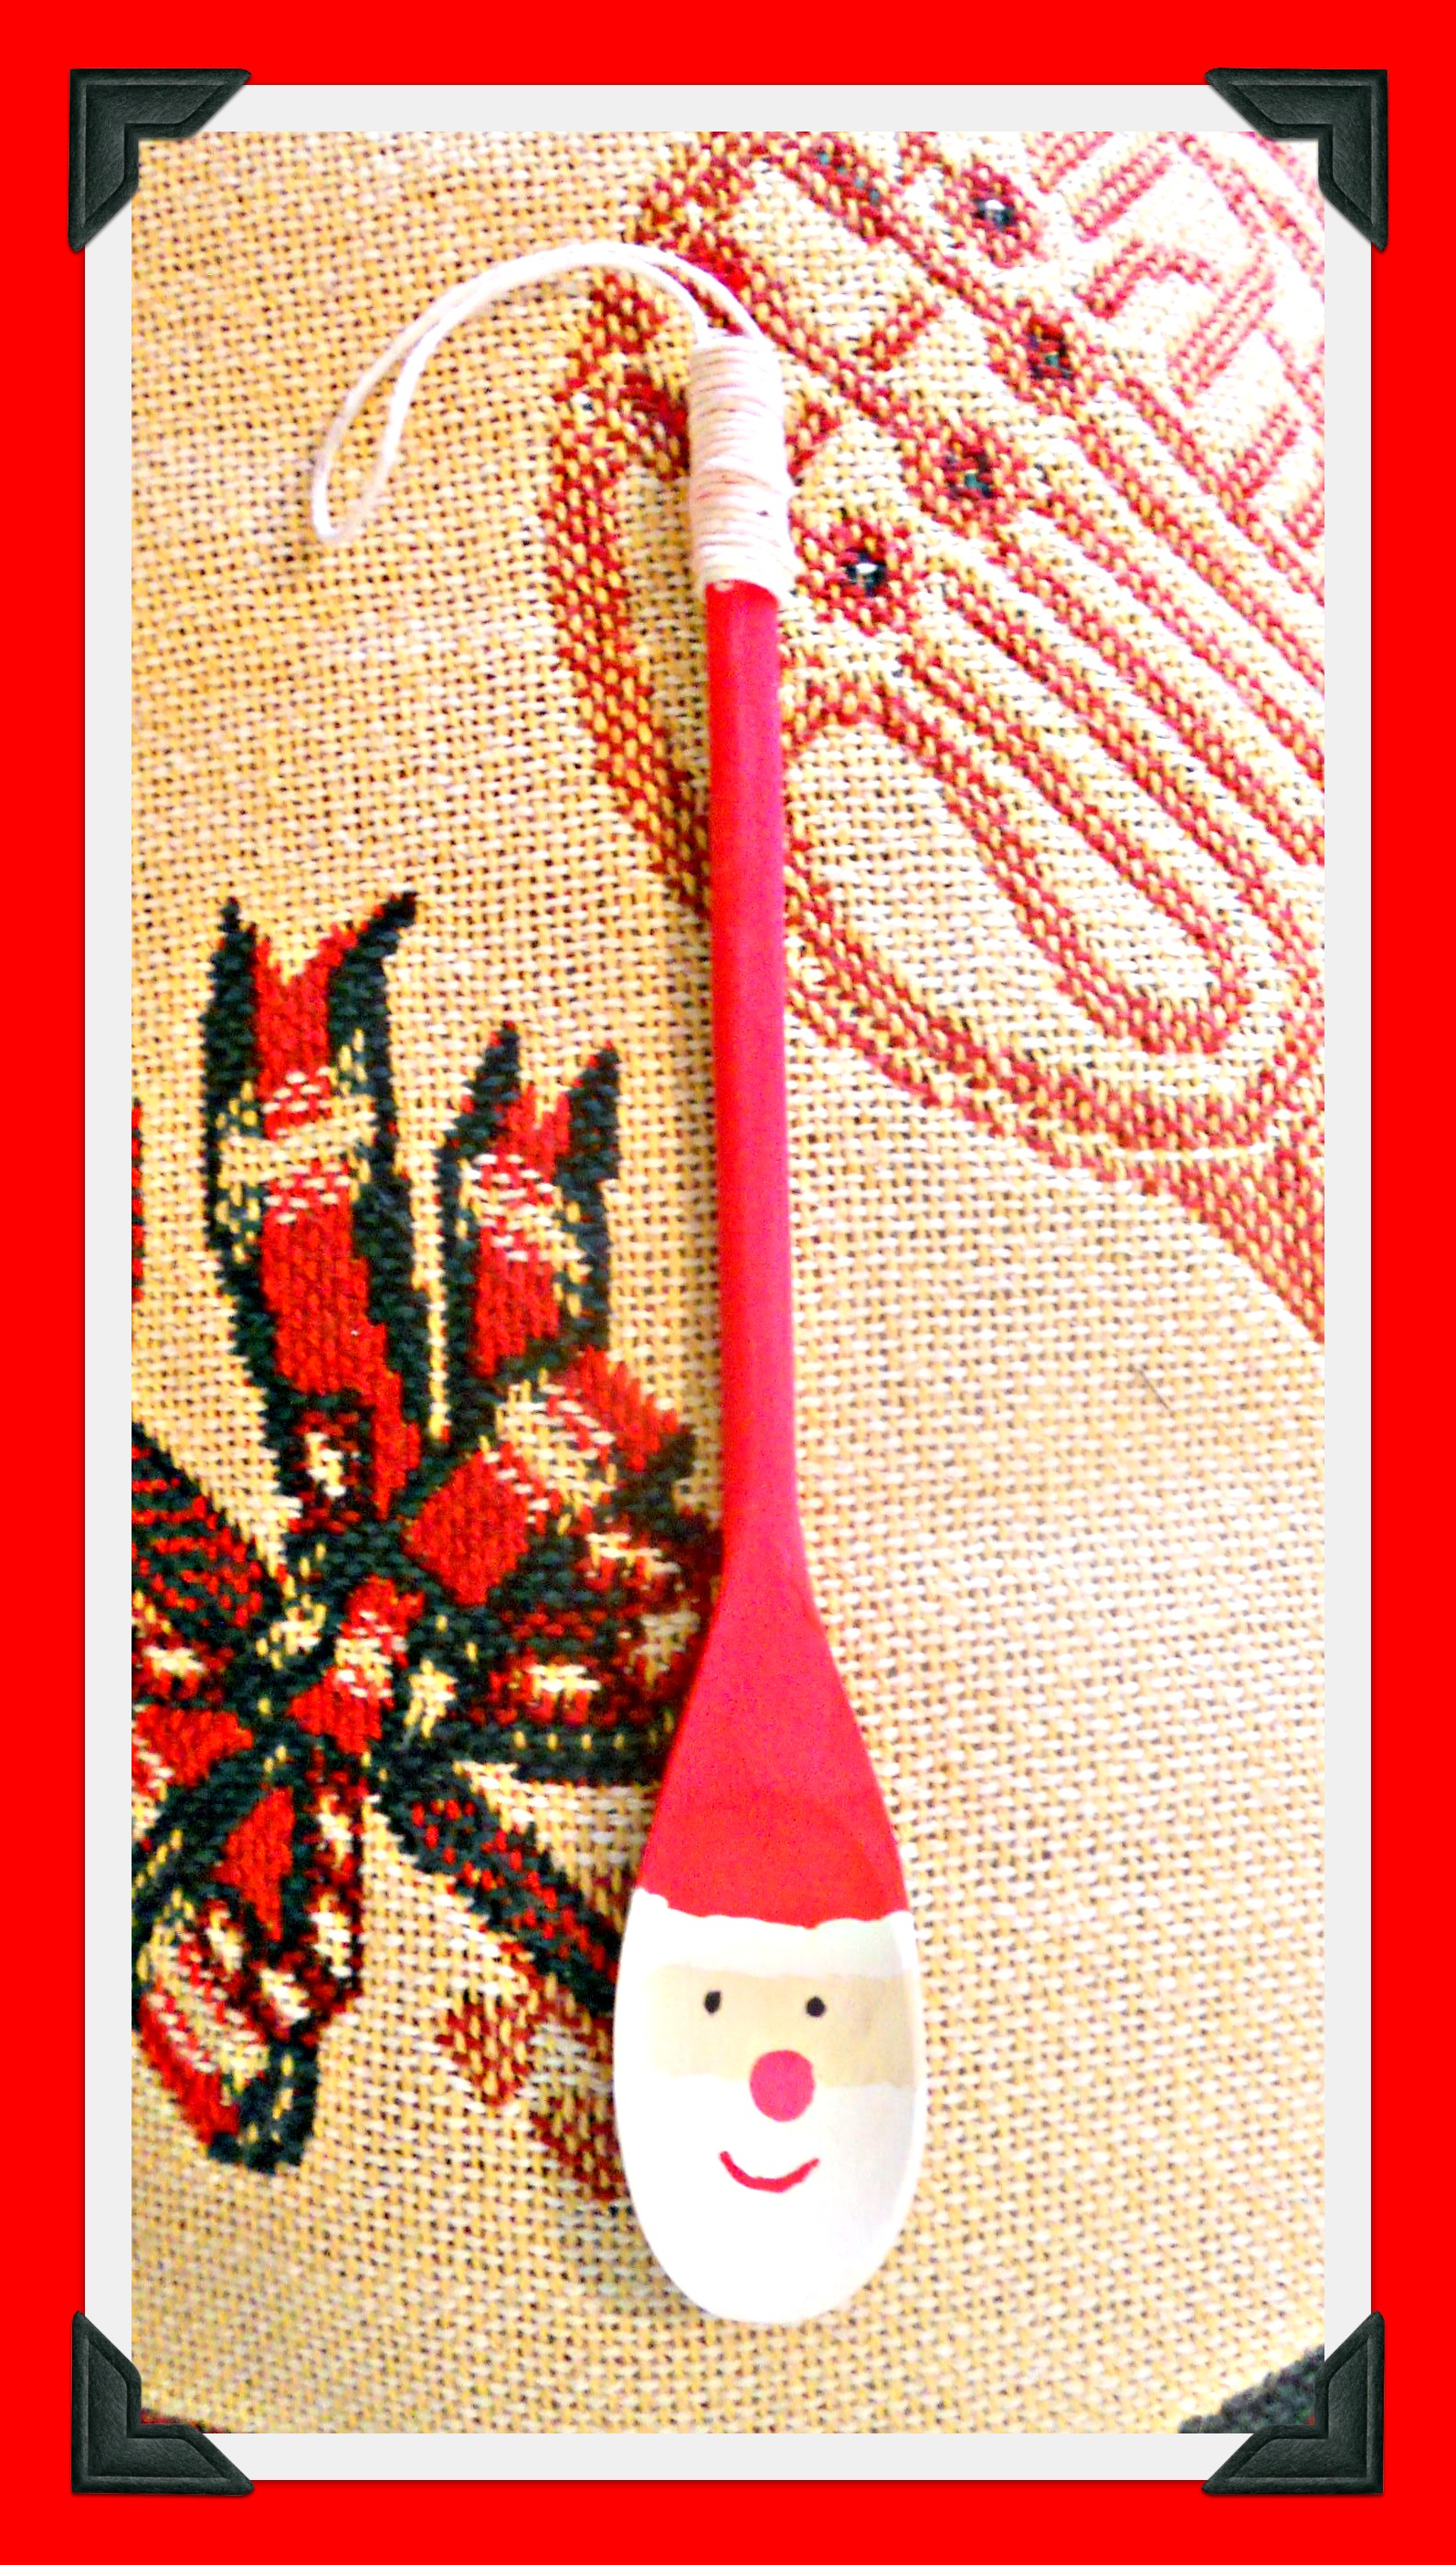 What do you get when you combine a Saturday morning, 8- and 10-year-old granddaughters, a roll of twine, red and white Tempera paint, and a package of dollar store wooden spoons? Sixteen Santas for teachers and friends on the girlies’ gift lists! You’ll find directions on Real Simple, and here are some other crafty ideas from Christmases past:
My blog has been on the back burner since summer, but I think of you often . . . sending love and best wishes for a joyous Christmas season to you and yours!
 Hello, my long-lost friends! I hope everyone is well. I miss reading your blogs and hope to catch up soon.
My friend Sewing Machine and I haven’t spent much time together this summer, but I did find a spot o’ time to make an apron for my adorable granddaughter Katy’s 2nd birthday. This fun pattern is SUPER easy to stitch up, since it uses bias tape instead of hems around all the edges. I bought this pretty pink-flowered tape for Katy’s apron at a craft show, but I now own a bias tape maker and can’t wait to try creating some myself with Beth’s tutorial at The Renegade Seamstress. Katy especially loves her name embroidered on the pocket!
Click here for the pattern from Joan Giammalva. And, if you want a fun cookbook to gift with the apron, I recommend Pretend Soup and Other Real Recipes by Mollie Katzen . . . perfect for toddlers and preschoolers.
Thank you for taking a peek! ♥


Since I have lots of hand-me-down vintage linens and doilies, I’ve been collecting ideas for using them in new ways. One idea I’ve seen several times is to use the piece as a-la-mode on a pillow. When I saw this pink polka-dot brown flannel next to this pastel pink table scarf, it was love at first sight! I simply centered the scarf on the cut out fabric, stitched it on, and completed the pillow as usual. Mmmm . . . brown and pink! ♥

As I mentioned in my previous post, I’ve gone a little crazy making these sunnies cases . . . and this photo doesn’t even show the three I’ve already given away! If you’d like to make your own, check out this lovely tutorial on Polka Dot Chair. I decided to embroider the word since that’s one of my hobbies, but Melissa’s fused method is very modern and chic. Thank you for the fun summer inspiration, Melissa! ♥

I loved trying out this Sunnies Case Tutorial by Melissa of Polka Dot Chair. My only tweak was to embroider the word on the front instead of fusing it. The project was so much fun that after I took this photo, I made over a dozen more . . . I’ll post them next! ♥

Recently I had the privilege of making a sweater teddy bear for Sharon of Gentlestitches, both shown in the photo below. Sharon sent a well-loved carousel-horse-print sweater all the way from Australia to Kansas, USA and wrote such a lovely post when her bear (now named Eddie!) arrived home. Here’s to bloggy friends near and far! ♥ P.S. Click here and here for more bear love. 
My sister took a crazy quilt class and made this fun block. I love the fabrics she chose and all the dashing embroidery stitches she added for a-la-mode. Then she gave it to me to make a pillow! I used a square of black and white striped fabric from my stash for the back. Thank you, Susan! ♥


I recently hung the Peeps garland I made last spring (out of felt, not the candy!). Here are the super-simple directions:
(1) Draw a simple bunny shape or find a free template online.
(2) Make the bunnies from felt, fabric scraps, construction paper, or scrapbook paper.
(3) Add the eye and nose dots with fabric paint, permanent marker, or embroidered French knots.
(4) Attach the bunnies to ric-rac, ribbon, rope, string, or twine using glue or hand or machine stitching.
You’ll soon have a cheery pop of color for your spring décor. Have fun! ♥
I love to make tooth fairy pillows from well-loved baby or toddler clothes! To transform the Disney World hoodie that Tyler chose, I simply cut it into a square, embroidered a tooth on one pocket and a dollar sign on the other, and stitched and stuffed. So easy! Now he’s eagerly waiting for that first loose tooth! ♥ P.S. Click here for another hoodie tooth fairy pillow and here and here for two more designs.

 For Tyler-the-matchbox-car-lovin’-kid’s birthday, I stitched up a car wallet . . . plus (surprise! surprise!) a pillow with the leftover fabric. I read TONS of tutorials for the wallet and ended up using bits of several of them. My version has four pockets, a road, a Velcro closure, an elastic band (aka stretchy headband cut to size) to hold it all together, and the birthday boy’s initials embroidered on the front. Here are my favorite links in case you’d like to make one for a small person you love! ♥

Since I have so many colorful red and green decorations and busy prints up for Christmas (like here, here, here, here, here, here, and here!) I decided to go completely the other way on my newest idea . . . somewhat of a visual trick since “Deck the Halls” is such a cheerful song! I used turquoise chevron flannel with the same color embroidery floss, then I played around with the size and placement of the words to replicate the chorus’s inflection, pauses, and pitch. I love the way it makes your eyes say, “Ahhhhh . . . ” Oh, and the embroidery hoops were hand-me-downs and I already had the fabric and floss in my stash, so this was a “free” project. I love those, don’t you? ♥

I had a sentimental sweater from a beloved family member that always seemed to say “teddy bear,” so I decided to give it a go! I have a hand-me-down pattern that was a perfect fit for the sweater front and back (McCall’s Crafts 703), but otherwise I probably would have sketched my own. The eyes only required a bit of embroidery on two of the knit-in designs. Then, since the McCall’s pattern was faceless, I used Claire’s cute (and FREE!) softie pattern on Craft Schmaft to figure out the snout. After stitching and stuffing, the squeezable, huggable Teddy is in the arms of a sweet little one. Plus, I still have the sleeves and a few smaller remnants left for new projects . . . we’ll see what those bits say! ♥

I love making a gift basket for the silent auction at the Arts and Crafts Mission Market at my church every November, which this year will benefit the Downtown Daycare Center here in Wichita, KS. This time I decided on a music theme.
Click here for gift baskets from the past few years. It’s my secret ambition to go into the gift basket business someday! (Dave, you didn’t see that, right???) ♥


In September, I told you about the lovely but mysterious 1927 quilt top we found among my husband Dave’s parents’ belongings. You can read about it and see photos here. Thanks to Dave’s cousin Betsy and some considerate and determined librarians, I’ve found a home for it! Here are the latest updates:
So . . . watch for “A Quilt Mystery: Part 3” . . . coming soon! ♥

Do you need a hostess gift idea? Does your hostess love to bake?
1. Stitch a simple drawstring bag.
2. Embroider the word “Cookies” on one side.
3. Fill it with fun or seasonal cookie cutters.
Don’t be surprised if you hear some oohs and aahs! ♥

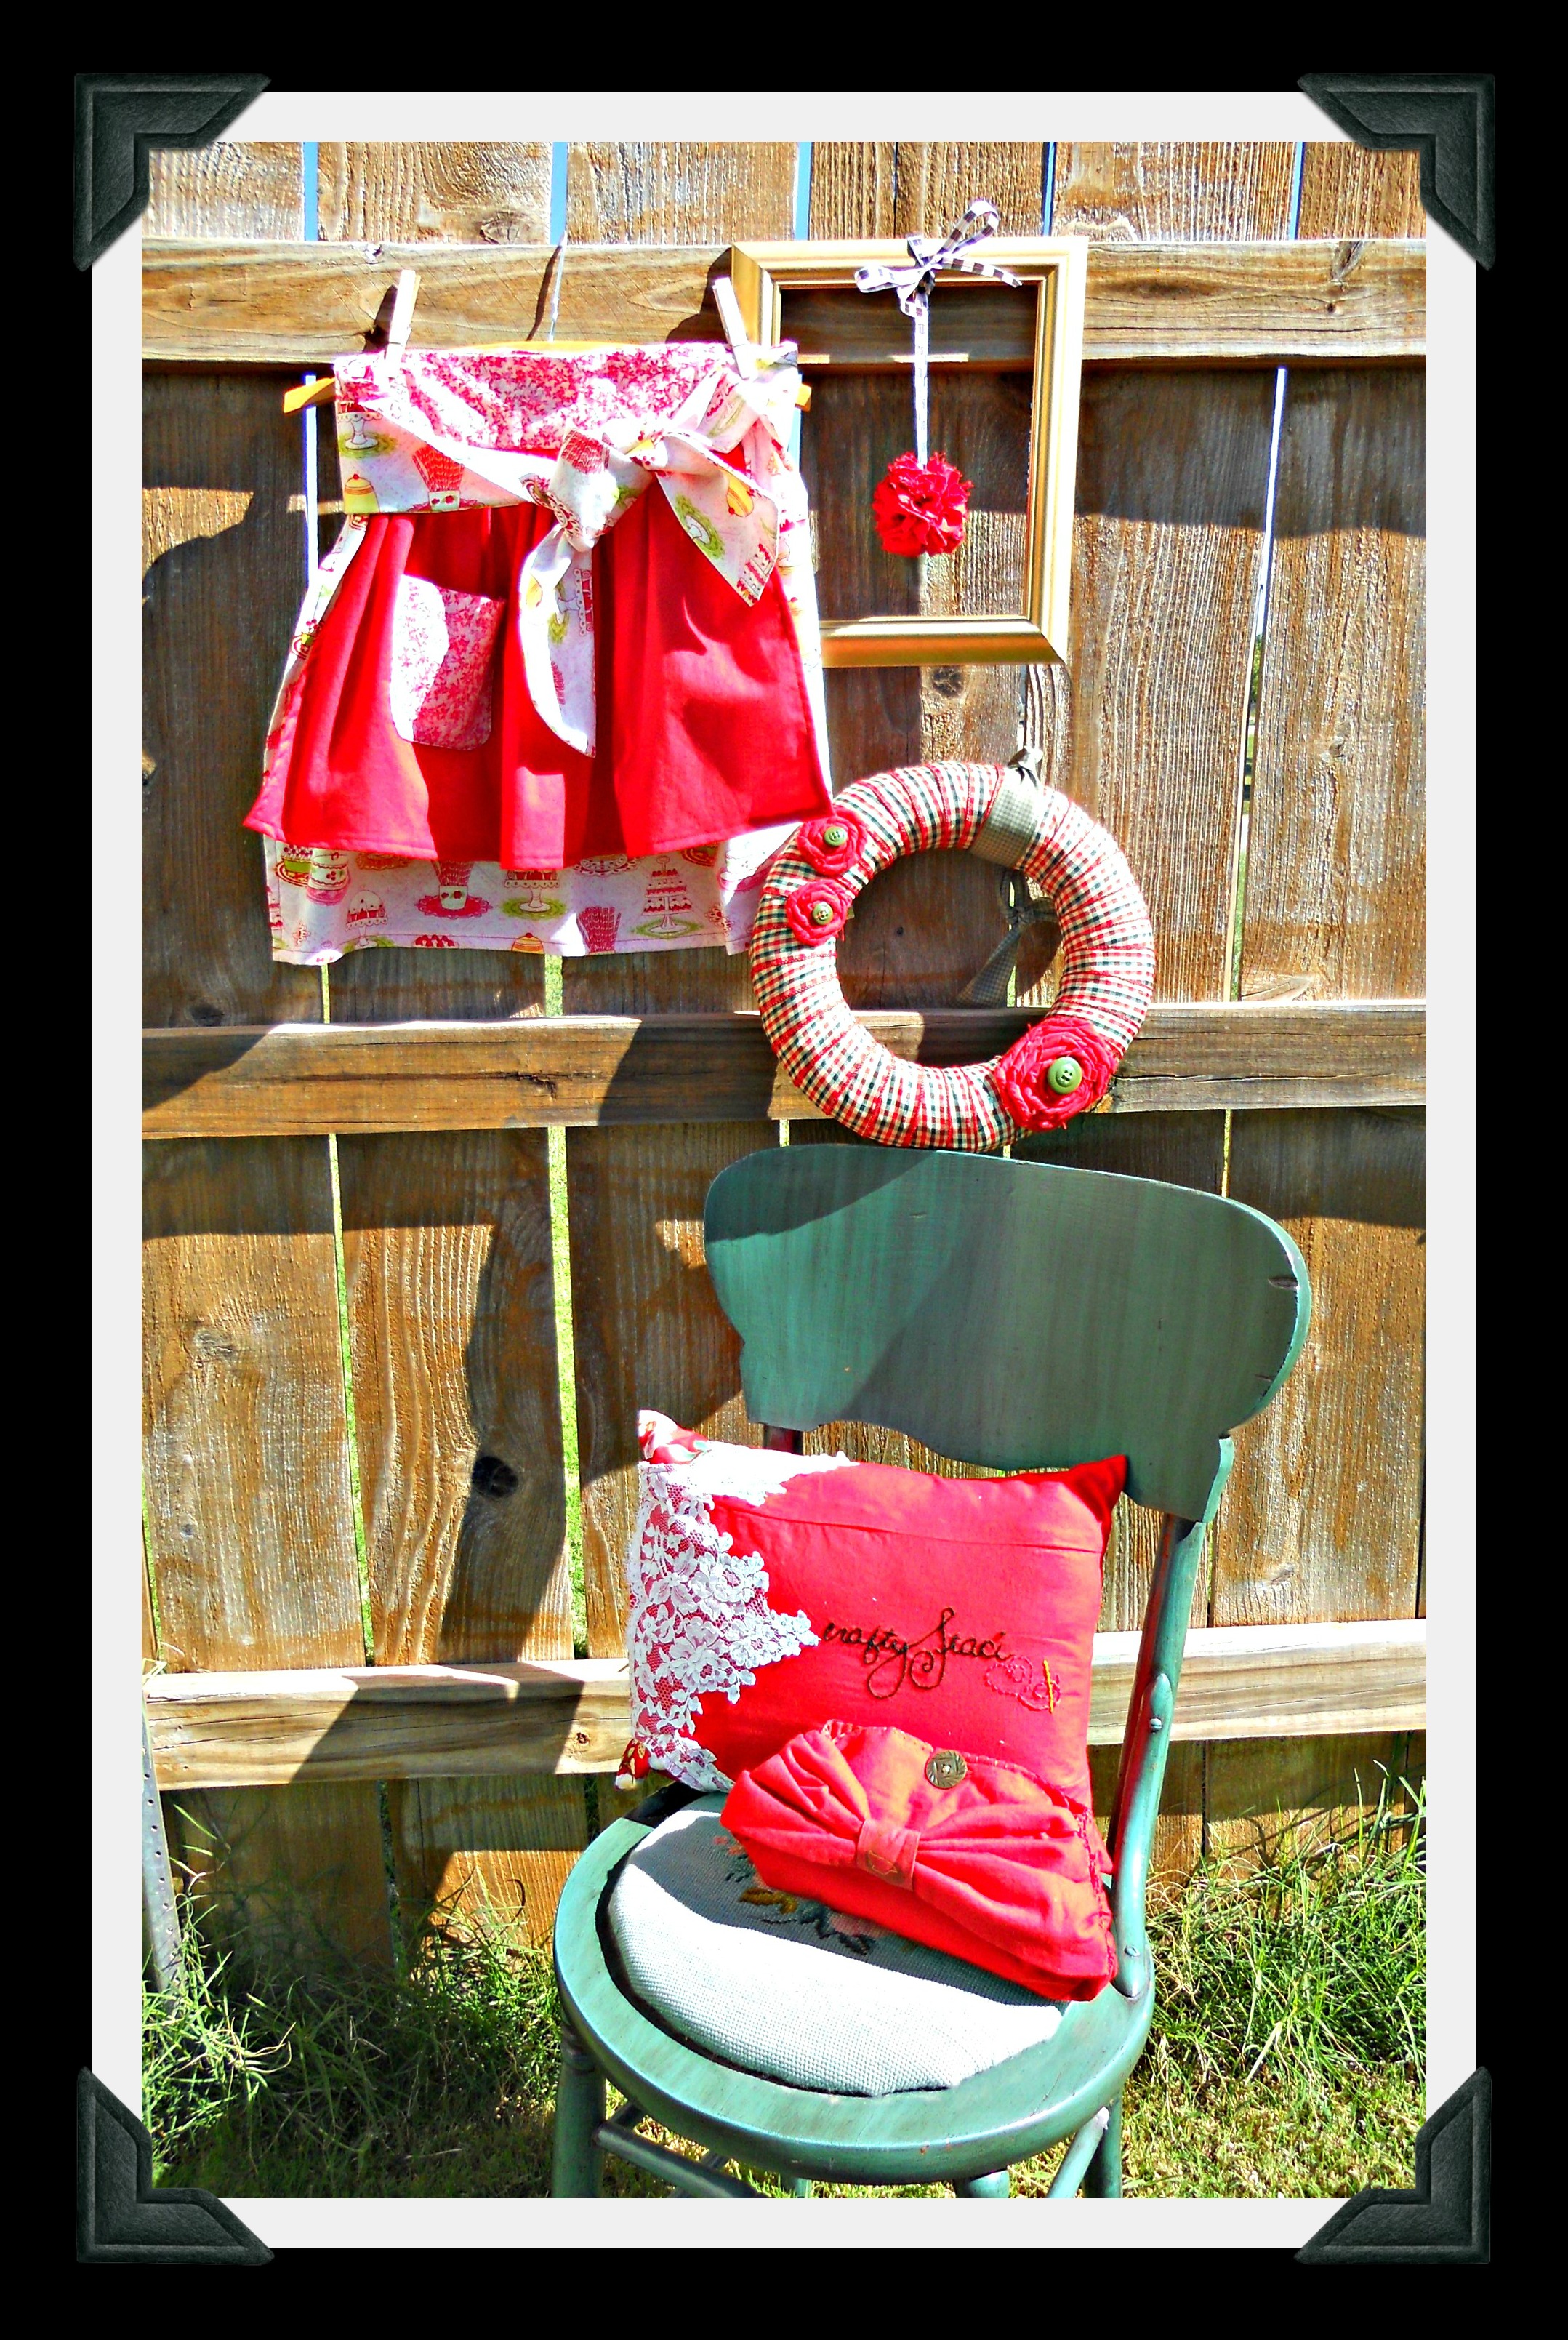
 For my two year blog anniversary, I invited you to nominate people you’ve met through the blogging world who you would like to have as next-door neighbors. It was SO heartwarming to read the lovely comments that came from around the world! The blogger with the most nominations was then invited to send me a once-loved garment to remake into some new treasures and return. This year’s winner was Staci of Crafty Staci, who decided to send her going-away dress from her wedding 22 years ago! She said, “It’s been stored under my bed ever since. I’d love to have it made into some things I could actually have out to enjoy, and red is still my favorite color, so that’s what I’ll be shipping to you.” I was so excited, and when this exquisite handmade dress arrived, my mind started spinning! So . . .today is the reveal! Here we go!
(1) I always like to start with a pillow, and the bodice of this dress was the perfect size to make a pillow cover for a 12 x 16 cushion. After detaching it from the skirt and shoulder straps and removing the boning, I traced and embroidered the logo from Staci’s blog and Etsy shop. Next, I put the pillow inside and nipped and tucked and pinned until I had a perfect fit, then took in the seams and stitched across the bottom. (The zipper is still in the back, just shortened a bit.) To fill in the armholes at the top, I made a lining with a coordinating floral fabric that could peek out at the corners, checked the fit again, pinned, then stitched the top closed. Then all I had to do was trim the seams, turn, press, and zip the pillow inside. I love that I got to showcase the lovely lace on both the front and back of the pillow!

(2) Next, I wanted to use part of the still-gathered skirt to make something to wear and decided on an apron! I found my inspiration on page 40 of my A is for Apron book by Nathalie Mornu which had a short skirt over a longer one. I used pieces from several different apron patterns along with some of my own ideas and two fun fabrics from my stash, and it came together perfectly. Here it is blowing in the wind on photo shoot day!

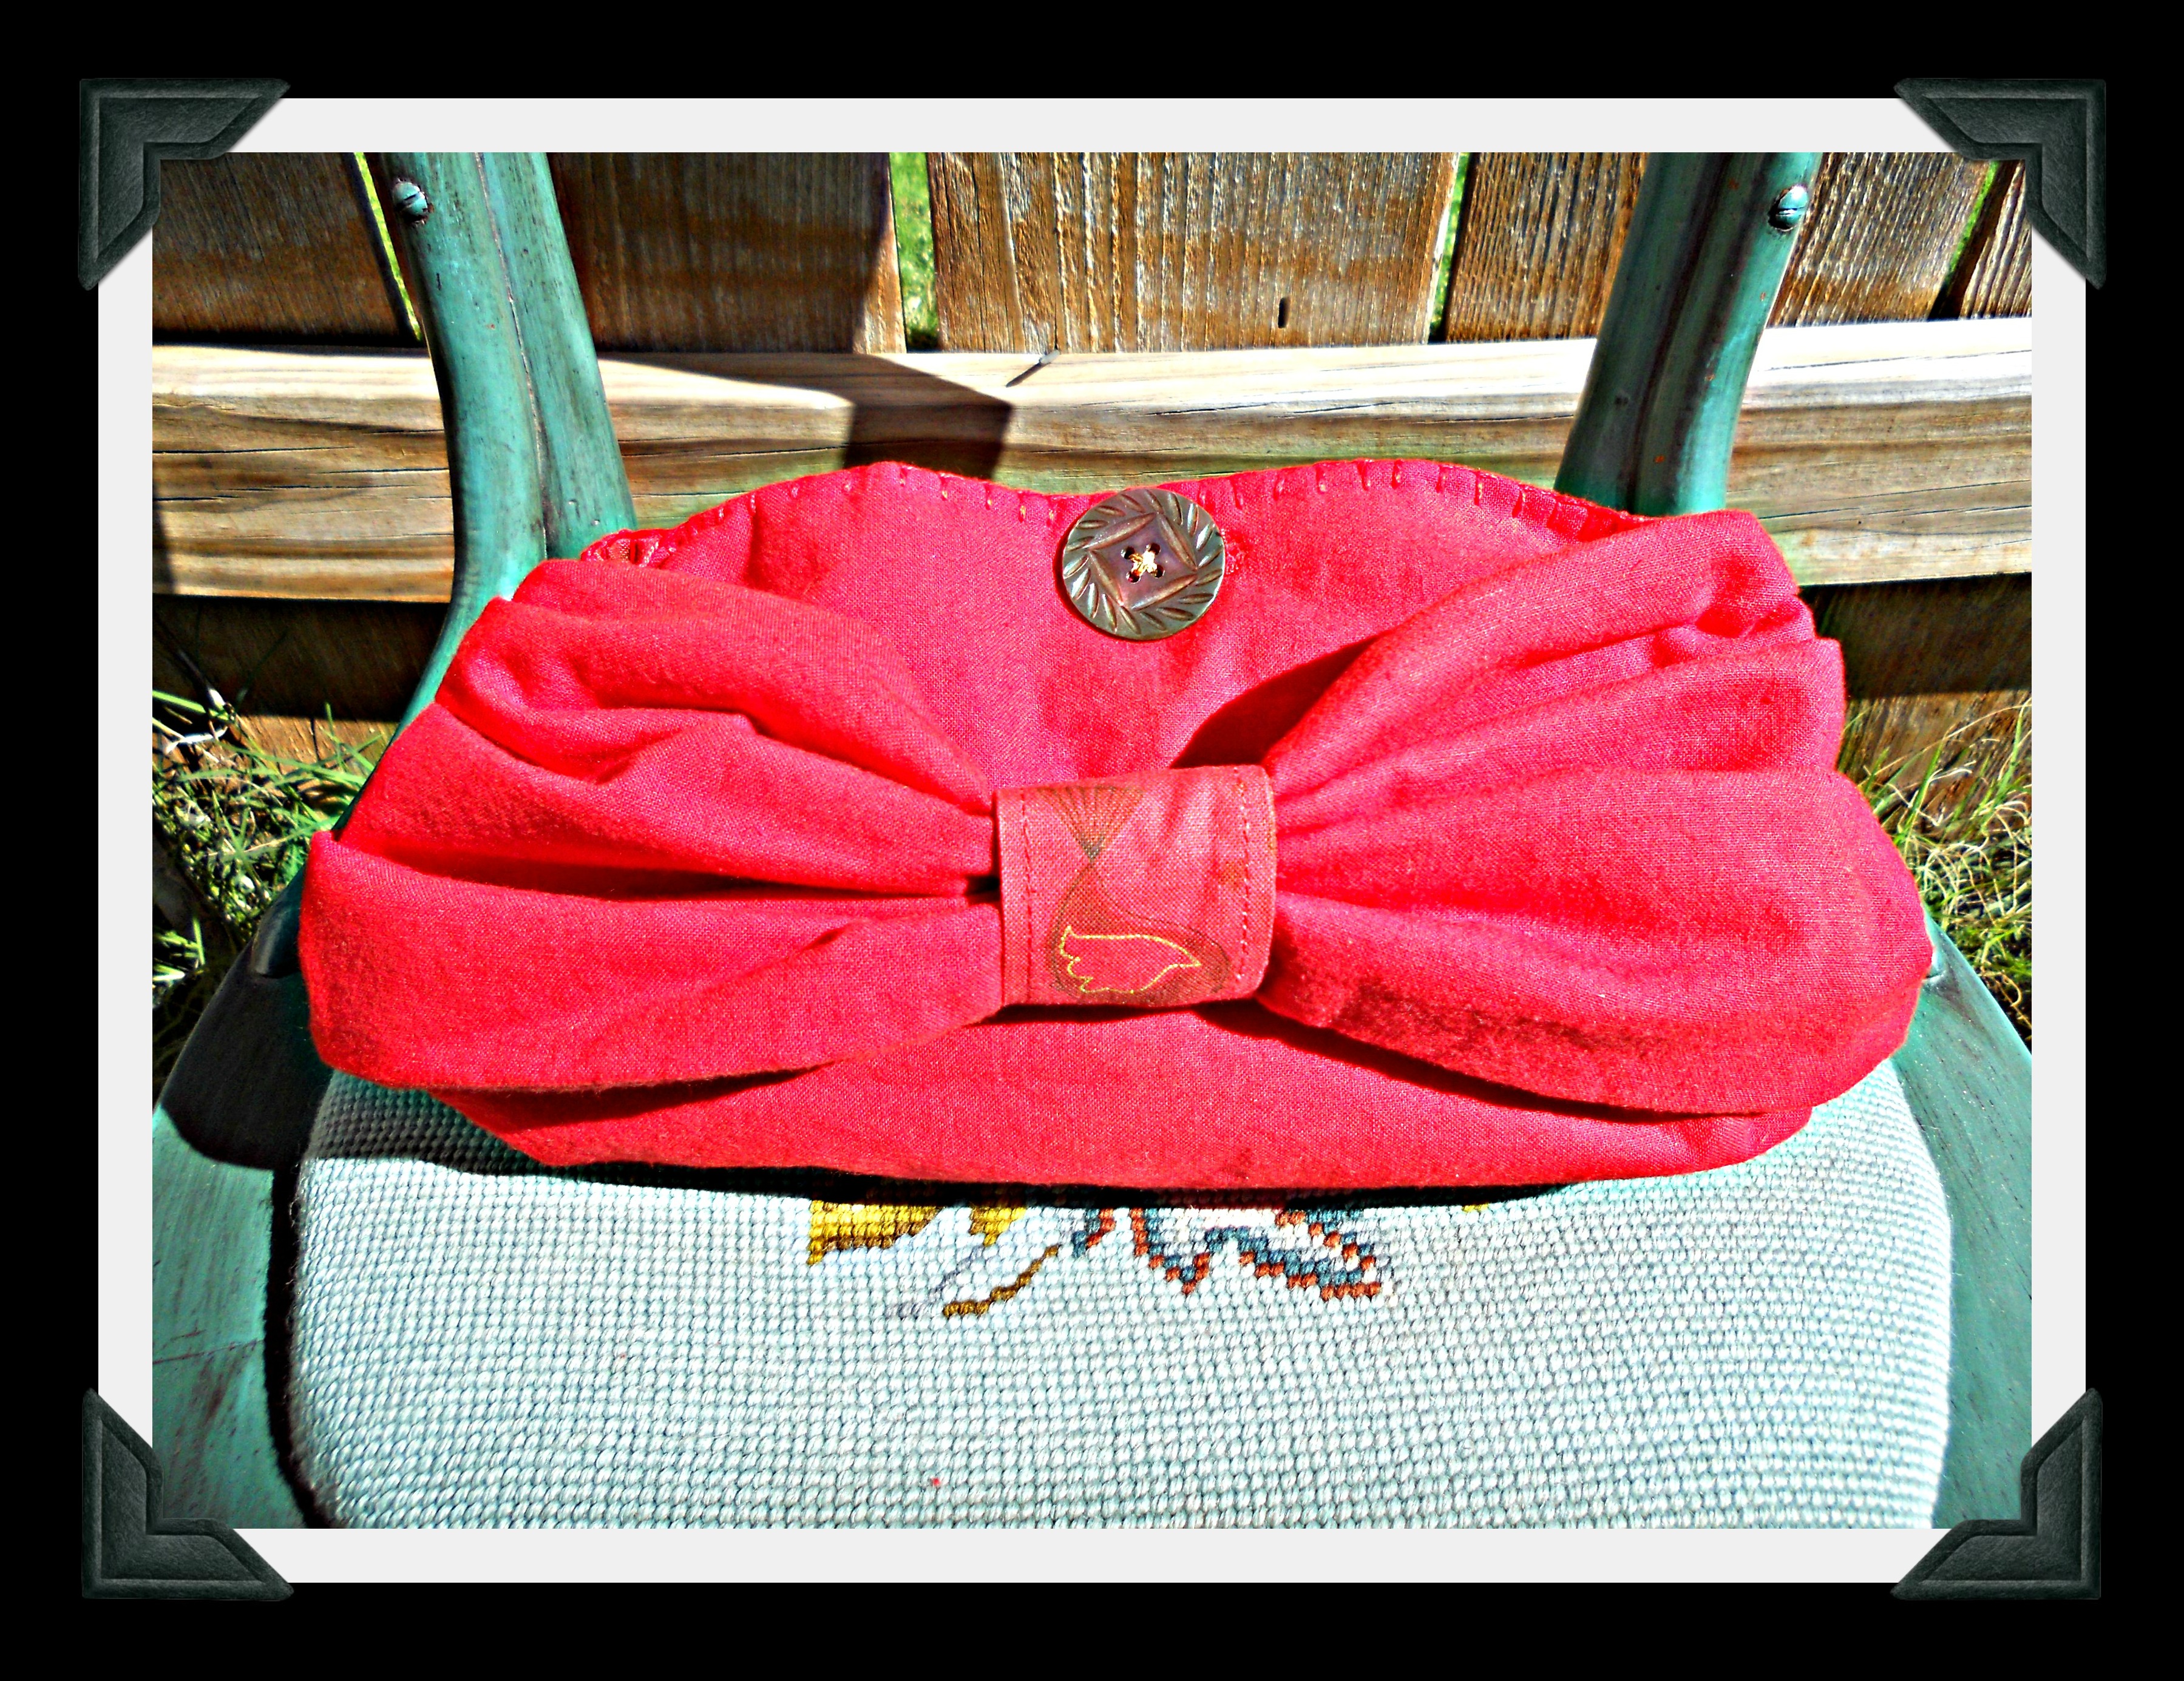
(3) When I saw the size and shape of the shoulder straps, I immediately thought of a bow clutch–one strap for the bag and one for the bow. However, this project turned out to be a little more challenging! I opened up one of the straps for the bag, made a lining from a coordinating fabric in my stash, and attempted to put in a zipper. Since the bottom was already closed up, that was a total fail! So I carefully removed the crooked zipper and simply blanket stitched the top and lining together, then added a button hole and vintage button for the closure. Next, I opened up the side seams and handstitched the other shoulder strap in on both sides, being careful not to catch the lining since I probably should have done this step first! (Since both pieces are padded, the seam was too thick for my machine.) Finally, I used another strip of the lining fabric to cinch the middle of the outer piece to form the bow. So . . . it’s not as perfect as I had envisioned . . . but maybe it will be cute for an evening event where the lights are low??? ♥
(4) The next step was to trim the hem from the skirt. With it, I made three of those fun “twist, coil, and stitch” flowers. I had a straw wreath and some red and green ribbon in my craft stash, so I wrapped the wreath, added green vintage buttons to the flowers, stitched the flowers onto the wreath, and added a coordinating green ribbon for hanging.

(5) Last but not least, I decided to make something kind of artsy and festive with a remaining piece of skirt fabric. I cut it into one-inch strips and made a pom-pom, then I hung it from ribbon on a gold wooden frame from my stash. I hope it will inspire the idea of “celebrating the everyday” as Staci lives her very creative life with her loved family and friends.

Thank you for being our good neighbor, dear Staci . . . and your package is in the mail! ♥
My mom-in-law had a quilt top among passed-down items tucked away in her home. When we helped her move to a smaller apartment, I asked her about it and she didn’t remember ever seeing it before. So I put it in a safe place and decided to try to solve the mystery someday. The time has come! The quilt has twelve muslin squares with embroidered names/designs and one square that says “HHC” (Happy Homemaker’s Club???) and the year 1927. First, I took a photo and checked with other family members to see if any of them recognized it or any of the names on it. Even though none of the names are relatives, I do have a lead as to a community where it may have originated so I’ll be starting there. My hope is that I can return it home, either to a quilt club or library, where it can be displayed—or the beautifully-embroidered squares can be detached and given to individual families–and, hopefully, find out the occasion for its creation, why the project was abandoned, and how it ended up where it did. Yes, I FINALLY get to carry out my fantasy of being Nancy Drew when I grow up! I’ll keep you posted! ♥

My dear nephew and his beautiful wife are expecting their first baby in November, and I wanted to make a little handmade gift for them. Then I found the PERFECT project by Sarah at Diddle Dumpling . . . a button caterpillar onesie to go with The Very Hungry Caterpillar board book. I just love it! And this will be extra special because all the buttons belonged to my grandmother . . . the new baby’s great-great-grandmother! Awwwww . . . ♥

In this post I told how to make freezer pop holders from 4 x 4 fleece squares. One of my wise commenters said that when she made them, she was going to leave them open at the top AND bottom so kids could slide them up the freezer pops as they ate. Well, I had lots of testers at our family get-together, and she was absolutely right! So I refashioned them by snipping off the bottom seam and blanket-stitching it like the top. Ahhhhhh . . . much better! Oh, and freezer pops and a little pouch of holders in a fun gift bag make a perfect summer hostess gift for families with little ones! ♥

 Our granddaughters Ally and Kira requested an overnighter before going back to school last week, so we decided to call it “Craft Camp.” We sewed pillowcase nightgowns and made painted fabric pillows. Ally made a mini-pillow with embroidery, and Kira made a button headband. We also enjoyed our usual play-dough, Bendaroos, Tinker toys, and fingerprint art projects, played outside, read books, cooked, and had lunch with the girls’ great-grandparents. I think we may have started a new tradition! ♥


Since I donated last year’s 4th of July pillows (here and here and here) to a charity auction, I whipped up a new one over the weekend using a remnant from the last Wonder Woman apron and some ric-rac and embroidery floss from my stash. I love how the red pops on the bright blue and silver fabric! The finished pillow is 11 inches tall and 20 inches wide. To all my U.S. bloggy pals . . . have a safe and fun holiday with your family and friends! ♥

 Look at this BEAUTIFUL apron I won in a recent giveaway from Deb and Kathy at Second Hand Roses! It’s vintage! And embroidered! And PINK! I just LOVE it!
If you’ve never read the Friday morning posts at Second Hand Roses, you MUST subscribe to their blog! Deb and Kathy give a tongue-in-cheek play-by-play of their visits to local second-hand shops and sales, like Be Kind to Animals, Please and Another Friday, Another Estate Sale. They make me laugh every time! They’ve even invited me to go shopping with them next time I visit Colorado . . . it’s on my bucket list!
Thank you, Deb and Kathy! ♥
P.S. Click here to read about Deb’s apron collection!

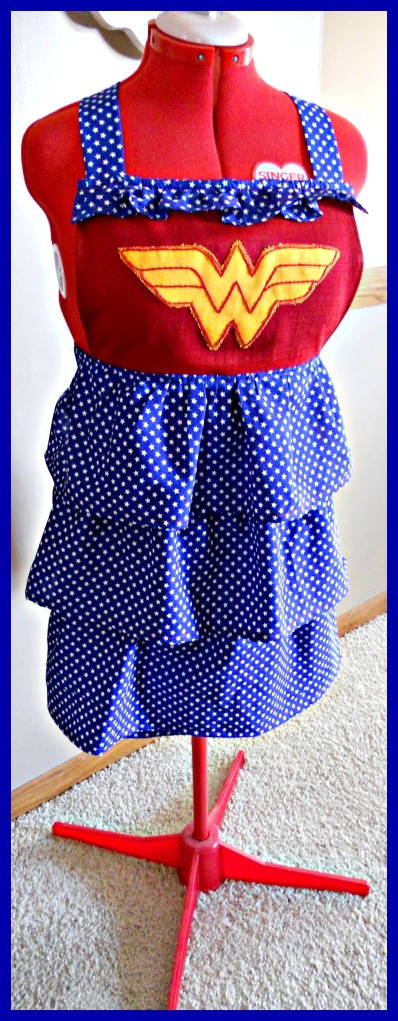
I had just enough fabric left to make one last Wonder Woman apron to give to an amazing Wonder Woman I know. But, even though I’m moving on to new designs, I’ll definitely keep using this pattern! Click here for links to the free tutorial along with some of my own tweaks. And, speaking of aprons, I’m taking a week off from work (and sewing! and crafting! and blogging!) and donning an apron to play hostess to our family while everyone gathers in to celebrate Dave’s milestone birthday. The house is clean . . . the party and meals are planned . . . the decorations are made . . . the toys and crafts are ready. . . the cookie jar is full . . . I can’t wait! See you next week! ♥

 When I went through my mom-in-law’s fabric box, I found a burlap square stamped on the right half with this lovely floral design.
I couldn’t wait to embroider it!
Then I paired it with one of the fun fabrics from my Make & Mingle kit and stitched them together into a lined eyeglass case.
I’ll really love carrying this summery, sentimental handiwork! ♥

After updating the guest bathroom with a painted and decoupaged kids’ stepstool and a few other decorative touches, I decided to finish it off with a piece of fabric art. First I “shopped my house” and came up with a 17 x 21 black poster frame and a remnant of black/white/lime green fabric (from this crib skirt) that perfectly matches the colors of the room. Then I . . .
Perfect! Now . . . bring on those guests! P.S. I laid the picture on one of my mother-in-law’s quilts to take this photo . . . such beautiful handiwork! ♥

Happy Memorial Day weekend! We traveled to Dave’s hometown today to pay our respects and visit loved ones. Since I needed a road trip project, I grabbed a bag of the 4 x 4 fleece squares left over from the no-sew fleece pillows my family made last Thanksgiving and some embroidery floss. I simply folded each square in half, hand-stitched the bottom and side, and added a blanket stitch on the top. [UPDATE: Now I only stitch the sides and blanket stitch the top AND bottom. Click HERE to see why! :)] They’re the perfect size to keep little hands comfy while holding and slurping freezer pops at our family get-together this summer! And, since it was a long trip, I have plenty for everyone. ♥


 After seeing all the creative menu boards on Pinterest, I decided it would be fun to have one in our kitchen. However, I needed a tall, narrow version to fit the best spot for it, so I decided to go with a pin-up board. I made it out of cardboard, quilt batting, and fabric like the memo boards here, here, here, and here. The adorable fabric is left over from my “Mix Things Up Apron” and purchased from Laura at LC’s Cottage. (Click here for a post with links to her lovely shop!) Then I found a bit of khaki-colored knit from my polo shirt upcycle and embroidered the word “Menus” to affix to the top, finishing it off with a small length of ric-rac trim. Since I had everything on hand, the cost was $0 . . . my kind of project! 🙂 And the two recipes are perfect complements to your favorite enchiladas! The “Corn Bake” has been in my husband’s family for a long time, and the dip is from a magazine ad. I’ll write an easier-to-read copy below! ♥
Salsa and Sour Cream Dip
Combine all ingredients; mix well, and chill. Serve with tortilla chips.

 Remember the fun felt citrus coasters I made last summer? While on my recent craft room spring-cleaning frenzy, I was surprised to find a whole set already made, just waiting for their little citrus fabric drawstring bag to live in! Don’t you just LOVE it when that happens??? I whipped up the bag in nothing flat, and now I have a another set ready for a summery hostess gift. Here are the instructions again:

 Make & Mingle has these fun “emporium of craft” boxes in their Etsy shop now! Even though I’m loving spring and looking forward to summer, I decided to go with the box of autumn colors. It will be so much fun to come up with projects for all these fabulous materials! I also ordered a little packet of “felt bon bon roses,” which will go on some accessories I have planned.
You can check out Make and Mingle’s blog here, Etsy shop here, and FB page here . . . or find them anytime from my Shop Love! page above. ♥
Have you discovered Global Girlfriend yet? Besides my friends’ shops, it’s my favorite shopping spot EVER! This fair-trade boutique sells handmade clothes, jewelry, handbags, accessories, bath and body products, and paper goods from all over the world, and the money goes to help craftswomen make a living to feed their families. They also have gift certificates, which the special girls in my family LOVE to get for their birthdays . . . even though it can literally take hours to decide which gorgeous items to spend them on! Right now, in honor of Earth Day, Global Girlfriend is offering FREE SHIPPING for $25 U.S. orders (code: FREE25) and $50 international orders (code: FREE50). Please check them out if you get a chance . . . it will definitely brighten your day! They’re also on Facebook here and my Shop Love! page here. P.S. Below is one of my favorite GG purchases, a set of inspirational cards made from handmade paper. I love them so much that I’ve also displayed them on my office wall! ♥

 So, ever since my Bag O’ Bunnies post, all my sewing buddies have been making bunnies out of their fabric and ribbon scraps! And some of my blogging friends, too, like Something to Ponder About and Sew Much Choice! I’ve been giving them away in small baskets as hostess gifts and have a big basketful of them by the fireplace, but I decided to gift the rest in handmade bags. I’m sure everyone already has a favorite method for making drawstring bags, but just in case, here’s mine:
(1) Cut out fabric in a square or rectangle of the desired size.
(2) Decorate the half that will be on the front with embroidery, applique, painting, or other crafty skills. I love to embroider and needed a road-trip project last weekend, so here is my design.
(3) Fold the bag in half right sides together.
(4) Stitch the side and bottom EXCEPT (and this is important!) for leaving an opening in the seam two or three inches from the top.
(5) Press open the seam, and press under 1/4 inch on the top of the bag.
(6) Turn the top to the inside and stitch it to the bag all the way around, making sure your stitching is below the opening in the seam.
(7) Turn the bag right-side out and press.
(8) Using a safety pin, thread ribbon or cord through the opening and tie the ends. (Click photo below for close-up.)
(9) Stuff bag with bunnies . . . you’re done! ♥


 Not long ago, I had a brave moment and decided to try crocheting. I got pictures to look at and lots of tips from family and friends. I already had some beautiful reddish yarn and a crochet hook. I made the chain and then dug in. I did it! Yay! I got to the end of the first row and added another row . . . and another . . . and another. “This isn’t so hard,” I congratulated myself.
Then I spread it all out and looked at what I’d made so far. Instead of a rectangle, it was an arch! Oops! I guess I added a stitch or two on every new row! But since it was my first try, AND I love the yarn, AND it looked pretty even in its wonkiness, AND it reminded me of the red soil on the farm where I grew up, I decided to make something out of it.
The picture slowly grew in my mind: a red hill covered in grass and wildflowers with a bright blue sky and bright yellow sun. So I dug through my remnants and . . .
That’s my lucky save, all ready to jump-start my spring decor! And today is your lucky day, too, because you get to read some amazing posts on the “Lucky” theme from eleven other bloggers (including one on how to REALLY crochet!) in this month’s Collectively Creative. Enjoy! ♥
 Here’s my latest apron . . . and I must say, I had LOTS of help! Here’s the scoop:
Details about the design are available on my Wonder Woman Retro Apron post . . . a free tutorial from the Jo-Ann web site along with a few tweaks of my own. The only thing I changed on this one was to line the bib to hide the back of my embroidery and make the top ruffle smaller so as not to hide the mixer.
I had SO much fun making this, and thank you to my friends for your lovely contributions! ♥

 March 2 is Dr. Seuss’s birthday! When I taught first grade, we always celebrated by wearing Dr. Seuss T-shirts, cooking green eggs and ham in the classroom, and reading all the kids’ favorite DS books. But now that I’ve moved on to a different career, I decided to use this well-loved T-shirt for my next “What can you make with a . . .” refashion.

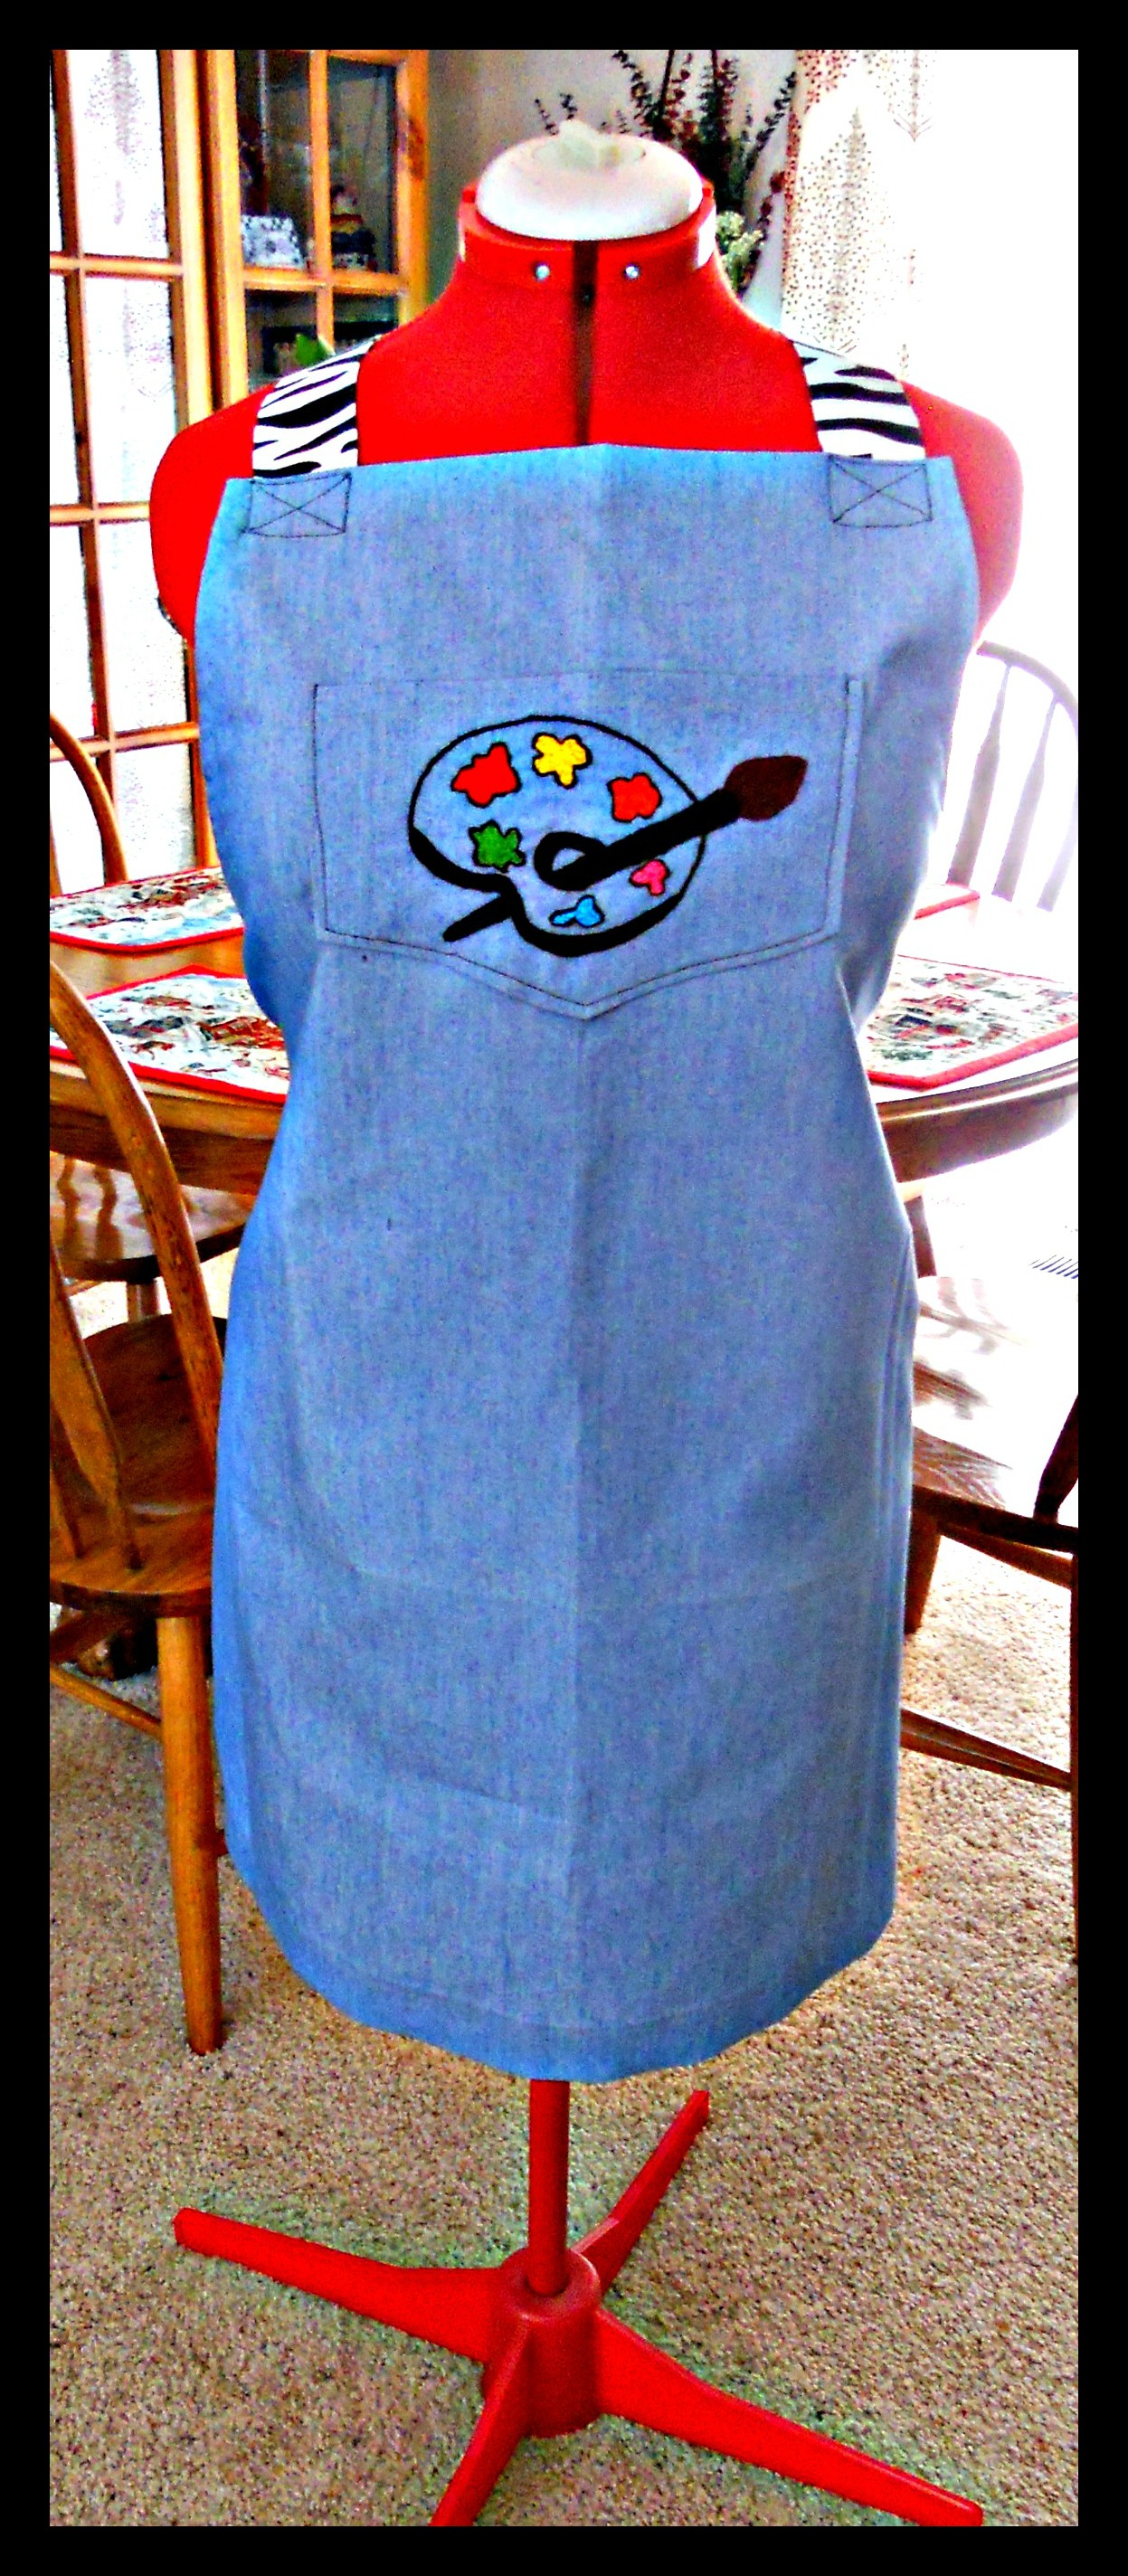 Recently I shared “Another Wonder Woman Apron” (a version of the Wonder Woman Retro Apron) that I made using a denim apron body from a sack of remnants a family member gave me.
A little more digging uncovered another one—a light blue this time—but again just the body and a bib pocket with no straps.
So . . . I decided to make another art apron!
First, I removed the pocket, googled a clip art picture of a paint palette, penciled it onto the pocket, embroidered it, and stitched the pocket back on.
Then I used the zebra fabric you’ve seen on some of my other projects (originally a set of sheets from Target!) for the neck and waist ties.
Ta-da! ♥

![]()
 And, speaking of love . . . I just had to share this gorgeous fabric ribbon I bought from The Dizzy Izzy Shop.
It’s full of hearts with a sweet saying for Valentine’s Day or any day.
It will be so much fun to use for projects, wrapping, and labels!
The shop also sells bias binding, button, felt, felt balls, notions, and other supplies.
If you haven’t yet met Helen of Dizzy Izzy, please check out her blog, her shop, and her FB page from this post or anytime from my Shop Love! page above.
Thank you for my lovely purchase, Helen! ♥
 Remember my Wonder Woman retro apron? (You can take a quick peek here!) I’ve made and given away three so far and have more in the works, but I wanted to make a simpler, non-ruffly version for art teacher Tiffany (one of the beautiful brides on my mantel!) who wears fun aprons at work in her job as a middle school art teacher. Then I received a bag of sewing hand-me-downs, and tucked between some fabric remnants was a denim work apron—just the body with a pocket on the bib, no neck or waist ties . . . perfect! To WW-ize it, I:
P.S. Click here for the heart-to-heart garland and here for the red sweater heart pillow.

 Welcome to the Collectively Creative Lovey-Dovey edition, hosted by Kelly of Cobwebs, Cupcakes & Crayons! My project this month is felt conversation heart mini-pillows. They were so much fun to make! Here’s how:
(1) Buy a bag of candy conversation hearts for . . . um . . . er . . . research. 🙂
(2) Create a pattern with a free-hand drawing or googling a heart template—or do like I did and use a heart-shaped cookie cutter.
(3) Trace around your pattern on two pieces each of white and various pastel felt.
(4) Lightly pencil a candy saying on a heart of each color, then embroider all the sayings in red.
 (5) Put the hearts of the same color back to back and attach the edges with a blanket stitch using a coordinating color of embroidery floss. Stop a couple of inches before you’re done to add a bit of fiberfill stuffing, then close them up.
(6) Use your hearts for valentines, brooches, magnets, hair accessories, sachets, mobiles, or gift-wrap, wreath, or pillow a-la-mode; display them in a pretty bowl or shadow box; or . . . make GARLAND! I added in some of my red-sweater hearts as well for the perfect Valentine mantel decor.
![]() Before you get started on YOUR mini-pillow hearts, be sure to visit all the amazing Lovey-Dovey blog posts below. Enjoy! ♥
Before you get started on YOUR mini-pillow hearts, be sure to visit all the amazing Lovey-Dovey blog posts below. Enjoy! ♥
 My blogging friend Kayla of The Art of Creating Joy has some exciting plans!
She is raising money for a mission trip to India in the fall!
To jump-start her funding, she has opened an Etsy shop featuring these adorable handmade knitted and embroidered coffee and tea cozies.
I chose these three and can’t wait to give them as gifts!
Now she even has one in French!
Click here for Kayla’s blog and here for her shop from this post or anytime from my Shop Love! page above.
She’ll keep refilling the shop as her supporters keep ordering.
Thank you for my fun purchases, Kaylee, and thank you most of all for your vision to help the world. ♥
 Last week I had a work-related training meeting in NYC. By the time I came home to Kansas I’d been in four planes, one train, and numerous cars and cabs, including a four-hour airport layover. Luckily, I’d brought along a project that hardly took up any space in my bag . . . hand-stitching little hearts made from the sleeve of an old red sweater. (If you predict a What Can You Make With A . . .? post coming up, you’re right!) I cut the shapes at home using a small cookie cutter for a template, then joined each pair together with a blanket stitch on my travels, leaving a small opening for stuffing and closing when I returned. What will I do with them? So far I’ve thought of:
Your ideas are welcome! ♥
 I recently bought this fun tote pattern from my blogging friend Michelle of Sew Michelle. I can’t wait to make it! Besides the detailed, photo-filled e-book, Michelle includes a unique feature called a “Sewnopsis” at the end of her patterns—a reference tool that has the supply list, cutting instructions, and important steps all on one super-handy page.
  Michelle has other amazing bag patterns as well and has also been kind enough to make some FREE patterns available to us! Click on the “Tutorials” link to find projects such as this “Owl Sweet Treat Holder”—PERFECT for Valentine’s Day!
“I have taught sewing classes for many years and have learned that including detailed instructions with lots of pictures makes it seem like I am right there with you when working on your project. My mission is to ‘Inspire You to Sew’ and I hope you will go and do just that,” shares Michelle. Please check out Michelle’s patterns at Sew Michelle from this post or anytime from my Shop Love! page above. ♥
 We lost my mom-in-law Vida last night. So I’ll be away for awhile, but first I want to share a story. This photo shows a tiny section of the border of a huge, gorgeous tablecloth that Vida embroidered for us, along with a set of eight napkins. I can’t even begin to imagine how long it took to make . . . just look at all the details, including little French knots around the centers of the flowers! One holiday we were all sitting around the table stuffed and unmoving, savoring the memory of the meal and putting off dish-washing as long as possible. “Everything was just perfect,” someone finally said, breaking the silence. Then another family member replied, “Well . . . not quite . . .” We all looked at her expectantly. “I’m not positive, but I THINK the cloth is on the table wrong-side up!” she explained. We all peered intently at the stitches, and honestly we couldn’t even tell because Vida’s embroidery is as perfect on the back as it is on the front! I sheepishly apologized, but Vida just smiled graciously, loving that my mistake was actually the highest form of compliment to her handiwork. Vida and I have laughed about that every holiday since then, and I know I always will . . . but from now on, with a tear. I love you, Vida! ♥
I absolutely love to send people cards made from original art and photography reproductions, so I was very excited to find these in the Redbubble Shop of my blogging friend Rita from Australia! Rita has her own studio and gallery, teaches classes, hosts exhibitions, and has MANY creative irons in the fire including quilts, fibre and textile art, mixed media, and collectibles. Here are Rita’s links, which you can locate anytime in my Shop Love! page above:
Thank you for the beautiful cards, Rita! ♥

I saw a set of superhero aprons on Pinterest and was so excited to try them, only to find that the post didn’t lead anywhere, even to a photo credit! But thank you to someone out there for inspiring me to figure out my own design, which—since I decided on Wonder Woman + ruffles—I’m calling “Wonder Woman Retro.” Here are some links and tips if you’d like to make your own!
Happy sewing! ♥
 Here is a photo of my new favorite pillow that I finished last night! It just sort of evolved . . . here’s how.
(1) When I recently organized my crafty corner, these two fabrics ended up side by side on a shelf and made me think of Christmas. The red cotton is from a thrifted tablecloth, and the lime green felt is from the citrus coasters I made last summer. Then I saw an argyle sweater in an ad, and a lightbulb went on!
(2) I used a shape pattern from Google images to cut these diamonds from the felt. Then I pinned them in rows and pondered how to attach them. I decided that having the corners loose would give the pillow a more interesting texture, so I embroidered an “X” across the middle of each diamond . . . sort of a “free-form argyle.” 🙂
(3) When I stitched the pillow front and back together (the back is another piece of the red tablecloth, unadorned), I stitched through the middle of each outer diamond, which gave the edges a sort of rick-rack pattern. Finally, I stuffed the pillow and hand-stitched the opening. I may never make another one, but it sure makes me smile! ♥
 Today I want to give a shout-out to my blogging friend Laura of LC’s Cottage. She has an AMAZING Etsy store where I found these patterns (the clown was a bonus . . . wasn’t that sweet?), beautiful fabric, and (as my granddaughter Miranda declared) the most adorable embroidery scissors in the world! She also has LOTS of other fabrics and patterns along with gorgeous threads and other goodies. Please check out Laura’s blog and store . . . you’ll be glad you did! ♥
In late summer I started on my Christmas mini-pillow ornaments, and I finally decided to stop . . . for this year! (They’re addictive!) All they take are little bits of fabric and ribbon, plus buttons, bells, lace, and embroidery . . . oh, and your imagination! P.S. Please check out these links for some more ornaments to try! ♥

 Awhile back I wrote a post about my blogging friend Laura of As Time Goes . . . Buy and how she inspired me to do the Good Neighbor Award project and refashion for my one year blog anniversary. Laura has been traveling, and I’ve been sewing, but she’s home, and I’m finished . . . so today is the reveal! Laura, your coat is now on my “What Can You Make With A . . .” page, and your package is in the mail! I was able to make:


Doll Sisters
Knowing that I had lots of my grandmother’s embroidered pillowcases, one of my crafty friends offered to lend me her pattern for pillowcase dolls! She explained that, historically, the dresses have matching bonnets and are worn by very simple, faceless muslin dolls so I’d actually have three items to cut out and sew—a doll, a dress, and a bonnet. Although I couldn’t locate a link for a free pattern like mine online, you can find several inexpensive (under ten dollars) patterns for dolls identical to these by Googling “pillowcase doll kits,” and you can also find free patterns for different types of rag dolls and doll dresses that could be adapted to this style. Making pillowcase dolls IS detailed and time-consuming, but it’s completely worth every tender stitch you put into it. I know these little ladies will be loved forever! ♥

Here’s a little project I made for someone special to keep her hands warm on the way to work while getting a *hug* from the two loves of her life. Filled with rice, just pop them in the microwave for a minute or so and put them in your pockets. Please visit Trixie’s Blog for a tutorial . . . thank you for the inspiration, Trixie! ♥

 My mom-in-law LOVES Chanel face powder . . . and I love it when she gives me the little black drawstring bags it comes in! Of course you can leave the famous brand name on the front, but where’s the fun in that? 🙂 Instead, I like to cover the label with a teeny remnant. This bit of green fabric with embroidered flowers was perfect (does it look familiar? ♥), and I added some colorful “reverse blanket stitch” on the edge for extra a-la-mode. Now it’s ready for its new life as a pretty jewelry pouch . . . or even a wristlet. ♥
 As you know, I’ve been having tons of fun with my “What Can You Make With A . . .” series (see page in header), so I MUST share who inspired me to offer a “makeover” for my one year blog anniversary prize! Following one of my posts, I had the following comment conversation with my blogging friend Laura of As Time Goes . . . Buy:
Laura: Okay, that’s it. I can’t take it anymore. Either you are going to have to adopt me or I am sending you all my old clothes so you can turn them in to cool new things. Of course you’ll have to send the new things back to me. ![]()
Me: Actually, now I want to do that!!! Because you have such a beautiful wardrobe, I can only imagine what fun I’d have! ![]() Send me an item you no longer wear . . . and I’ll work my magic and mail it back to you, and we can both blog about it. Okay???
Send me an item you no longer wear . . . and I’ll work my magic and mail it back to you, and we can both blog about it. Okay??? ![]()
Laura: Seriously?! That is so cool! Now I will be up all night thinking about what I can send…but I have a thought. I’ll email you tomorrow. I’m soooo excited!! ![]()
Me: Yay!!! Can’t wait! ![]()
So, I thought if Laura would think this was fun, maybe someone else would, too. Thank you, Laura! And check out the A-M-A-Z-I-N-G jacket Laura sent (and click on the photo to see the beautiful embroidery!) . . . all the way from Australia to Kansas, USA! I’ll be posting on it sometime in November . . . stay tuned! ♥

 For my one year blog anniversary, I invited you to nominate people you’ve met through the blogging world whom you would like to have as next-door neighbors . . . and to tell why. It was SO heartwarming to read the lovely comments that came in from all around the world! The blogger with the MOST nominations was then invited to send me a once-loved garment to remake into some fun treasures (a-la “What can you make with a flannel shirt?,” “What can you make with a lace tank?,” and “What can you make with a polo shirt?“) and return. The winner was Kelly of Cobwebs, Cupcakes & Crayons! Kelly said, “After the shock wore off I ran to my closet to decide what I was going to send. I chose a little sundress that has a lot of happy memories attached to it, but now that I’m a mama seems a little, well…SHORT. I know that I will never wear it again, so I am very excited to send it off!” So . . .today is the big reveal! In addition, this project will have a permanent home on the “What Can You Make With A . . .” page on my header.
Done! Kelly . . . your package is in the mail! ♥


Since I finished my fall wreath, my new “kitchen project”–as in leaving the materials out on the kitchen island to work on in spare moments–is to make enough mini-pillow ornaments to decorate a small Christmas tree. I started on these last fall but only ended up finishing five. First, I cut all my Christmas remnants into 4-inch squares to mix and match for fronts and backs. I always add a bit of embroidery a-la-mode to the front, along with buttons or jingle bells here and there. Then I stitch and stuff just as I would a regular pillow but add a ribbon for hanging before sewing. I love how festive they look, and they make a great road-trip project, too. I’ll post my decorated tree when they’re all done! ♥


AFTER!

BEFORE . . .
When I ran across a paper towel holder I no longer use, I immediately thought of the rolls of ribbon I recently bought at Michaels (three for a dollar!) to make some more fabric memo boards. They’re a perfect fit! Here are a few other craft and sewing room ideas:
UPDATE: Emily at Two Purple Couches just sent me a tip that this and lots of other great storage tips are included in the September HGTV magazine! I did a little sleuthing and found a link here. Enjoy!
 One of my teacher friends posted this adorable chart-paper poster from the First Grader At Last! blog on Pinterest. I wanted to make one for a teacher in my family, but instead of recopying it on paper I decided to embroider the whole thing! Crazy, I know! 🙂 But here are the steps:
Here’s my colorful version, taped (a bit wonkily!) to a wall for a photo shoot before heading to a new kindergarten classroom. Happy school year! ♥

 I’ve loved notebooks ever since I was a little girl . . . maybe that’s why I decided to be an elementary teacher and writer when I grew up! Anyway, awhile back I started on a B-I-G embroidery project (post to come!) and I wanted it to be on fabric that looks like notebook paper. I found a lightweight knit in white with black stripes . . . perfect! The other day I noticed the remnants and decided I should turn them into something, too. So I cut them into twelve squares, embroidered a red stripe on half of them (my other road trip embroidery project), stitched them right sides together with a square of quilt batting added to the stack, trimmed, turned, top-stitched, and had a set of six cute coasters in no time at all. I think they’ll make a perfect gift for a teacher or writer . . . and I know lots of those! ♥
One of my recent road trip embroidery projects is now paired with a fun music print to make a pillow! The credit for this idea goes to Darilyn at TheHighNoteDotNet who graciously shared this lovely quote by author Bertold Auerbach. And, if embroidery isn’t your medium of choice, she will email you an iron-on transfer to use on a pillow, T-shirt, or other fabric craft . . . how sweet is that!!! P.S. The red one is from my flower pillow collection, and here’s a link to another music pillow from my very first month of blogging! ♥

We spent fifteen hours in the car this weekend for a fun trip to see family. In my project bag I brought along . . .
(1) blue and gold scrapbook paper to cut into circles for garland for my class reunion next weekend,
(2) fabric and buttons to make flowers, and
(3) two embroidery projects to finish (posts to come!).
I also received these adorable earrings as a surprise gift from our hostess! They’re created by a nonprofit called Unboxed Art . . . please check out their website when you get a chance, and have a lovely week! ♥

Here are my latest pillowcases, embroidered with a simple graphic and floral design. I do love to embroider . . . it’s relaxing, portable, and the perfect way to add a bit of a-la-mode to sewing and crafting projects. I learned my first stitches from my grandma when I was ten years old . . . I hope I get to pass them on to my granddaughters someday! ♥

 I always have a line-up of a dozen or so projects I want to try, but once in awhile something bumps all the way to the front. That happened when I saw this intriguing bag on the Empty Nest Feathers blog, who linked to the tutorial at Exchanging Fire. I couldn’t wait to make one for my embroidery floss, and I decided to use a couple of the black and white fabrics I already have as different elements in my office/sewing room. (Click on any photo for a larger view.) All you need are two 18-inch squares of fabric, two yards of cording or ribbon, and an hour or less of time. I can foresee a larger version for a beach bag, a tiny version for a jewelry bag, and every size in between for all different types of gifts and storage. It was SO easy and fun . . . you’ll want to try it! ♥


I was browsing the department store ads in the Sunday paper a couple of weeks ago when I was captivated by a lovely display of summery picnic dinnerware. When I saw coasters that looked like slices of oranges, lemons, and limes, my little DIY fairy said, “You should make some of those!” So off I went to the fabric store where, serendipitously, I spotted a lovely orange, lemon, and lime print on my way to purchase the felt I’d need. How fun is that!!! 🙂
Here’s how I made the coasters:
For a gift, make four of each and tie them together with a pretty orange, yellow, or green ribbon. Or, if you’re lucky enough to find some fabulous fruity fabric, you can make a simple little drawstring bag to gift them in. They’re so fun, easy, and colorful . . . you’ll love making your own! ♥


 One of my teacher/writing group friends just got her first publication acceptance, so I wanted to give her a gift that includes the dragonfly on her business cards. I traced the dragonfly on a small scrap of sheer fabric, triple-folded it for strength, and embroidered over the lines. Then I cut it out and glued the body onto a flower on the cover of one of my mini-notebooks, leaving the wings free. Oh, and I wrote a message for her to discover on the first page. I’m SO happy for Pam! ♥


 I’ve been seeing all sorts of tutorials for tiny weights to use in place of pins when cutting out a pattern. I’d never heard of this before, so it sounded intriguing! Wanting to use items I already had on hand, a quick search yielded just what I needed: two-inch green felt circles left over from a Christmas wreath pillow I made last winter and a stash of pennies I keep around to go with my Pennies book when I do classroom author presentations. To make a pattern weight, I simply held two circles together, handstitched most of the way around the edges with a contrasting color of embroidery floss (all six strands), filled the tiny bag with ten pennies, then finished the last stitch or two and tied off the floss. Easy-peasie! Now, what shall I sew . . . . ♥
 After making necktie onesies, I wanted to make a girly version, but what to put for a-la-mode? Ruffles? Flowers? No, BLING! But sweet bling, like embroidered lockets. These were super easy, too.
(1) Lay a real locket on the onesie and lightly trace around it with a pencil.
(2) Embroider the chain in gold.
(3) Embroider the “Mom” heart in hot pink and the “Dad” heart in teal blue. ♥
 e
e