Tag Archives: Crafts

Merry Christmas!

Standard

SpoonWhat do you get when you combine a Saturday morning, 8- and 10-year-old granddaughters, a roll of twine, red and white Tempera paint, and a package of dollar store wooden spoons? Sixteen Santas for teachers and friends on the girlies’ gift lists! You’ll find directions on Real Simple, and here are some other crafty ideas from Christmases past:

My blog has been on the back burner since summer, but I think of you often . . . sending love and best wishes for a joyous Christmas season to you and yours!

Zentangle Art Book . . . FREE!

Standard

Our friend Mahe of Altered Upcycling is offering her newest Kindle book, Zentangle Inspired Art: A Beginners Guide to Zentangle Art and Zentangle Inspired Art and Craft Projects, to all of us for FREE from Monday, May 19 through Friday, May 23! The book is full of projects and worksheets to facilitate both the beginner and experienced artist. Mahe says, “Even if you have never tried doodling before, this guide will walk you through the entire process of Zentangle art in a step-by-step manner supported by numerous pictures and examples.” Thank you, Mahe! ♥  P.S. Remember . . . if you don’t have a Kindle, you can get a free app for your phone, tablet, or computer to read Kindle books!

Zentangle

Mommy/Grandmother Vase

Standard

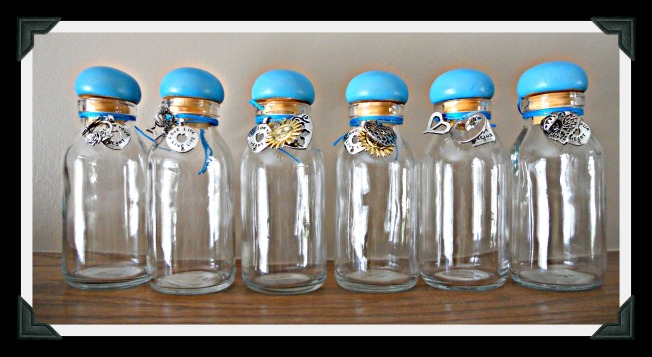
Are you looking for a fun, quick, and easy gift for a mom or grandma you love? Last summer I made a grandmother vase for a dear friend . . . a tiny bottle, corked when not in use, with charm a-la-mode in which to display a flower (or dandelion!) lovingly picked by a small child . . . or a pretty leaf he or she discovers . . . or a found feather. . . These sweet little bottles are readily available at craft stores, as are bags of charms—plus these stores often have great coupons. However, I was lucky enough to snag the 5-inch wooden-stoppered bottles below at a craft garage sale! With a good washing, a coat of paint on top, and charms around the necks, they’re all ready to go. Simply remove the stopper, fill part way with water, and add a flower. Happy Mother’s Day! ♥ Bottles

Peeps Garland!

Standard

peeps-garland

I recently hung the Peeps garland I made last spring (out of felt, not the candy!). Here are the super-simple directions:

(1) Draw a simple bunny shape or find a free template online.

(2) Make the bunnies from felt, fabric scraps, construction paper, or scrapbook paper.

(3) Add the eye and nose dots with fabric paint, permanent marker, or embroidered French knots.

(4) Attach the bunnies to ric-rac, ribbon, rope, string, or twine using glue or hand or machine stitching.

You’ll soon have a cheery pop of color for your spring décor. Have fun! ♥

Valentine Hearts Card Garland

Standard

During my last spring cleaning, I found NINE unopened decks of cards in the game chest. If they haven’t been claimed yet for their intended purpose, they’re up for grabs for crafting, right? So, when I saw several versions of Valentine garland made from hearts playing cards on Pinterest, I had to give it a try! I punched holes in the corners, strung them with red baker’s twine, and added a few hearts cut from the backs of the Jokers and advertising extras for a-la-mode. So easy, and they made great gifts for some special people I love! ♥  P.S. Here’s the red sweater heart pillow that’s sitting on my favorite chair this month and the felt conversation heart garland I hung across the mantle.

Garland

Card Garland

A Quote I Love . . .

Standard

When I saw a touching layout designed by Ellie on My Little Bunny Cupcake, I knew I’d found the perfect quote to put on my card when I give a fabric flower to a friend: Just living isn’t enough . . . one must also have freedom, sunshine, and a little flowerThank you, Ellie and Hans Christian Andersen! ♥  P.S. My dress form is wearing my scarf crocheted by our bloggy friend Tamara. Isn’t it just lovely?

Fabric Flowers w Quote

Journals from Vintage Children’s Books

Standard

When I saw this post on Thrift Store Crafter, I suddenly remembered that I, too, have a journal upcycled from a vintage book! I also remembered that I’d promised the person who gave it to me (my BFF/sister Susan) that I would actually USE it and not put it away with my treasures, so I got it off the shelf and began listing all the crafts/sewing projects I want to make and tucking in clippings and patterns. Now, when I find myself with a little block of free time, I’ll be all ready to go. And besides . . . this journal just makes me smile! ♥  P.S. Be sure to check out Sarah’s tutorials on Thrift Store Crafter! DP Journal

Sneaky Art!

Standard

I’m a lucky crafter . . . I won this fun Sneaky Art book and Rainy Day Art Pack, both by Marthe Jocelyn, from Robyn of Museiddity‘s recent giveaway! I’m happily set for my next little visitors! Please click here to learn more about the book and here to learn more about Robyn and and begin exploring her Museiddity creations. Thank you, Robyn! ♥

Sneaky Art_Rainy Day Art

Let It Snow!

Standard

In autumn I bought a fun chicken-wire frame at a craft show from Shantilly, and since then I’ve had fun restyling it for different holidays and seasons.  November’s design reminded us to give thanks, December’s spoke of joy, and January’s is all about snow . . . a clip-art mitten illustration mounted on scrapbook paper, letters snipped from alphabet fabric, and tiny clothespins to hold everything in place. ♥

January_letitsnow

Sweater Wreath

Standard

BearHappy 2014! I hope everyone had a lovely Christmas season. I had extra fun with my family celebrating Christmas, New Year’s, AND my birthday! And, with several days off from work, I enjoyed some extra sewing and crafting time, too.

Remember my sweater teddy bear? For my first holiday break project I wanted to use up the leftover sweater parts, and I found the perfect idea in the January, 2014 Woman’s Day magazine, submitted by Anna of Lasso the Moon. For mine, I . . .

  • cut the scraps into two-inch squares,
  • folded them in half,
  • strung them on stiff wire,
  • tied off the wire, and
  • added a ribbon.

It’s always fun to have something new to hang after undecorating for Christmas! ♥

Wreath and Ribbon

Merry Christmas!

Standard

Look at the lovely ornament my sweet art-teacher-writer-friend Ginger gave me at church on Sunday! She twisted and turned a piece of wire into a heart surrounding my L-O-N-G name . . . thoughtfulness and handcrafting at its finest. And now, with Christmas Eve just one week away, I’m off to finish my end-of-year writing assignments, bake, and celebrate with my family. I wish you and yours a very merry Christmas and happy, happy New Year, and I’ll see you in 2014! ♥

KatherineWireOrnament

J-O-Y

Standard

Besides my felt peppermint wreath, another favorite decoration at our home is this set of decoupaged J-O-Y letters . . . I made them from upcycled Christmas cards! Click here for complete instructions as well as links to lots of other fun, crafty Christmas projects. ♥

j-o-y

Our Peppermint Wreath

Standard

One of my FAVORITE holiday decorations is the felt peppermint wreath I made last winter. Click here to learn how to make the garland, and remember that you can use leftover “peppermints” to decorate anything from a package to a tree skirt to a headband. Enjoy! ♥

wreath

I love my all-holiday frame!

Standard

Remember the chicken-wire frame I bought at the craft show from Shantilly? And how I decorated it for Thanksgiving with cut out burlap letters and a fabric flower? My granddaughter Miranda helped me restyle it for Christmas with new letters, then we added the scrapbook paper ornament my friend Debbie taught me how to make. Perfect . . . and I’ve already got ideas for when Valentine’s Day rolls around! ♥

Christmas Wire Frame

Give Thanks

Standard

In my Sleepover! post I told you about Shantilly, a new crafty business launched by my daughter-in-law Shannon and her sweet mom and sister. Their popular handmade items include different sizes and colors of chicken-wire frames to use for memo boards.  (My friend Karen bought one for each of her nieces for Christmas!) With mine, I made a new wall decoration for our upcoming Thanksgiving dinner. The letters are snipped from a remnant of the burlap I used for my mini-screen bag, the teeny wooden clothespins are left over from my t-shirt garland kit, and for a-la-mode I pinned on one of my fabric flower brooches. I just love it, and the best part is that I can update and reuse it for Christmas, Valentine’s Day, and more! Thank you, Shantilly! ♥

Give Thanks

Sleepover!

Standard

Did you love sleepovers when you were a little girl? They were my favorite! Last weekend some fun girls in my family drove in for a “Crafty Cousins Slumber Party.”  We went out to eat, chatted, crafted, slept, ate breakfast casserole and cinnamon roll-ups, went to a big craft show (where my lovely daughter-in-law Shannon launched Shantilly!), and ended with lunch out with my dad. We made fabric flower brooches, Christmas cards (thanks Margo!) and earrings (thanks Karen!). If you heard laughter floating through the air Saturday night, now you know why. ♥

Treasures

Vintage Magnet Board

Standard

A year or so ago I had fun making some vintage earring magnets but I’ve given them all away, so it was time for another batch. Simply use pliers to pull the hardware from a clip earring, then superglue a sturdy magnet on the back! Then I had a chance to go to a new-to-me antique store last week, and I found a vintage metal tray to use as a magnetic memo board . . . a perfect match! ♥

P.S. What are the memos, you ask?

  • Top Left—A recipe for “Peachy Spread” (to serve on quick breads) from my friend Janice: Mix together 4 ounces of cream cheese, 3 tablespoons of baby food peaches, and 2 tablespoons of brown sugar. This will keep in the refrigerator for a few weeks.
  • Top Right—“When you lie down, you will not be afraid; when you lie down, your sleep will be sweet.” (Proverbs 3:24)
  • Bottom Left—A photo for a project I can’t wait to make . . . the ANNY BAG from my bloggy friend of It’s Sew Anny!
  • Bottom Right—Adorable Josh . . . our youngest grandson! ♥

Tray Collage

“Runs With . . . Scissors”

Standard

I found a cute brown and pink “saying” t-shirt for $1 at the crafter’s sale and just had to buy it to make into a pillow for a fun-loving scrapbooker I know! One of my handmade flowers covers up a small bleach spot on the fabric and adds a bit of a-la-mode. Easy peasy! ♥

Scrapbooking Pillow

The Green Crafts Lifestyle (and their special promotion starting this Friday . . . and a new call for submissions!)

Standard

Book CoverIn June, I wrote in this post about our crafty upcycling friend Mahe (aka MZ) that included a call for submissions for her new upcycled craft book. The Green Crafts Lifestyle is now out, and it’s amazing! It includes sections on paper, plastic, wood, metal, and fabric and has projects from 20 artists around the world, including four of my bloggy friends:

Along with 35 projects detailed on nearly 200 pages of photographs and step-by-step directions, you’ll find author bios and photos with links to their blogs, websites, and other online contacts.

Now for the promotion! To provide all crafters with a chance to learn from these techniques, Mahe’s Altered Upcycling business will provide unlimited FREE Kindle copies of The Green Crafts Lifestyle this Friday, August 16 through Sunday, August 18! Kindle doesn’t restrict you to its device; you can read the book on any PC machine or tablet with the free Kindle App. Simply click HERE for your free copy.

AND . . . drum roll . . . MZ is looking for MORE submissions from MORE of you! In her words: “We need talented artists, crafters, and upcyclists to provide projects and tutorials based on upcycling and green crafting. Altered Upcycling will take submissions for Part 2 of “The Green Crafts Lifestyle” series, and the project submission deadline is August 31, 2013. Please make sure you send tutorials that upcycle wood, plastic, paper, glass, or fabric. The tutorials must be in MS Word format with the pictures embedded in the doc file. I will also need a photo of you as well as an artist bio and links to your blogs, Etsy shops, etc. Please email tutorials to thecraftycan@gmail.com. Let’s save the world one craft project at a time!”

Thank you, Mahe! ♥  P.S. If you haven’t entered my “Catch-up Giveaway,” please click HERE!  

The Upcyling Queen Returns!

Standard

Adventures.Mixed.Media.CoverIn the past, I’ve shared reviews of two of Mahe Zehra Husain’s fabulous upcycling books, The Ultimate Guide to Upcycling and Make a Card Awesome. So, when she asked if she could send a preview copy of her newest publication, I was more than happy to agree! This one is called Adventures in Mixed Media: A Step-by-Step Guide to Creating Beautiful Pieces of Art. It includes chapters on:

  • Materials (Paper, Coloring Mediums, Found Items, and Art Stores)
  • Techniques (Making Mixed Media Art Paper and Making Mixed Media Collage Paper)
  • Projects (A House Journal, Altered Art Organizer, Paintbrush Book, Mixed Media Canvas, The Earth Without Art, Idea Journal, Mixed Media Memories, Art Around your Neck, . . . And Now ‘Round your Wrist, Birds, My Imaginary Flight, and Believe)

I love the way Mahe describes how she organizes her craft room to store “found” items, and the sections on “7 Unusual Sources of Paper” and “Let’s Go On a Treasure Hunt” had my creative juices flowing! Mahe includes YouTube videos for each of her techniques, as well as complete written directions and photographs of all papers and projects. You’ll love Mahe’s friendly, conversational writing style, too! You can get your copy by clicking here at Amazon.com or any time from my Shop Love! page above.

Oh, and remember that Mahe’s first book is ALWAYS available for FREE at her web site, Altered Upcycling. Thank you for all you do to care for Earth as you create, Mahe! ♥

Freezer Pop Holders

Standard

Happy Memorial Day weekend! We traveled to Dave’s hometown today to pay our respects and visit loved ones. Since I needed a road trip project, I grabbed a bag of the 4 x 4 fleece squares left over from the no-sew fleece pillows my family made last Thanksgiving and some embroidery floss. I simply folded each square in half, hand-stitched the bottom and side, and added a blanket stitch on the top. [UPDATE: Now I only stitch the sides and blanket stitch the top AND bottom. Click HERE to see why! :)] They’re the perfect size to keep little hands comfy while holding and slurping freezer pops at our family get-together this summer! And, since it was a long trip, I have plenty for everyone. ♥

Collage

Birthday Banner!

Standard

Banner

SideThe main occasion for our big family gathering over Father’s Day weekend is my husband Dave’s *milestone* birthday. Since Dave has been a teacher, principal, and Superintendent of Schools throughout his career, we’re using a school theme for the party.

The Book Page Banner designed by Lauren of The Thinking Closet (one of the sweetest, most talented bloggers I know!) sparked the idea of using bunting shapes and book-page letters for the birthday banner. My version included:

  • measuring, drawing, and cutting the shapes from black cardstock with a ruler, pencil, and scissors,
  • adding an inch at the top of the 5″ x 7″ size and folding it over to give a little extra strength to the punched holes and help the letters stand out from the wall,
  • Googling “printable alphabet template” for the letter patterns, tracing and cutting them out from an old book I save for just this purpose, and using a glue stick to attach them to the cardstock, and
  • threading baker’s twine through the holes for hanging.

It was easy and fun and will be a perfect complement to our other decorations. And, if you haven’t checked out Lauren’s amazing banner (complete with detailed tips, a C.S. Lewis quote, a free cut file for your Silhouette, and POM-POMS!!!), then click HERE right now! And follow her blog and FB page, too! Thank you for the inspiration, Lauren! ♥

Monogram Father’s Day Cards

Standard

9-hole buttonsHave you ever heard of 9-hole buttons? And did you know you can use them for words and monograms??? I didn’t until I read this fun post by Nicole on Diary of a Mad Crafter! And Nicole is so clever that she even made her OWN buttons!!!

I found mine at the yehuting Etsy Shop . . . only $4.98 plus shipping for forty. This lovely shop owner has TONS of other amazing notions, too. Do pay her a visit!

We’re having a big family reunion in June that falls on Father’s Day weekend. I wanted to make cards for all the dads who’ll be visiting, and the wooden buttons on plain kraft cardstock worked perfectly for a masculine monogram. I have quite a few left over, too . . . so more projects to come! ♥

1

Drama Queen Seams

Standard

Drama Queen SeamsThank you to Jeanna at Drama Queen Seams for such a lovely post about the recent Origami Owl Living Locket giveaway sponsored by designer Tiffany Scraper! You MUST see all of Jeanna’s stunning photos wearing her new chain, locket, charms, and tag!

Please contact Tiffany at thehootsuite@gmail.com, her Facebook page, or her web site if you have any questions about creating your own Living Locket or becoming an Origami Owl independent designer.

And be sure to check out Jeanna’s amazing creative talents as well in this Shop Love! post, on her blog, in her Drama Queen Appeal Boutique, and on her FB page. ♥

Easy-Peasy PEEPS Garland!

Standard

PEEPS Garland

I love PEEPS . . . even though they make most of the rest of my family go “Ewwwwwwwww . . . !”  But who could resist some adorable PEEPS garland? It’s super easy, and as I made it, I realized I had lots of choices.  So here’s a chart!  Simply pick one thing from each column (which you probably already have around the house!), and soon you’ll have your finished garland hanging among your other spring decor. Here is mine with felt, fabric paint, ric-rac, and machine stitching. (Click on the photo for a close-up.)  Oh, and you can find lots of free templates for the bunny shape on Google images. Have fun! ♥

PEEPS Bunny
Eyes and Nose Garland Attachment Method
  • felt
  • fabric scraps
  • construction paper
  • scrapbook paper
  • brown fabric paint
  • brown permanent marker
  • brown embroidered French knots
  • ric-rac
  • ribbon
  • rope
  • string
  • twine
  • machine stitch
  • hand stitch
  • glue

A Lucky Save!

Standard

Flowers

PillowNot long ago, I had a brave moment and decided to try crocheting. I got pictures to look at and lots of tips from family and friends. I already had some beautiful reddish yarn and a crochet hook. I made the chain and then dug in. I did it! Yay! I got to the end of the first row and added another row . . . and another . . . and another. “This isn’t so hard,” I congratulated myself.

Then I spread it all out and looked at what I’d made so far. Instead of a rectangle, it was an arch! Oops! I guess I added a stitch or two on every new row! But since it was my first try, AND I love the yarn, AND it looked pretty even in its wonkiness, AND it reminded me of the red soil on the farm where I grew up, I decided to make something out of it.

The picture slowly grew in my mind: a red hill covered in grass and wildflowers with a bright blue sky and bright yellow sun. So I dug through my remnants and . . .

  • found some blue canvas duck for the pillow squares
  • handstitched my piece of crochet at the bottom of the pillow front,
  • found some yellow canvas duck and appliqued/embroidered the sun,
  • embroidered some lime-green grass on top of the hill,
  • chose some vintage buttons that complemented the colors I’d already used and stitched them at the top of green embroidered stems for flowers,
  • sewed a zipper in the center of the pillow back and opened it,
  • stitched the front and back right sides together,
  • trimmed the seams,
  • turned the pillow right-side out through the zipper opening, and
  • inserted a 12-inch pillow form.

That’s my lucky save, all ready to jump-start my spring decor! And today is your lucky day, too, because you get to read some amazing posts on the “Lucky” theme from eleven other bloggers (including one on how to REALLY crochet!) in this month’s Collectively Creative. Enjoy! ♥

DIY Craft: ‘Stained Glass’ Shamrock – (Time With Thea)
The many meanings of “lucky” – (The Thing About Joan)
This Party Calls For A Theme:  It’s All Rainbows and Unicorns – (Green Door Hospitality)
Keep Calm and Pinch On – (A Ponytail Kind Of Day)
Honorary Irish and my favorite Irish Soda Bread – (My Healthy ‘Ohana)
Hello, 6 – (Joy, Lovely Joy)
Luck o’the Irish for Easter!  – (Minerva’s Hand)
Lucky Gold Elephant – (Now at Home Mom)
Asian Cucumber Salad – (Inspire and Indulge)
Jell-O Shamrocks: A Kid’s Lucky Snack – (Cobwebs, Cupcakes & Crayons)

Trixie Lixie (Don’t you just LOVE that name?)

Standard

Collage

I was the amazingly lucky winner of a recent giveaway on the Trixie Lixie blog . . . a beautiful fabric covered journal! I just love it, and it even has a pocket on the inside back cover. Then, as if that wasn’t enough, Tracy also sent me one of the new knicker kits she sells in her shop! Just look at this pretty fabric and elastic! I can’t wait to try this project! Following are LOTS of links you can follow to check out Tracy”s creativity from this post or anytime from my Shop Love! page above. Thank you, Tracy! ♥

  • Click here for the Trixie Lixie blog.
  • Click here for a tutorial on making fabric-covered journals.
  • Click here for a knicker tutorial.
  • Click here for the Trixie Lixie shop.
  • Click here for the Trixie Lixie FB page.

Knicker Kit

FREEBIE ALERT: The Upcycling Queen Strikes Again!

Standard

Book CoverIn my “Meet an Upcycling Queen” post last month, I introduced Mahe of Altered Upcycling. Many of you picked up the free ebook she offers from her blog and loved it! Now Mahe has another free offer starting TOMORROW, February 23 and running through Wednesday, February 27—a card-making ebook available here on Amazon.com.  (If you don’t have a Kindle, you can download “Kindle for PC” from Amazon.com here, also for free.)  Mahe was kind enough to send me a preview copy, and I found:

  • cards featuring paint chips along with items many of us already have around the house,
  • cards for lots of different holidays, seasons, and occasions,
  • step-by-step directions and photographs,
  • links to youtube video demonstrations,
  • and much, much more!

Please take a moment to help yourself to this lovely gift which is regularly $2.99 but ours for free for the next five days. Thank you, Mahe! ♥

Crafters With Heart

Standard

In honor of Valentine’s Day, I have a little story to share. For me, it started with this sweet post from Claire of The Penguin Theory about an amazing artist from Portugal named Sandra. When the Etsy community learned that Sandra had faced a great loss, they banded together for a fundraiser sponsored by Esther and Estella of Star of the East (with an Etsy shop here) who invited fellow artists to make a donation toward a raffle with more than 50 Etsy items as prizes. The response was overwhelming, and I know all the winners are just ecstatic! Others have ordered items from Sandra’s own Etsy shop called Azulado, where I found this gorgeous ceramic heart. It arrived this week just in time for the holiday, beautifully wrapped in a handmade box tied with ribbon.  Please visit Azulado when you get a chance (and also Etsy angels The Penguin Theory and Star of the East) from this post or anytime from my Shop Love! page above. Love and prayers to you and your family, Sandra! ♥

Collage

Dizzy Izzy (I just love saying that!)

Standard

Ribbon

Dizzy Izzy RibbonAnd, speaking of love . . . I just had to share this gorgeous fabric ribbon I bought from The Dizzy Izzy Shop.

It’s full of hearts with a sweet saying for Valentine’s Day or any day.

It will be so much fun to use for projects, wrapping, and labels!

The shop also sells bias binding, button, felt, felt balls, notions, and other supplies.

If you haven’t yet met Helen of Dizzy Izzy, please check out her blog, her shop, and her FB page from this post or anytime from my Shop Love! page above.

Thank you for my lovely purchase, Helen! ♥

Photo Star

Standard

Photo StarYes, I’m about to share ANOTHER amazing daughter-in-law craft! We were so excited to get this beautiful star with photos of our dear little ones for Christmas.  Jen was kind enough to send me a tutorial this week . . . and she must have known I’d ask, because she’d even taken a photo of her materials!  Thank you, Jen! ♥

(1) Get a wooden or metal star from a craft store, some scrapbook paper, Mod Podge, a paint brush, scissors, and photos.  Tip: Photos that are further away from the subject work better than close-ups.

Jen's Craft Materials(2) Use a piece of plain paper to cut templates for each side of the star points. Then look at the pictures and decide which ones to put on the star and where they will go based on their sizes and vertical/horizontal positions.

(3) Use your template to cut out the pictures, making sure they are facing the same way as their position will be on the star.

(4) Paint the backs of the photos with Mod Podge and stick them to the star.

(5) Cut scrapbook paper to fit any extra space on each point of the star and Mod Podge it on.

(6) Paint the whole star with Mod Podge and let it dry overnight.

(7) TA-DAH!!!

Meet An Upcycling Queen!

Standard

Free BookDo your New Year’s resolutions include using more of what you already have in your crafting, gift-making, and home decor?  Then you’ll want to meet Mahe at The Altered Upcycling Blog and Altered Upcycling. Mahe explains that she has a Master’s degree in Operations Research, works at a software house, and is an avid altered artist who is constantly looking for ways to make the world greener one small craft project at a time.  And, if you sign up on her blog or web site, you’ll receive her FREE pdf book called The Ultimate Guide to Upcycling  for one-of-a-kind jewelry, cards, gift bags, wall art, and more.  Mahe sends out free ideas and how-to videos in her email newsletter as well, such as how to make a beautiful card from a dinner napkin, old dictionary page, leftover ribbon, and glue!  Mahe writes in a friendly, conversational style as if she’s sitting right beside you, includes what worked and DIDN’T work for her, and supports her ideas with step-by-step directions, photographs, and alternatives.  You can get your copy by clicking on the link in this post or any time from my Shop Love! page above.  Thank you, Mahe! ♥

J-O-Y to the World!

Standard

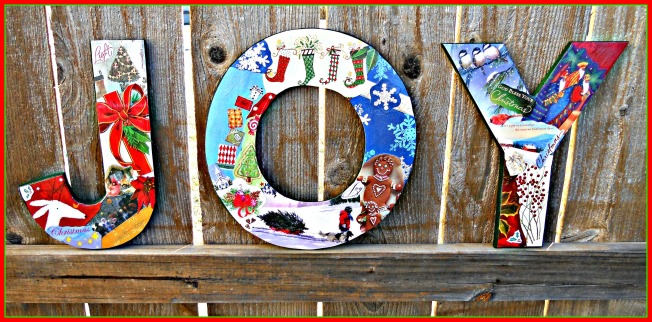
J-O-Y

Welcome to the “JOYFUL” edition of Collectively Creative, hosted by Kelly of Cobwebs, Cupcakes & Crayons! My project is easy and fun . . . similar to the Instagram collage letters I made this summer. . . . and I love how it turned out!

(1) Purchase some wooden letters at a craft store. Mine are 12 inches tall and were on sale for around $2 each.

(2) Optional: Paint the letters and let them thoroughly dry. I spray painted these with the green paint left over from my antique milk bottle project.

(3) Get out Christmas cards you received and saved from last year and cut out pictures and words to fit the shapes of the letters, overlapping them as in a collage. Attach these bits with Mod Podge. Or, if you don’t have cards available, use images and words from holiday magazines.

(4) When each surface is covered to your satisfaction, coat the entire letter with Mod Podge and let it thoroughly dry.

(5) Display your letters on a shelf or drill small holes or attach hanging hardware to the backs and hang them on the wall. Mine are now over the stairs along with my peppermint wreath where they’ll greet our Christmas Day guests at the front door. ♥

P.S. Before I link to our other Collectively Creative posts, I’d like to give a shout out to some other amazing bloggers who have shared their J-O-Y this season. Thank you to ALL of you for your inspiration!

Daisey Jane

Alana Jones-Mann

My Latest Project

Diary of a Mad Crafter

Our Next Great Adventure

Made in a Day (and here!)

The Joyful Edition Logo 2012COLLECTIVELY CREATIVE:

Sincerely Liz Boutique

Standard

DressOne of my VERY favorite bloggers is Liz from a A Ponytail Kind of Day. Every time I saw one of her unique creations, I’d think, “I sure wish she had a shop!” Well, now she does! It’s the Sincerely Liz Boutique, where you’ll find all kinds of beautiful handmade items for your home. Since I was looking for gifts for specific people, I ordered these fabric hangers, a set of rag coasters, and this way-cool bowl made from a Christmas record album. Then, friend that she is, Liz also put in this “Keep Calm and Sew On” framed art AND an AMAZING vintage dress and lace overlay that she bought for one dollar because she knew how much I’d have fun using it for a “What Can You Make With A . . .” project! What a sweetie! Please check out Liz’s boutique from this post or from my Shop Love! page above, and THANK YOU, Liz! ♥

Collage

Earring Frame

Standard

The beautiful vintage sewing machine earrings I won in the Hugs & Kisses blog giveaway inspired me to take all the danglies out of my overcrowded jewelry box and hang them on the wall.  Since I already had all the materials on hand, it was free, too!  Simply wrap an old frame in fabric strips (I used a faux suede remnant), staple strips of lace across the back, and poke the earring wires through the holes in the lace.  It’s easy-peasy, pretty, and makes choosing just the right pair of earrings a breeze.  P.S. One of my Thanksgiving guests exclaimed, “That’s just what I need!” so now I’m making one as a gift for her, too!  P.P. S. (1-3-13) I was just going through some bookmarked websites and found THIS! I couldn’t remember before where I got my inspiration, but now I know! Thank you, This Italian Family! ♥

Earring Frame

Art Jars

Standard

A couple of years ago I saw a kids’ art jar online and thought it would be the perfect gift for a special little girl’s birthday.  It was so colorful and intriguing . . . but when we dumped everything out, I found LOTS of pretty raffia filling and WAY too few actual art supplies.  Live and learn, right? So, when my dad was preparing for a recent move and asked if I’d like to have some empty plastic snack containers, I immediately thought, “ART JARS!”  I began collecting artsy/crafty items from the dollar bins at Michaels and Target, plus hitting the dollar stores, and soon had a huge bag of fun things to include.  These will be under some Christmas trees soon! ♥

Art Jars

Shop Love . . . a Post and a Page!

Standard

Today I’d like to highlight four amazing WordPress bloggers’ stores where I did my Cyber-Monday gift shopping this year. Each one has BEAUTIFUL products and EXCEPTIONAL customer service! Here are their contact links along with a little photo shoot of my lovely purchases (plus a few freebies they added!). I hope you’ll get a chance to check them out yourself soon!  P.S. I now have  “Shop Love!” page in my header to promote my blogging friends’ small businesses. I’d love to add more, so please leave a comment or send me an email if I may feature YOUR store! ♥

(1) Lili and Mum’s: Click here for her blog, here for her FB page, and here for her store.

(2) Neecy’s Neccessities: Click here for her blog, here for her FB page, and here for her store.

(3) P.S. I Love Soap Company: Click here for her blog, here for her FB page, and here for her store.

(4) Drama Queen Seams: Click here for her blog, here for her FB page, and here for her store. ♥

Collage Numbered

Peppermint Wreath

Standard

Yesterday I posted a tutorial for “Easy No-Sew Felt Peppermint Garland.” Here’s what I made with mine! We’ve had the grapevine wreath forever, and it was definitely due for refreshing, so I pulled off all the tired greenery and replaced it with my new garland. Other than tying the ends together at the top, I didn’t even have to stitch or glue anything as the branches themselves hold the garland in place. Now the wreath is hanging in my kitchen window topped with a little raffia. I love it! ♥  P.S. I have ten “peppermints” left over, so watch for one more post on them!

Wreath

Easy No-Sew Felt Peppermint Garland

Standard

I fell in love with this Christmas garland, adapted from an idea in Fa la la la Felt by Kathy Sheldon. Here are the steps:

(1) Cut red and white felt into strips. Mine are 1/2 inch x 8 inches.

(2) Lay a white strip over a red strip, then pull the white strip down about an inch. Begin rolling upward at the end you pulled down. This will give the “candy” a solid white center and a red outer layer.

(3) After the piece is rolled, put a pin through it to hold everything in place until you string the candies.

(4) Using a sturdy needle and extra-strength thread, poke the needle through the loose end of a candy, go through the middle of the candy and out the middle of the opposite side, and remove the pin. Pull the candies close together to keep the rolls tight.

(5) Hang your garland on the mantel, in a doorway or window, or on a Christmas tree or wreath! ♥

Debbie Does Doodles

Standard

Yes . . . I was the very lucky winner of another blog giveaway! Debbie of Debbie Does Doodles made these fun and lovely tags and labels and included a sweet note on a vintage postcard that made me smile. Isn’t her work amazing? THANK YOU, Debbie! I appreciate you! ♥

Crafts ‘n Coffee

Standard

I want to thank my blogging friend Sharon of Crafts ‘n Coffee for the WONDERFUL blog giveaway gifts she sent to me—THREE Christmas craft magazines, three mini-magazines with even more crafting ideas, and a STAK tree kit . . . plus she added a button, Starbucks coffee packet, and full-length pocketed apron from Styrofoamflorals.com! THANK YOU, Sharon . . . I can’t wait to try all these ideas! ♥

Facebook: http://www.facebook.com/StyrofoamCrafts
Pinterest: http://pinterest.com/craftsncoffee/
Twittter: https://twitter.com/craftsncoffee

Hot Air Balloon Mobile

Standard

Awhile back I posted the hot air balloon mobile kit I won in the Craft Schmaft blog giveaway.  I finally had a block of time to put it together . . . it was SO much fun!  And now that I have the pattern, I can cut out my own fabric and make as many as I like!  THANK YOU, Craft Schmaft! ♥

  • Click here for Craft Schmaft’s blog.
  • Click here for Craft Schmaft’s FB page.
  • Click here for Craft Schmaft’s store where you can buy this fabulous kit!

Mrs. Hetherington’s Thanksgiving Pageant

Standard

Welcome to the “THANKFUL” edition of Collectively Creative! Today I have a giveaway for all of our blogging friends . . . one of my children’s stories from Pockets magazine for you to read, share, and/or use to introduce a creative writing activity about holidays.  Simply click the first link for a printable word document or the second link for a printable pdf.

Mrs. Hetherington’s Thanksgiving Pageant (word document)

Mrs. Hetherington’s Thanksgiving Pageant (pdf)

I hope some special kids in your life will enjoy meeting Mrs. Hetherington and her Portland Elementary School Drama Club this holiday season! But first, please pour a cup of tea and take a few minutes to savor the rest of this month’s Collectively Creative posts. Each one has something special to enrich our lives. Happy Thanksgiving! ♥

P.S. If you’re a parent, grandparent, children’s book reviewer, librarian, or teacher, please check out the new kids’ Thanksgiving book called Sarah Gives Thanks by one of our fellow WordPressers, Mike Allegra at heylookawriterfellow. I bought a copy, and it’s a keeper!

COLLECTIVELY CREATIVE:

Arts and Crafts Mission Market

Standard

Here are the tags for this year’s donations to the silent auction at the Arts and Crafts Mission Market at my church. It’s such a worthy cause . . . all the money goes to a local daycare center for families in need. Click here to see how to make the Christmas wreath pillow and here to see the Americana pillows.   P.S. Below are my gift baskets from markets past, each based on . . . you guessed it . . . a pillow! ♥

Crafty Corner

Standard

One thing I LOVE is seeing my blogging friends’ sewing and crafting spaces. Some have whole rooms dedicated to their art, some have one bookshelf or a few pretty boxes, and many (most???) of us spill over onto the dining room table for big projects. When I recently finished a weeks-long high-priority project for work, I couldn’t wait to get reacquainted with the “crafty corner” of my small home office (which also includes jewelry, scarves, and belts, a Mary Azarian print my mom loved, and some of my grandma’s vintage hats) . . . but first I decided to reorganize it so I’ll be ready for all the fun ideas I’ve been collecting. Then, when I snapped a photo of my finished work, I was amazed at how many projects I already saw in this tiny space! So here’s the photo, here’s the list, and now . . . to start playing! ♥

  • Click here for pretty tape dispensers.
  • Click here for a ribbon dispenser.
  • Click here for neat bobbins.
  • Click here for “spool kabob” thread storage.
  • Click here for penny pattern weights.
  • Click here for bin labels and a pattern weight jar.
  • Click here for a pink fabric basket.
  • Click here for a scissors pocket necklace and shirt-sleeve fabric bins.
  • Click here for embroidery floss clothespins, jewelry frames, and notion jars.
  • Click here for a zebra-print origami lotus bag
  • Click here for a sewing machine cover.
  • Click here for a fabric flower storage display.
  • Click here for a reversible lace belt.
  • Click here for a dinosaur bracelet holder.
  • Click here for beautiful ceramic wall hooks.
  • Click here for mini-pillow Christmas ornaments (in progress!).

How Cute Are These???

Standard

I met my super-crafty, super-sweet, and super-pretty daughter-in-law Shannon for coffee, and look what she made for me!  Tiny easels with paint and ribbon a-la-mode and tiny art canvases with paint and paper decoupage (and tiny spools for Frankenstein!) for my Halloween decor!  I LOVE them!  THANK YOU, Shannon! ♥  P.S. Click here to see an example of Shannon’s mixed media “She Art.”

Craft Schmaft!

Standard

I am SOOOOOOOO lucky . . . I won the recent balloon mobile kit giveaway by craftschmaft! (Here is her Facebook page, and here is her store.)

I can’t WAIT to start on it!

BUT . . . I have a ton of writing and editing deadlines right now, so it will have to remain on my to-do list until the perfect time arrives.

So, thank you, Claire, and I’ll look forward to writing a fun post about my project as soon as I finish it!♥

Another 5-Minute Craft Room Idea

Standard

AFTER!

BEFORE . . .

When I ran across a paper towel holder I no longer use, I immediately thought of the rolls of ribbon I recently bought at Michaels (three for a dollar!) to make some more fabric memo boards. They’re a perfect fit! Here are a few other craft and sewing room ideas:

  • For pretty tape dispensers, click here.
  • For a pattern weight jar, storage bin labels, and needle book, click here.
  • For no-tangle bobbins, click here.
  • For easy-access thread storage, click here.
  • For neat and pretty embroidery floss storage, click here.
  • For a pretty ironing board, click here.
  • For a way to store and display your fabric flowers, click here and here.
  • For a portable way to store your colored pencils (or knitting needles or crochet hooks), click here and here.  Happy weekend! ♥

UPDATE: Emily at Two Purple Couches just sent me a tip that this and lots of other great storage tips are included in the September HGTV magazine! I did a little sleuthing and found a link here. Enjoy!

Lost Earring Necklace

Standard

Have you ever lost one earring from a favorite pair? That’s happened to me several times lately. I’ve been wanting to incorporate the saved mates into a different piece of jewelry, and I finally figured out how!

At a craft show last fall a lady had the ingenious idea of attaching the round part of a bracelet closure to a necklace latch that could clip onto any necklace chain or cord and then attaching charms to the bar part of the closure that slips into the circle. I bought the latch and one charm (with some miniature scissors, a flower, and two crystal beads), and I love it! So, to make my “lost earring necklace,” I removed the earring findings, bought another bracelet closure the same size, attached the pretty parts of the earrings to the bar with a little wire circle, and closed it up with my needle-nose pliers. Now I can exchange it out with my other charm whenever I like . . . YAY!

P.S. I’ve never made jewelry so I’m probably using all the wrong terms in this post, but hopefully the photos will help. ♥

5-Minute Project

Standard

If you, like me, keep many of your sewing/crafting supplies out in the open in decorative containers, you’ll love this quick-‘n-easy project from Dianne Faw! Simply take the cover out of a tape dispenser, use it as a template to make a new, pretty one (from scrapbook paper, gift wrap, a map, whatever you have on hand), and put the new cover in. So cute! ♥

P.S. I’m keeping my new dispensers in this fabric basket that I fashioned from an “oops” while making my first bracelet purse. And if you haven’t tried a bracelet purse yet, click here. They’re so much fun to make and give for little girl gifts!

Sometimes It’s the Little Things . . .

Standard

I had a few spare minutes today and decided to tackle some quick-‘n-easy projects with my materials and supplies, so now I have . . .

(1) a clasp on my needle book (braided embroidery floss stitched to the back cover wrapped around a small button on the front cover),

(2) labels on the red fabric bins where I keep my office/sewing/crafting supplies (typed lists taped to scrapbook paper rectangles and clipped to the fronts of the bins), and

(3) a home for my ever-growing collection of PW‘s (pattern weights) . . . the mason jar from my Mother’s Day gift labeled with a Publishers Weekly logo. (I don’t think they’ll mind, do you?) ♥


Road Trip Project!

Standard

I’m going to be in the car for 7-8 hours tomorrow and wanted to take something to work on. I’ll share what I came up with in case you have a road trip coming up, too. 🙂

  • First, go to The Renegade Seamstress and check out Beth’s fabric flower tutorial . . . super-easy! (I stitch instead of glue, but either way turns out great.)
  • Go through your remnants and cut out circles–seven of each fabric.  I use a peanut butter jar lid as a template (mmm . . . peanut butter . . . ) and all types of fabrics–solids, prints, wovens, and knits.
  • Put the seven circles in a baggie along with a button, beads, or earring for the flower center and a spool of matching thread.
  • Throw the baggies into your project bag along with a needle and some scissors, and you’re good to go!

I’ll put the pins and/or clips on the back when I get home, and hopefully I’ll have LOTS of pretty flowers to show you! ♥

circlesbaggiebaggies

Organized!

Standard

Like many of you, I started the new year by reorganizing my clothes closet and office/craft room. Everything looked great except that I always left my current sewing project on the chair in the bedroom. Then, I got the perfect birthday gift from my sweet son and daughter-in-law Bradley and Danielle. Here it is, filled with my first “Year of Homemade Gifts” project (post to come!). Don’t you just love the fabric? Now my handiwork sits BESIDE the chair so we can actually sit IN the chair. Thank you, B&D! ♥