I’ve seen this saying on kitchen printables all over Pinterest, so I decided I should embroider it! ♥
I’ve seen this saying on kitchen printables all over Pinterest, so I decided I should embroider it! ♥
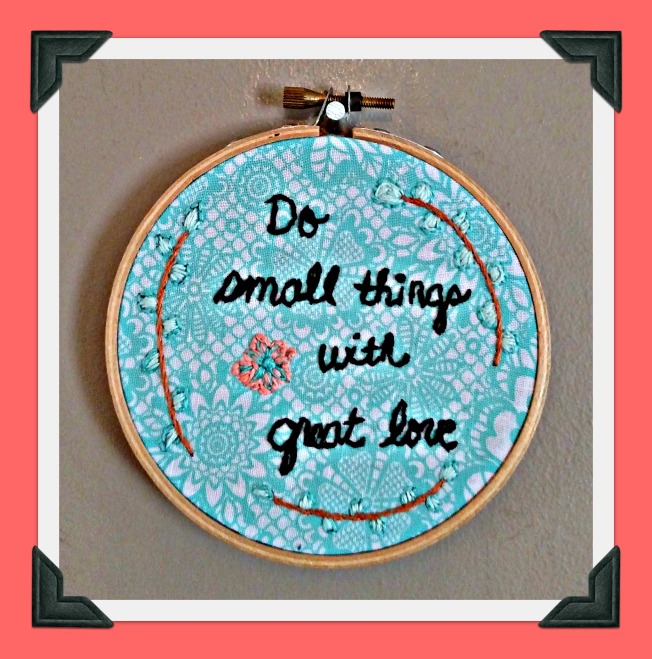
I found this design as a free printable on View Along the Way (thank you, Kelly!) and decided I must embroider it! It’s based on Colossians 3:12-14 . . . and a good reminder to start every day with love. ♥

I found this inspiring embroidery design at Nana Company. (Click here for the free pattern . . . thank you, Amy!) It’s so pretty! Even more, its message expresses how I hope to live my life. ♥
Another blog that has amazing embroidery patterns to share is Wild Olive. This one was so much fun to make! I especially love how the words and the design cancel each other out. Click here for the free pattern . . . thank you, Mollie! ♥
Yes, it’s another Flamingo Toes hoop art pattern . . . a housewarming gift for a loved one who just bought a new cottage (and loves purple!). ♥

My niece and her husband have a little one coming soon! I saw lots of cute elephant-themed items on their registry, so I purchased a couple and then bought some flannel to make some burp cloths. I had one little strip left over so dreamed up a pillow for the rocking chair, too. Can’t wait to meet the newest member of the family! ♥

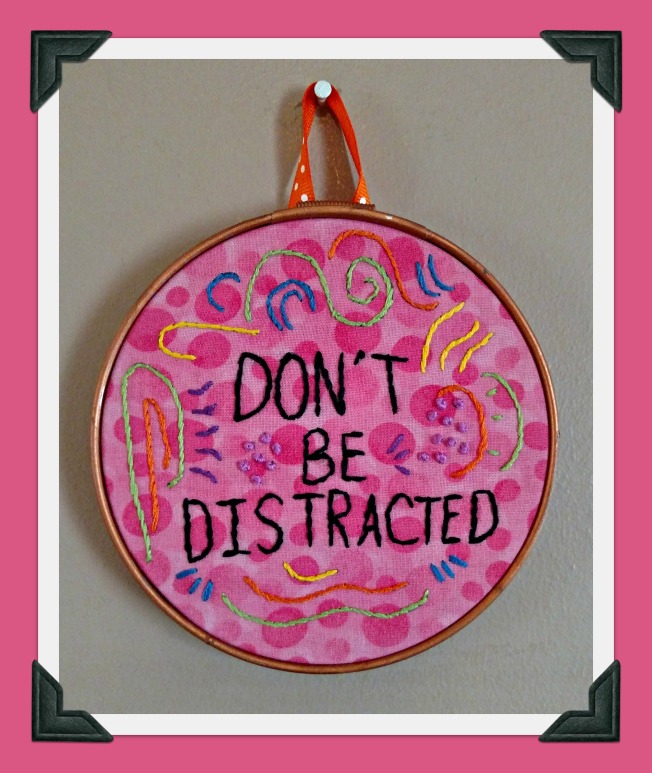
I have a little poster on my office bulletin board that says, “She believed she could, so she did.” That’s so empowering! It also matches my latest embroidery project, a reverse of the common pessimistic declaration “I’ll believe it when I see it.” It makes you think for a moment, but it’s true! ♥

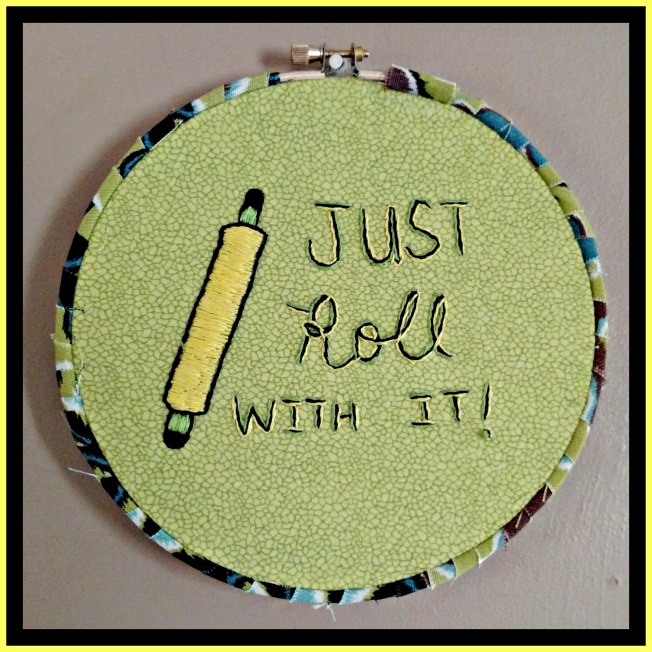
I saw this on a poster, and it begged to become my next embroidery project. I hope it gives you a smile today! ♥
I’ve been embroidering lately since it fits in my here-and-there creative moments. This quote seemed the perfect choice when I found enough heart fabric to fit these two little hoops. After embroidering, I wrapped the outer hoops in red polka-dot fabric strips for a bit of extra color, and then I gathered the backs and covered them with circles of the same fabric to finish them off. I’m going to take this message to heart! ♥

(Visit THE Inspired WREN for the tutorial!)

Snowy blue fleece + mini crocheted doilies + stuffing = snowflake pillows to gift as gifts this winter! ♥

Two of my ruffle aprons are heading to a silent auction benefiting my favorite youth group’s mission trips next summer. I fancied up some hangers by wrapping them in coordinating fabrics and added rolled-flower brooches to the aprons for a little a-la-mode. Maybe someone will be wearing them to prepare Thanksgiving dinner this year! ♥

More aprons . . .
 My husband cleaned out his closet, and I gained a stack of shirts to refashion.
Here’s the first result . . . an apron with coordinating fabric added for neck and back ties.
The sleeves and other leftover parts will be put to good use for another project.
Thanks, Dave! ♥

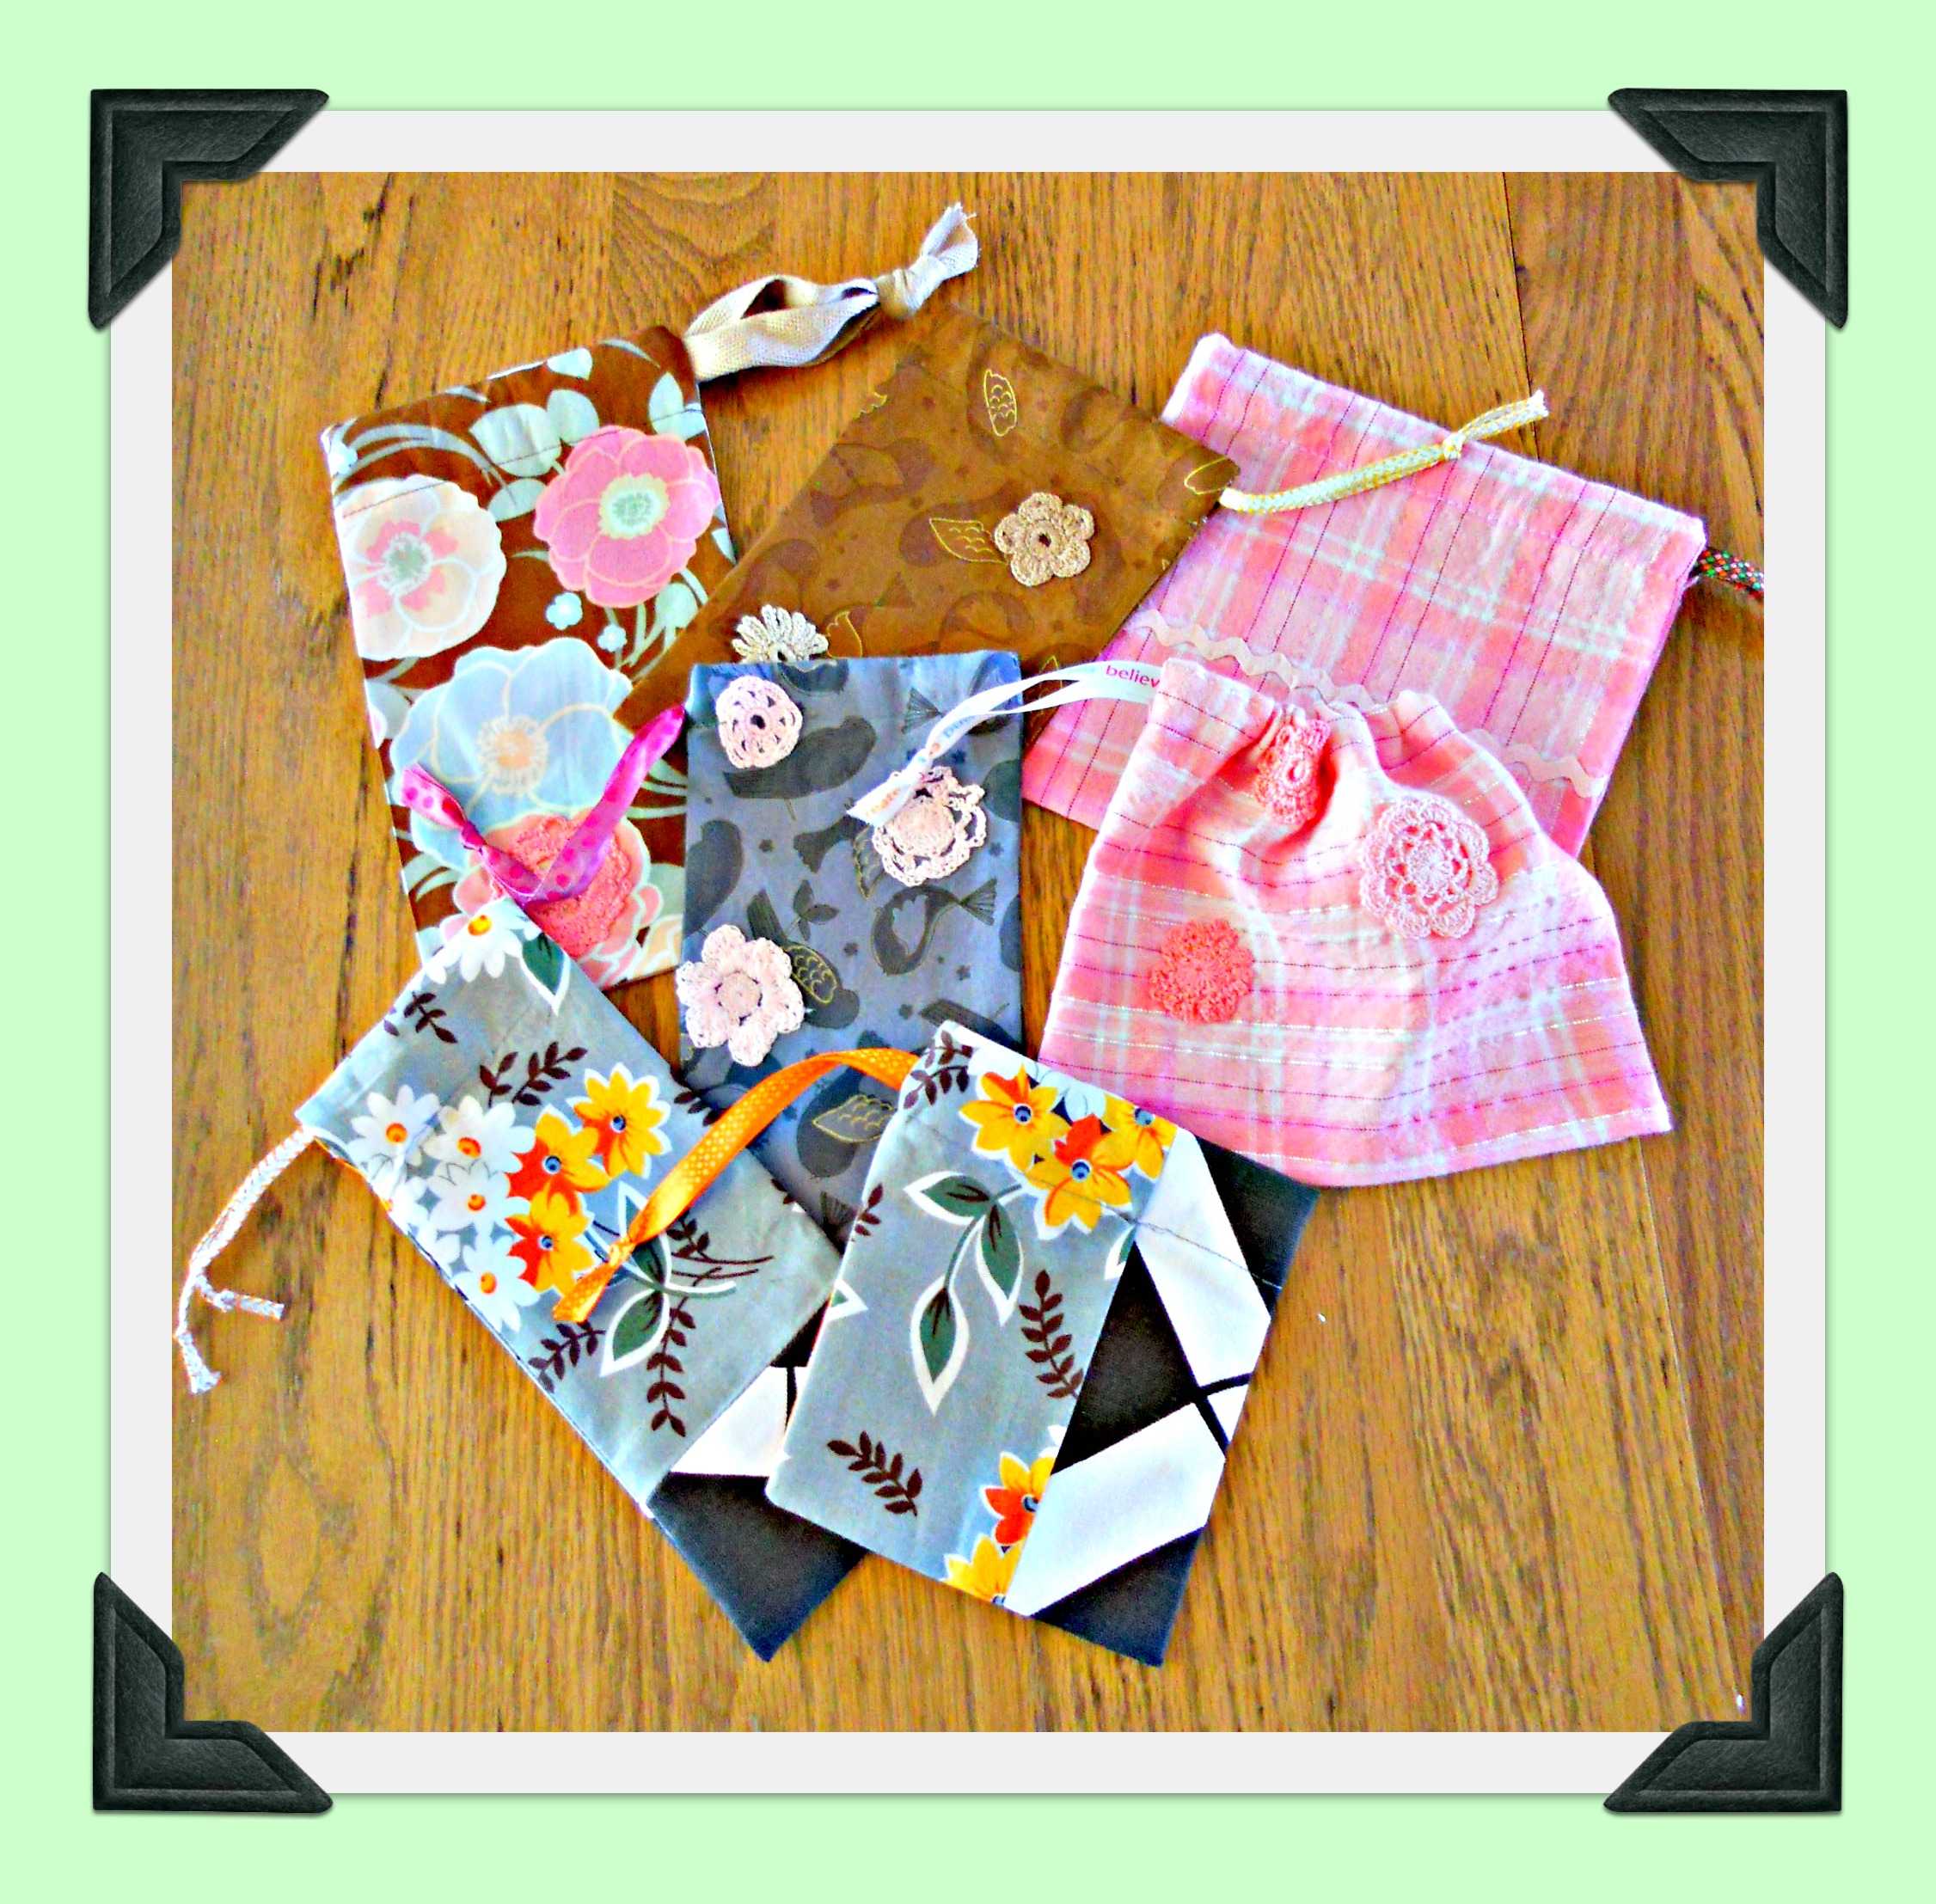
A fun way to present a handmade or store-bought gift is in a bag made of a fabric design that fits the gift. Sometimes you can use a bit of fabric left over from the project itself, such as this bag for Katy’s superhero cape with a “K” logo for a-la-mode:

Other times, you can use a themed fabric, such as this beach-designed bag for the swimsuit cover-up I made for Danielle and bunny/carrot fabric for a carrot and book for a toddler Easter gift:


It’s also fun to find fabric that matches books. Here is some Mr. Men fabric for a drawstring bag for a set of books for Kira and some Nancy Drew fabric for a tote bag full of books for Ally and Miranda:


A final idea is to add embroidery to “regular” fabric to fit the theme, such as this bag for cookie cutters:

I love making drawstring bags and totes when I need a quick “sewing fix,” so this is definitely win-win. Thank you for checking them out! ♥
Katy is turning three, so it’s time for another superhero cape! Click on the post about Josh’s cape to get the tutorial for this super-safe version (worn by slipping the child’s arms through the elastics rather than tying the cape around his or her neck). I found the fun fabric on ebay by searching for “girl’s superhero fabric” and used star fabric from one of my Wonder Woman aprons for the tips and back. Happy birthday, dear Katy! ♥

Here’s a fun, easy swimsuit cover-up made from Kwik Sew 3505. You can also wear it as a tunic over a cami and shorts. The fabric is a soft, swingy, cotton jersey . . . so comfortable! P.S. The pattern is now out of print, but you can find it on ebay. ♥
 One of my favorite bloggers, Crafty Staci, designs and sells reversible coffee cup sleeve kits in her Etsy shop. They’re only $5 and come with instructions, two coordinating fabrics, insulated interfacing, elastic cord, buttons, and a tag. All you add is your own sewing thread and pins! They’re perfect to stitch up as gifts OR to give as is to people who love to sew. I gave a kit to my friend Faye when she was having surgery and needed some fun things to do during recovery, and I sent some to my niece Amanda because we love doing the same projects across the miles from Connecticut to Kansas. One of Amanda’s is below . . . so cute! They would also be fun for kids to sew as gifts for teachers or coaches. Please check out the wide variety of kits at Staci’s Etsy shop, and be sure to stop by her blog, too. Enjoy! ♥

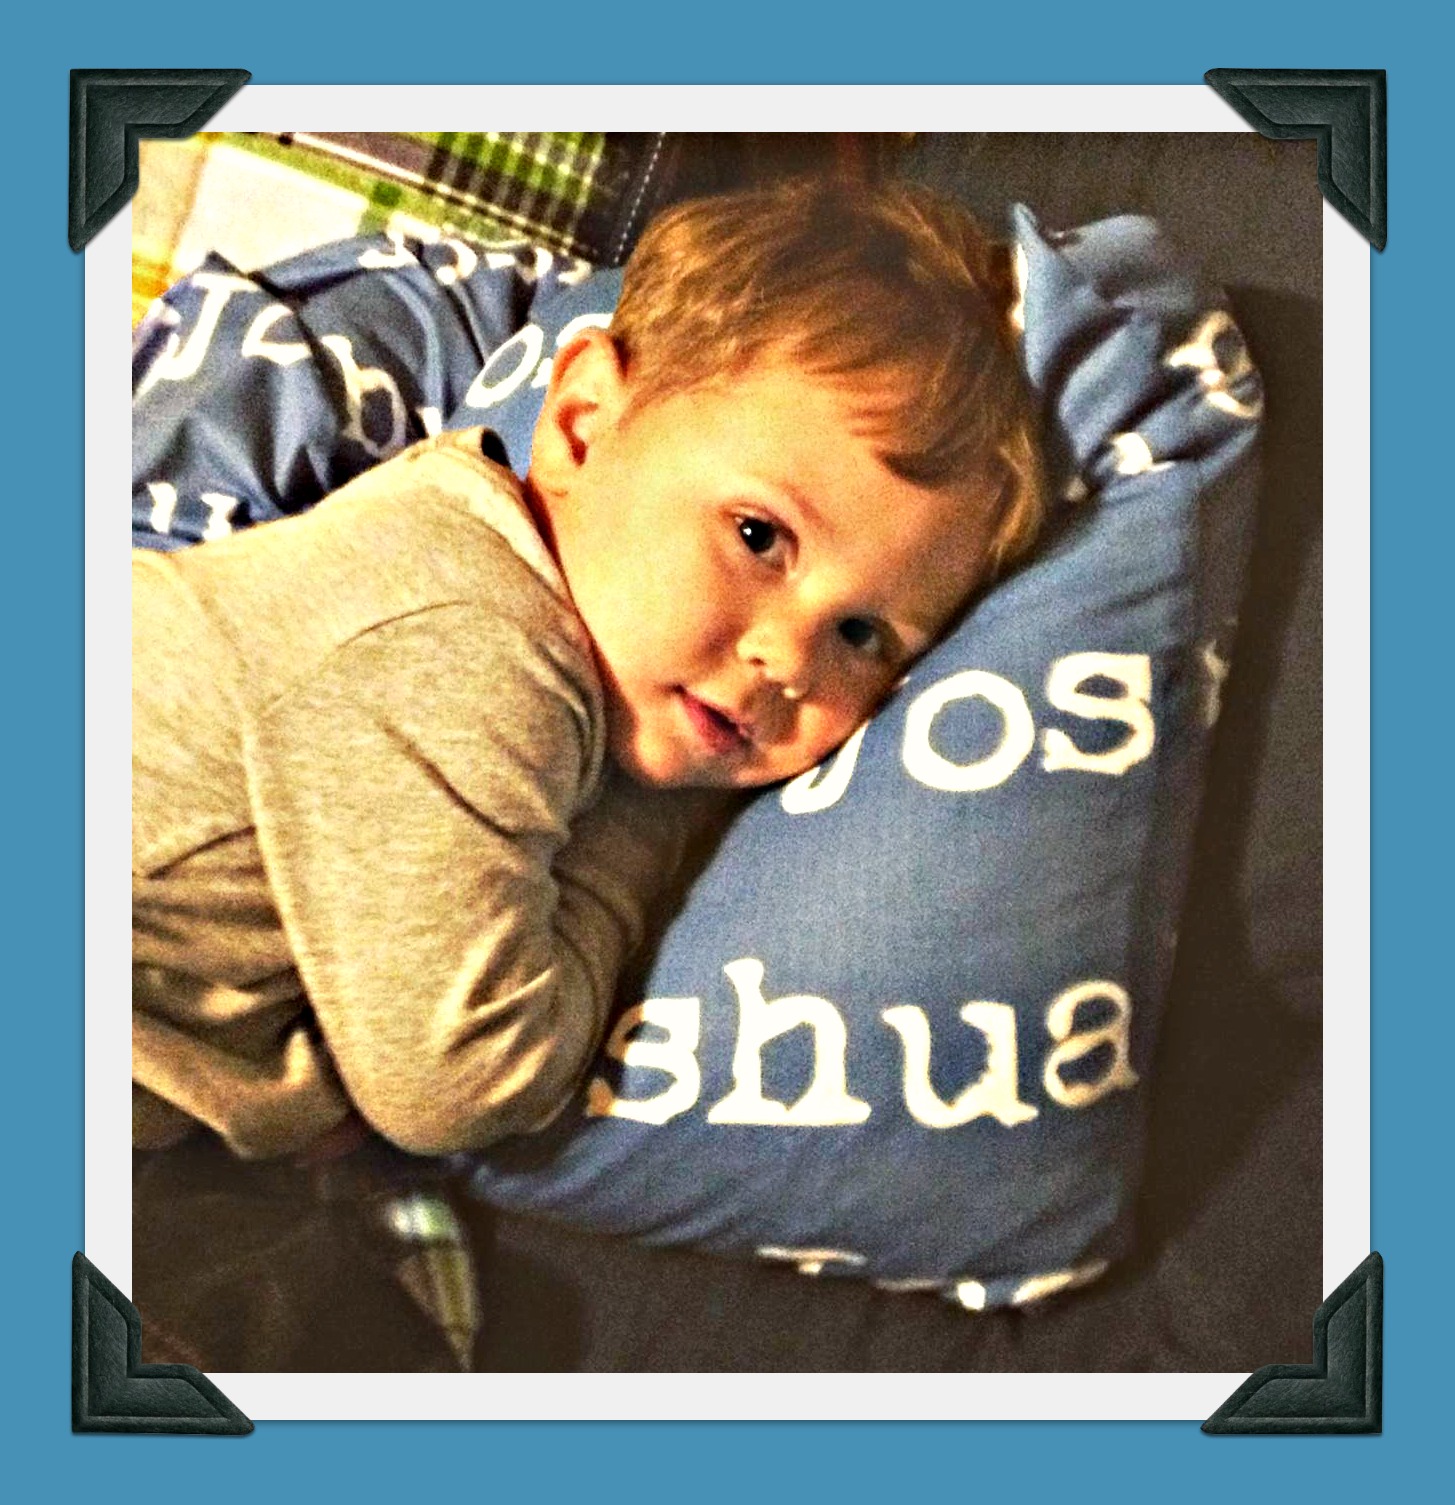
Our grandson Josh turned three today and is a superhero in every way. He needed a cape! In a Pinterest search, I found one that attaches with arm elastics instead of tying around the neck. How clever is that! And safe! And easy! I used this tutorial, except I made it reversible and left the top of the triangle to showcase both fabrics when worn. Just tuck the elastic arm bands into the seam when stitching the two fabrics right sides together, leaving a small opening at the bottom for turning, then topstitch and press. Oh, and you can also add an emblem with your little one’s initial from this pattern before stitching the two triangles together. Happy birthday, Josh! ♥

I pulled out my small fabric remnants and had fun using them to make a variety of sizes of drawstring gift bags. I used this design, but sometimes I use this or this. For a little a-la-mode, simply sew on buttons, crocheted flowers, ric-rac, or other embellishments, pin on a rolled flower, use patterned ribbons for the drawstring, or mix fabrics. ♥

I love making these rolled flowers . . . a perfect TV/road trip project. Simply cut fabric scraps into strips, twist, coil from the center out, and hold everything together with a few hand stitches on the back. The flowers can be big or small, and it’s even okay if the back is messy, because you’ll cover it with a glued-on fabric circle on which you’ve attached a pin or barrette (after adding a bead or button center if you like). Or, you can simply sew a flower directly onto an item like a purse, tote bag, or pillow. I love having a stash of these available to put in or on homemade fabric gift bags . . . my next post! ♥ P.S. You can see more here and here and here and here and here!

OK, now that’s a crazy title! But it’s perfect for these burp cloths made from Lauren’s tutorial on The Thinking Closet for a new baby born into a family of musicians! These are super-easy and a great way to use soft remnants from other projects. I couldn’t resist photographing them on my piano! ♥ P.S. Here’s a link to another set of burpies I made using a tutorial on Homemade by Jill. They’re keepers, too!

My Grandma Leona used to make these receiving blankets for all the spring and summer babies in the family. No pattern is needed; simply pin and sew two large squares of lightweight, seersucker-type fabric together with giant ric-rac tucked in the seam. I had the perfect excuse to make one, too . . . for our newest granddaughter, Emily Elizabeth! ♥

Brown and pink for girls . . . gray and chevron for boys . . . bunny pattern available from Positively Splendid . . . bunnies embroidered with names and attached with Heat n’ Bond and outline stitch . . . use any lined tote pattern . . . time for an Easter egg hunt! ♥

![pillow[1]](https://pillowsalamode.files.wordpress.com/2015/03/pillow1.jpg) It’s always fun to switch out the winter decorations for spring things! Here’s my favorite pillow (and the story behind it!) and links to some other handmade goodies. Enjoy! ♥
It’s always fun to switch out the winter decorations for spring things! Here’s my favorite pillow (and the story behind it!) and links to some other handmade goodies. Enjoy! ♥
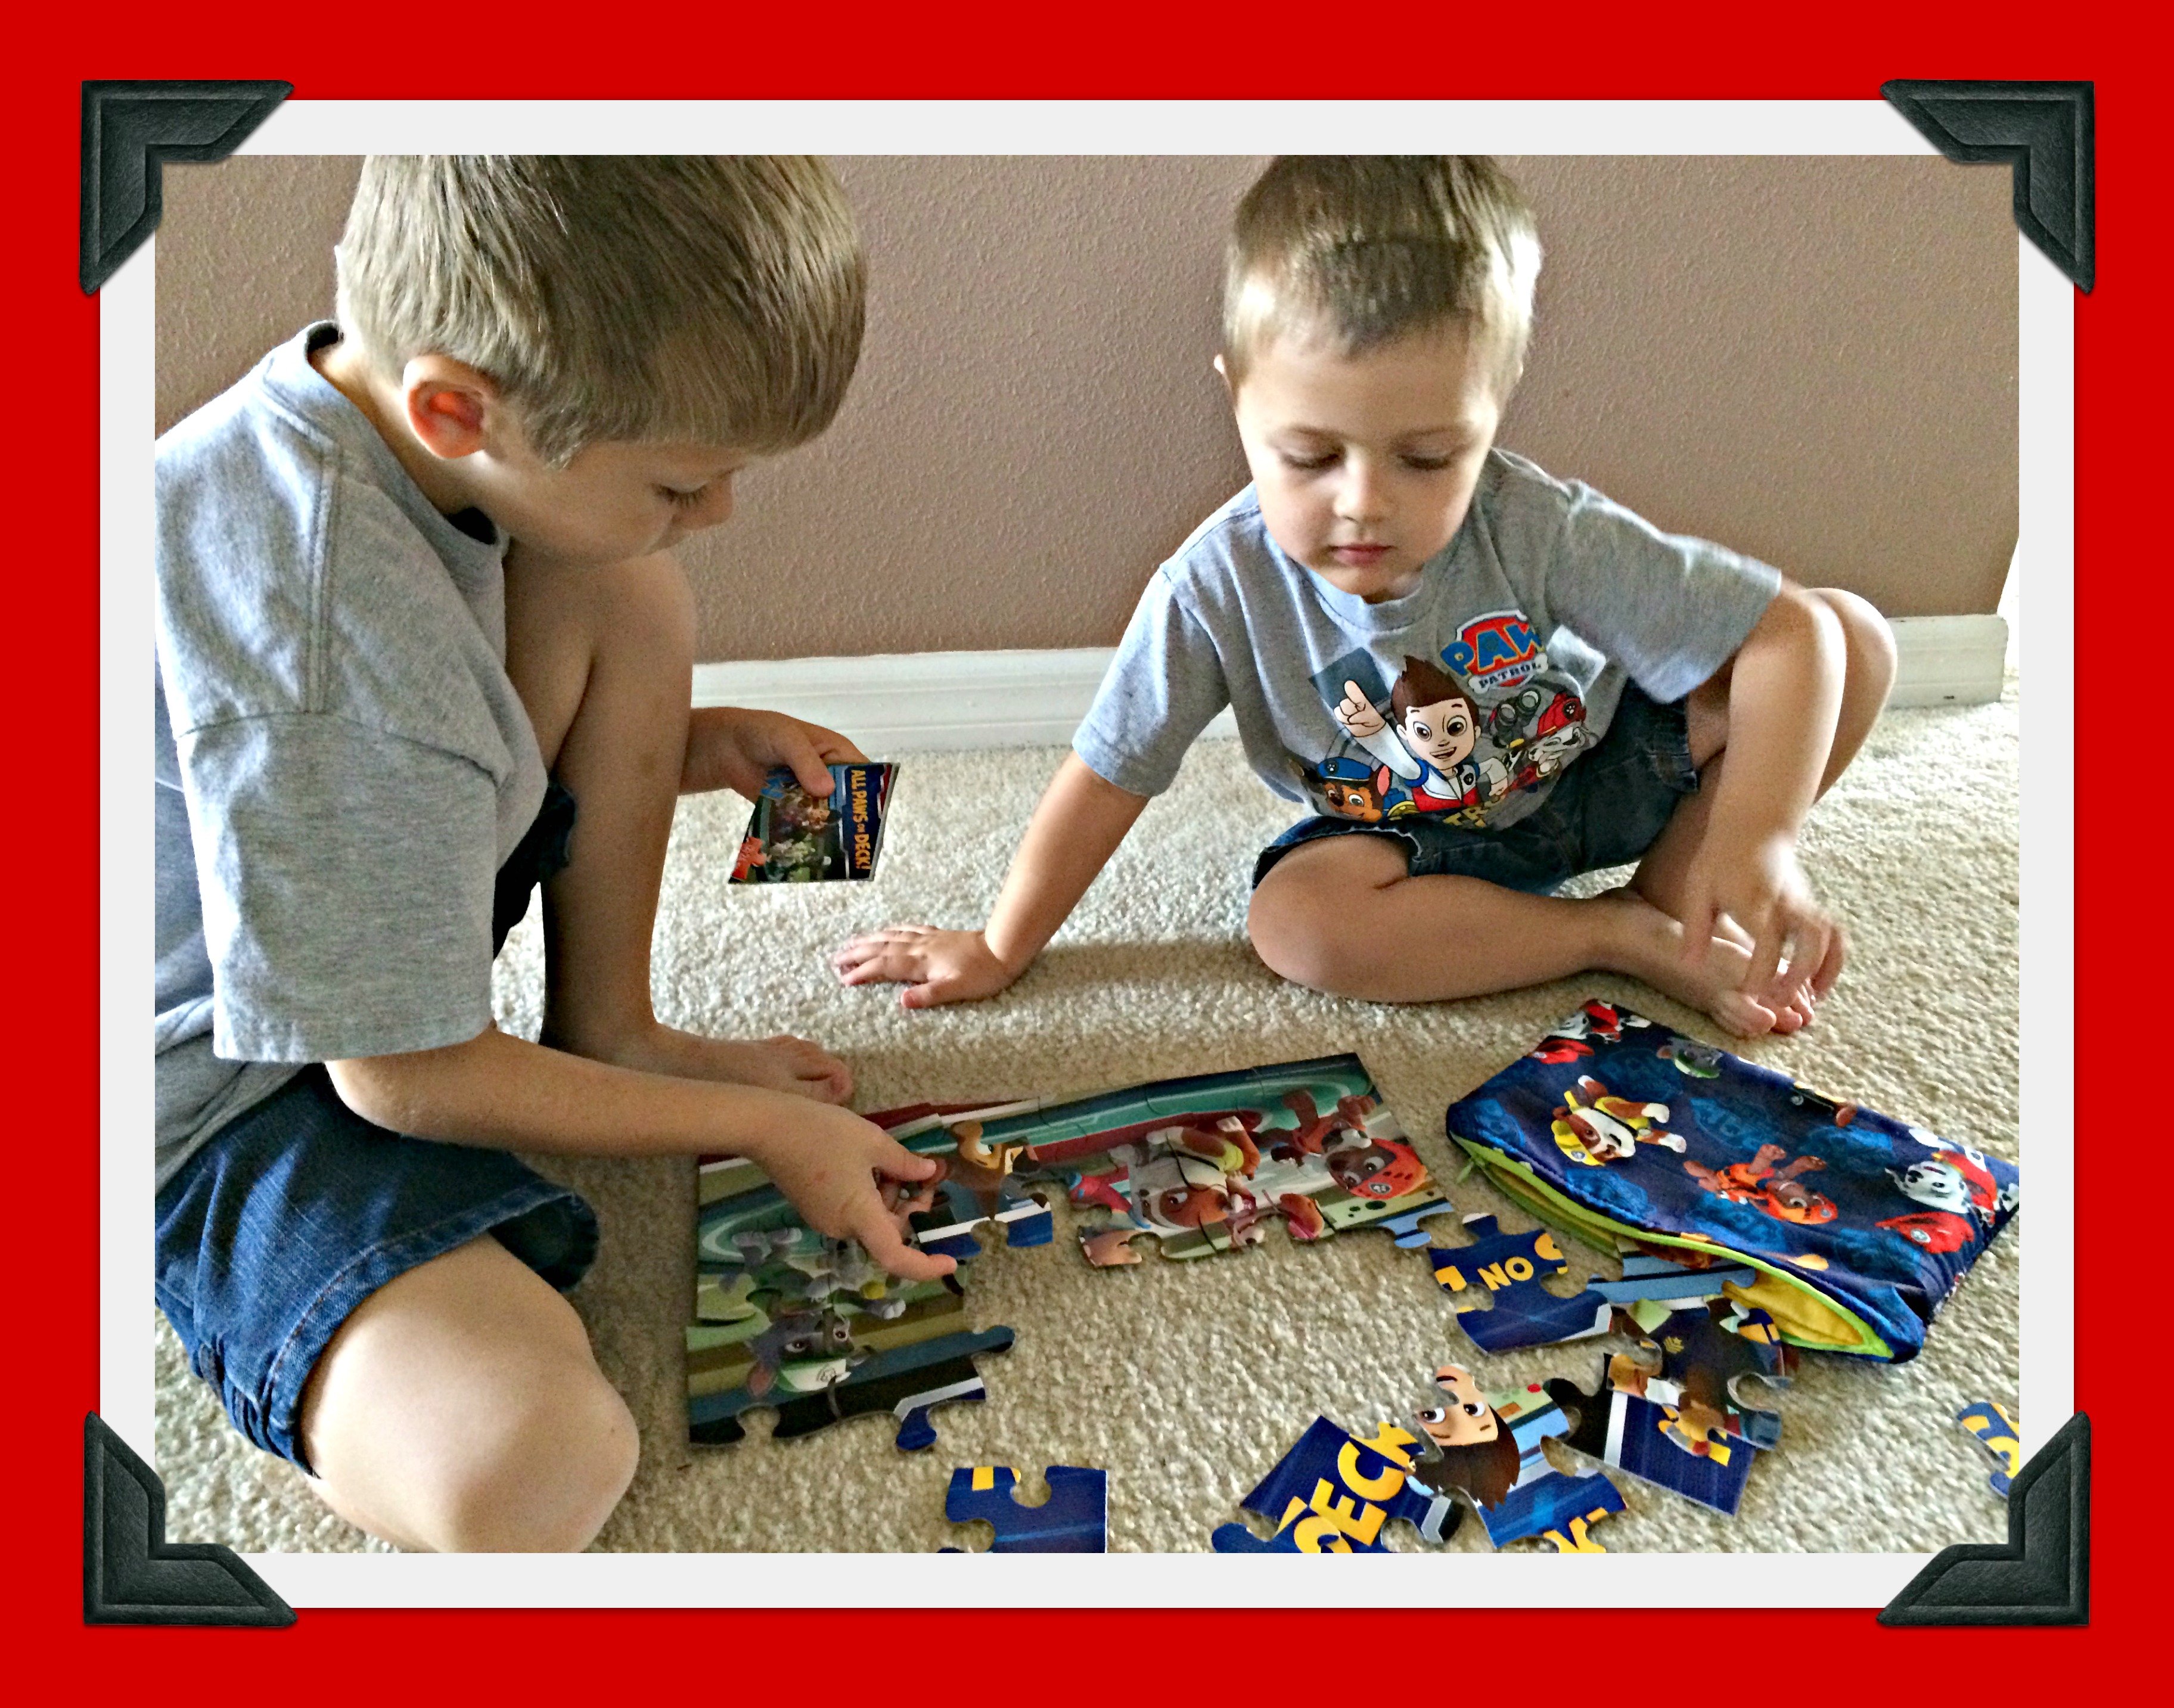
Besides cars, Tyler and Ryan love puzzles! So, when their mom Jen saw the zippered pencil pouches on my blog, she thought they’d be perfect as puzzle bags, too. I made the pouches a bit larger to hold 24-piece puzzles, and I used a different color of zipper on each one so the boys will know which color stands for which puzzle. Here they are, trying them out. ♥ P.S. Click Pencil Pouch to download instructions.

 My daughter-in-law Jen is always looking for creative ways to corral her little boys’ toys. When she found a wall-hanging car caddy on Pinterest, I was in!
Jen tweaked the design and chose the fabric, and I sewed, adding some interfacing between the front and back and doubling the fabric on the pockets to make it extra sturdy.
We got a curtain rod for hanging, but instead of the usual hardware, Jen cleverly used some removable hooks to avoid putting holes in the wall.
We think it’s cute . . . but not nearly as cute as the sweet little boys using it! ♥

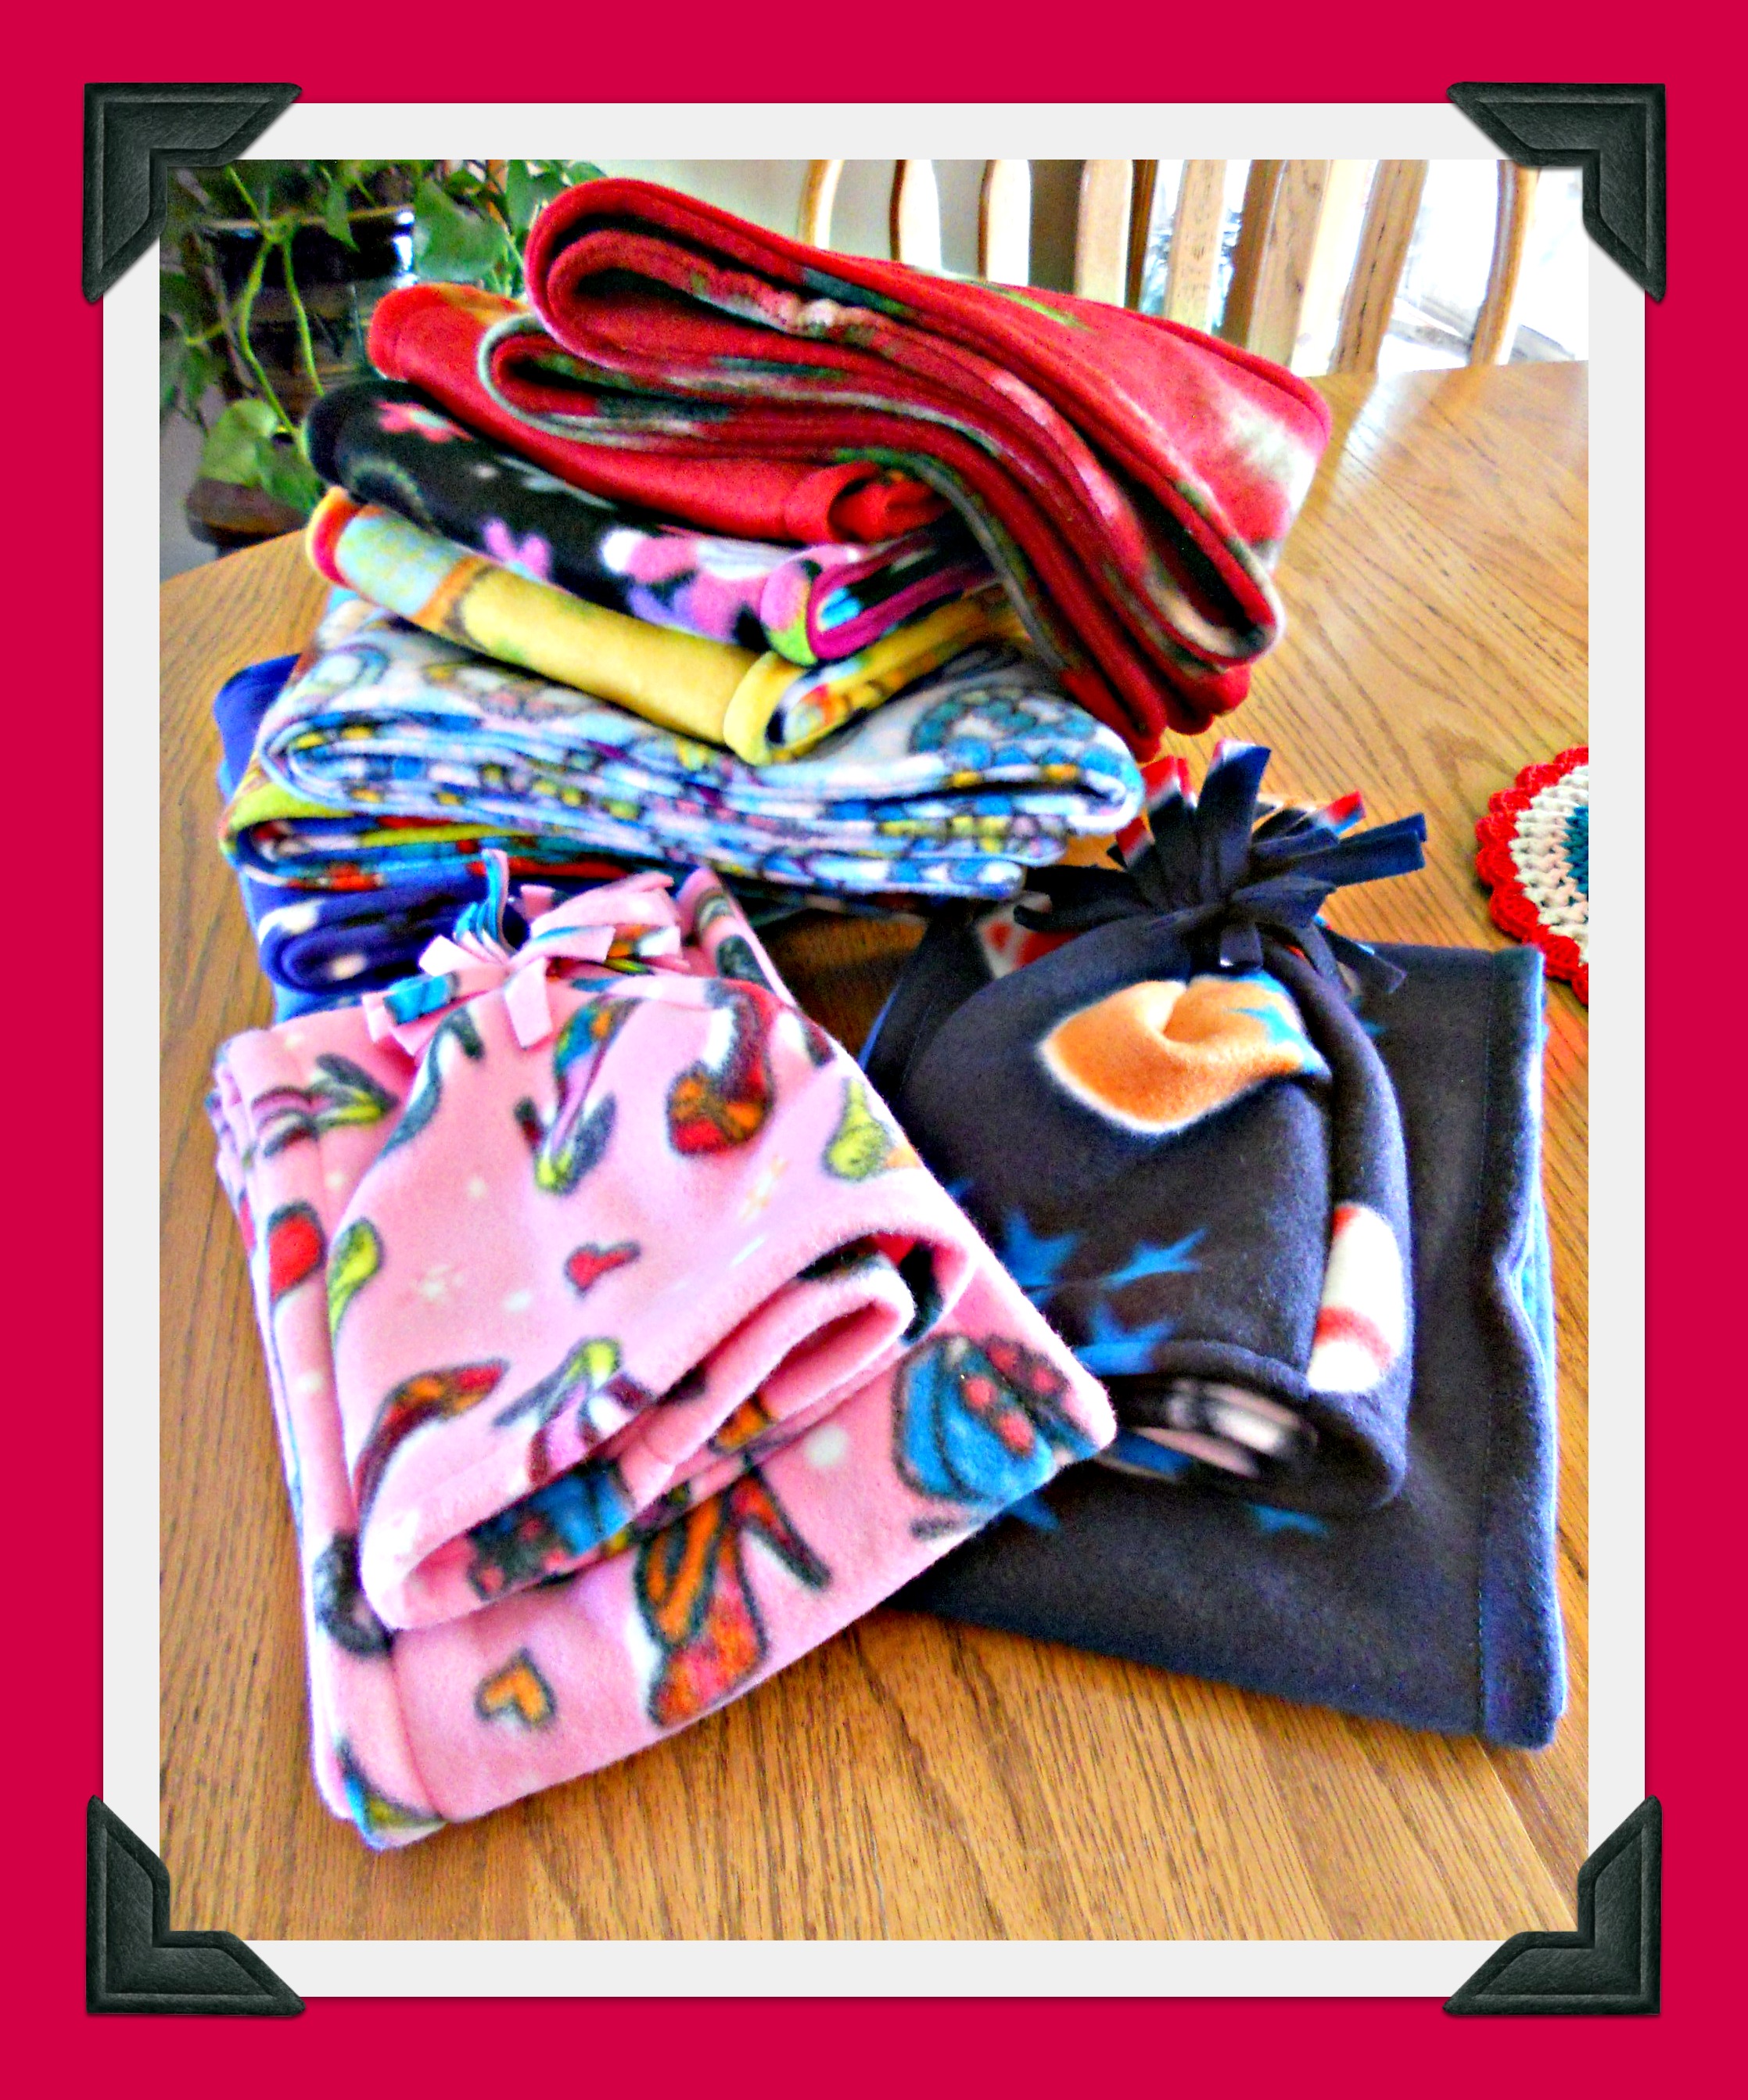
 We’ve had another cold snap since Valentine’s Day, and I’m still working on using the immense amount of fleece I bought for a family service project a couple of years ago, so it was the perfect time to try out the kids’ hat and scarf pattern I found in a $1 bin at Jo-Ann.
I changed the scarf up a bit and made it two layers instead of one, but I followed the hat pattern as is . . . super easy.
Now they’re ready to donate to a local preschool for some little ones who might need a soft, warm, wearable hug. ♥
Other fleece projects:
 . . . is only one week away! The only new things I’ve made for the occasion this year are some infinity scarves from red-on-white and white-on-red dotted chiffon that I had in my stash. They’re super-easy to sew (check out Pinterest for tons of tutorials!) and perfect for gifting. But it’s also fun to put out some treasures from previous projects, such as:
and my February Shantilly Frame.
Have a happy week sharing *a little extra* love with your family and friends. ♥

 When I saw this fun fabric on Pick Your Plum, I HAD to get one each for grandchildren Allyson, Kira, Miranda, Brody, Tyler, Ryan, Joshua, and Kaitlyn. It’s exactly the right amount for a “sweet dreams” pillowcase, but it would also make a perfect cape, tote bag, or other personalized item. The photo below is Joshua, who immediately snuggled in and told his mom, “I sleep on it!”
If you sign up at Pick Your Plum, you’ll get daily emails with fun crafty items and accessories at amazing discounted prices. With a little luck, this fabric treasure will come up again soon! ♥
 Hello, my long-lost friends! I hope everyone is well. I miss reading your blogs and hope to catch up soon.
My friend Sewing Machine and I haven’t spent much time together this summer, but I did find a spot o’ time to make an apron for my adorable granddaughter Katy’s 2nd birthday. This fun pattern is SUPER easy to stitch up, since it uses bias tape instead of hems around all the edges. I bought this pretty pink-flowered tape for Katy’s apron at a craft show, but I now own a bias tape maker and can’t wait to try creating some myself with Beth’s tutorial at The Renegade Seamstress. Katy especially loves her name embroidered on the pocket!
Click here for the pattern from Joan Giammalva. And, if you want a fun cookbook to gift with the apron, I recommend Pretend Soup and Other Real Recipes by Mollie Katzen . . . perfect for toddlers and preschoolers.
Thank you for taking a peek! ♥


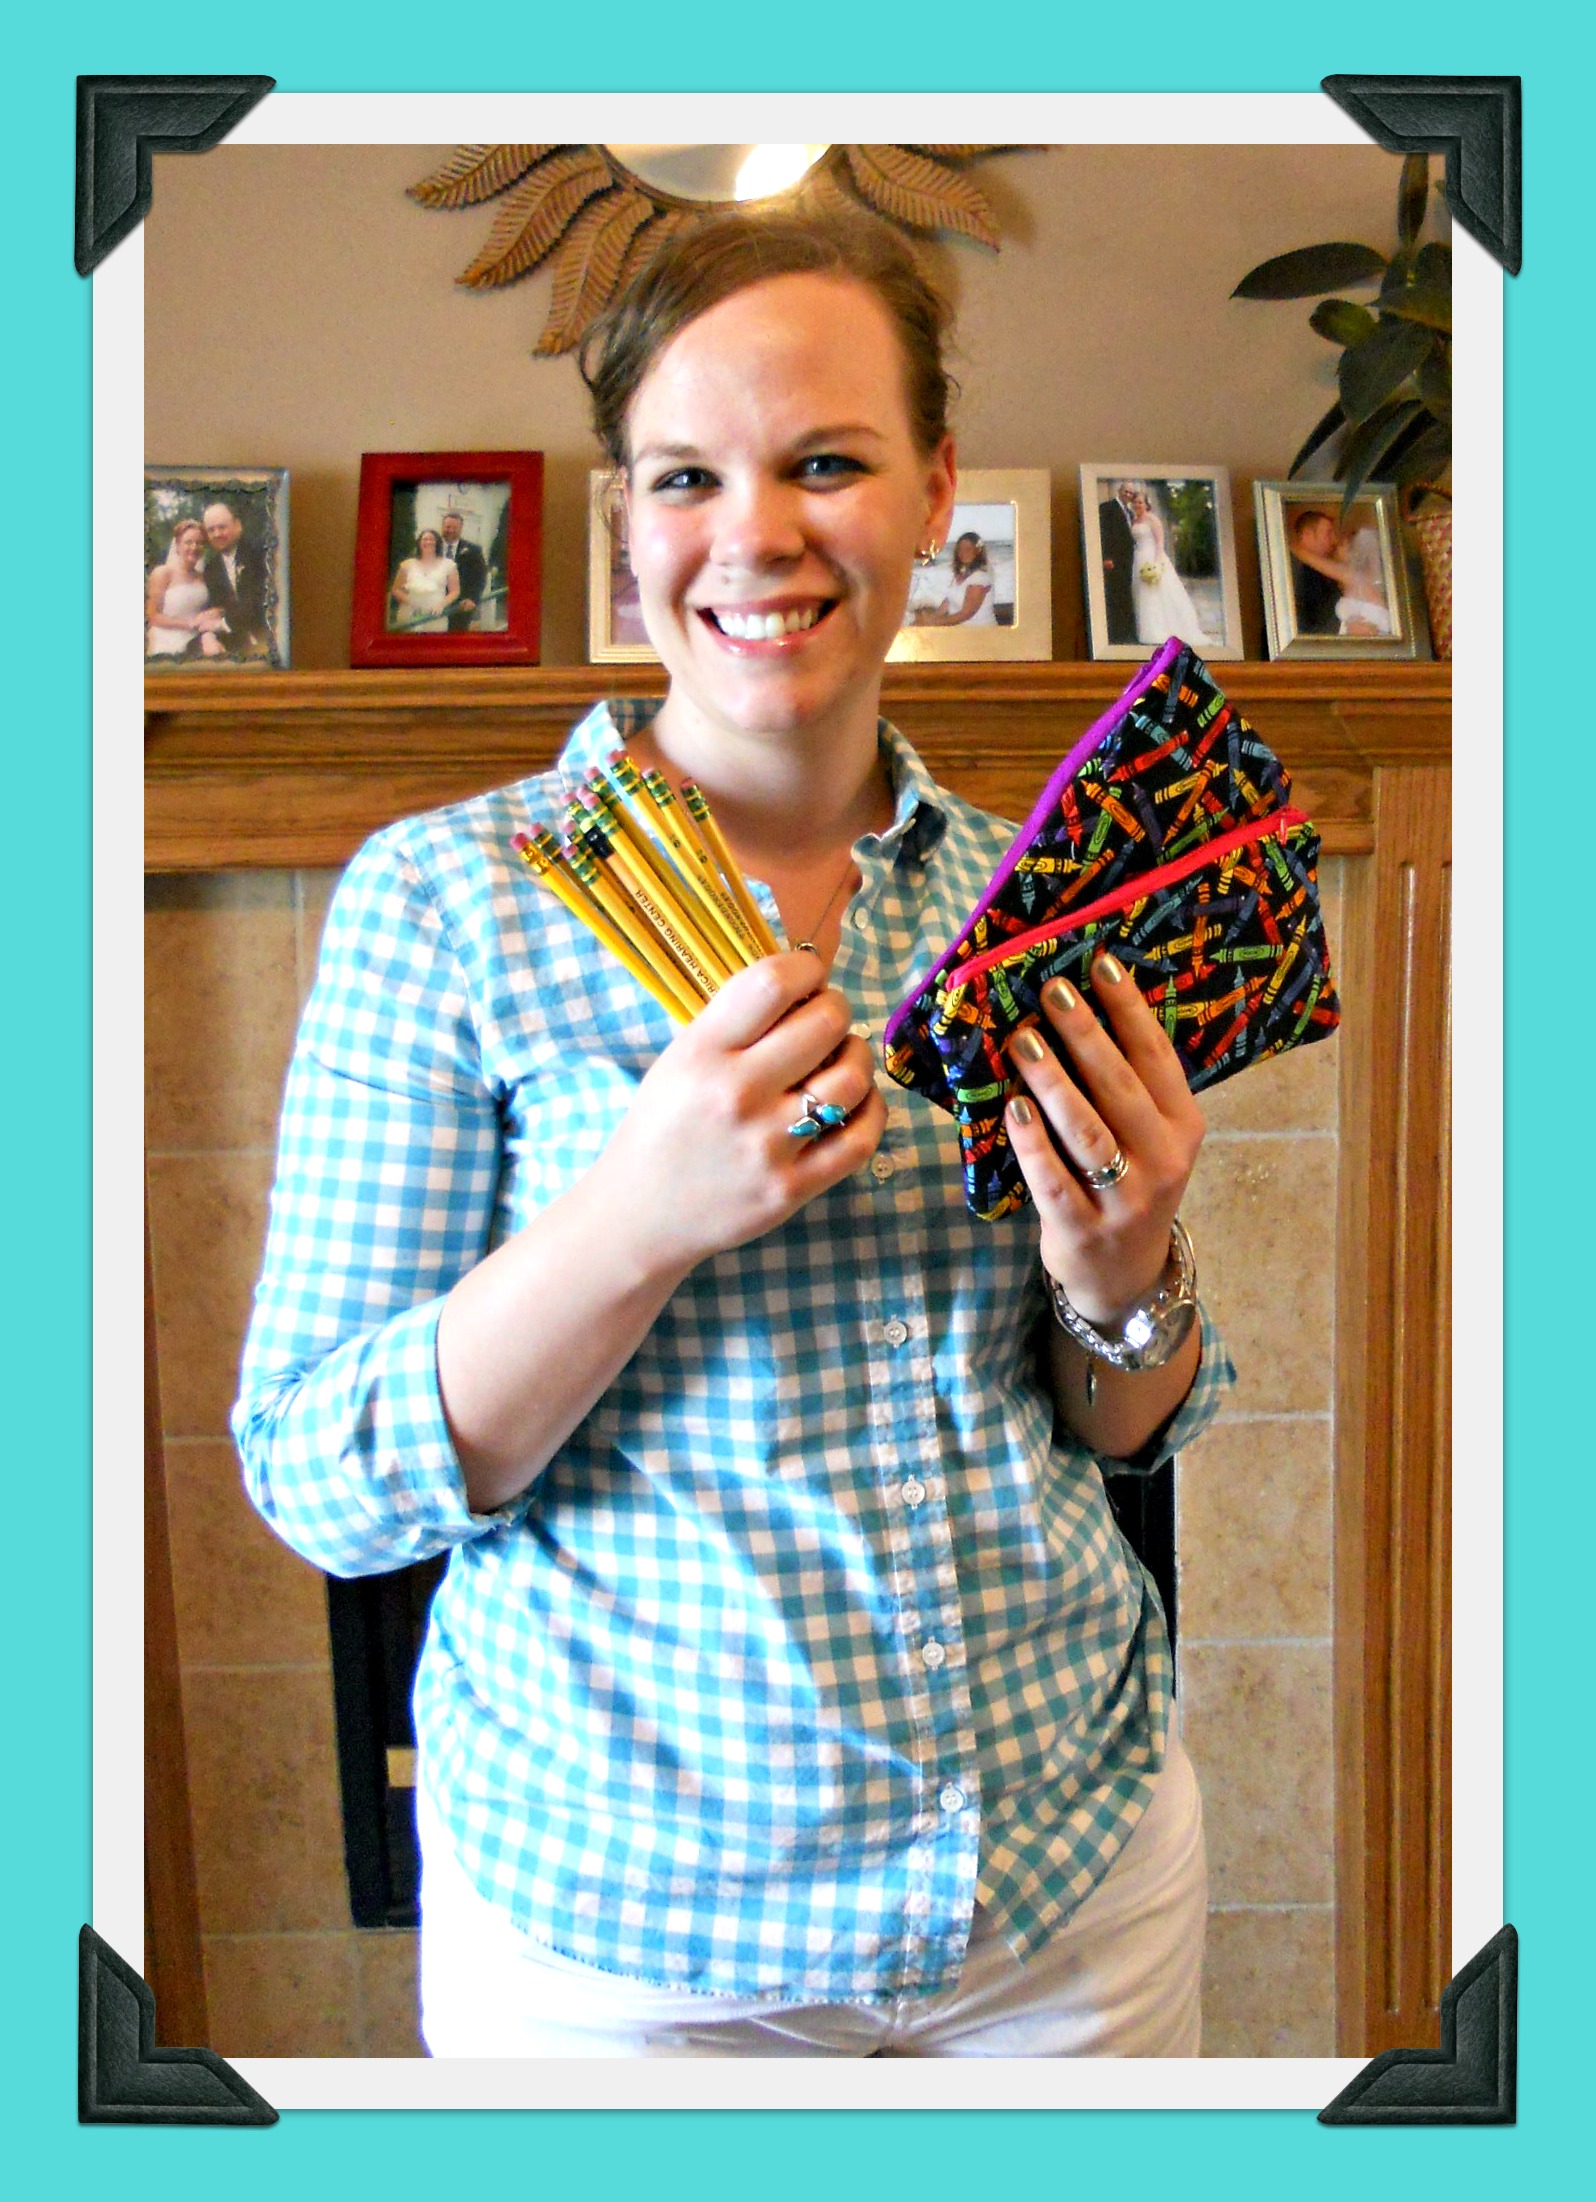
My niece Amanda got to stop by for a few hours on her vacation to Kansas. We love to make projects together when she visits, like last summer’s ruffle apron. This time we made pencil pouches for HER nieces who are getting ready to begin first and second grade. Amanda looked through my stash and found a crayon print for the outside, alphabet print for the inside, felt for interfacing, and zippers in the girls’ favorite colors. We used the sunnies cases tutorial, only in a different size and shape. We also typed up the instructions so Amanda can make more when she gets home. Click Pencil Pouch to download all the steps. Happy Back-to-School! ♥
Remember my Quilted Front Zippered Pouch? My friend Faye made this adorable version using two styles of Mickey Mouse fabric inside and out and gave it to ME! (She and her kids and grandkids are huge Disney World fans!) I just love it! Be sure to visit Noodlehead for easy, fun directions for this bag and many more. Simply click on the Tutorials page . . . but you’ll want to explore the rest of Anna’s blog, too! Thank you, Anna and Faye! ♥

As I mentioned in my previous post, I’ve gone a little crazy making these sunnies cases . . . and this photo doesn’t even show the three I’ve already given away! If you’d like to make your own, check out this lovely tutorial on Polka Dot Chair. I decided to embroider the word since that’s one of my hobbies, but Melissa’s fused method is very modern and chic. Thank you for the fun summer inspiration, Melissa! ♥

I loved trying out this Sunnies Case Tutorial by Melissa of Polka Dot Chair. My only tweak was to embroider the word on the front instead of fusing it. The project was so much fun that after I took this photo, I made over a dozen more . . . I’ll post them next! ♥

Thanksgiving before last, we had a family craft/service project while everyone was here for the holiday, making fleece pillows for Christmas gifts for local nonprofits. Afterward, I had about a bazillion 4 x 4 inch squares of fleece left over! Last summer I used some to make freezer pop holders, but I still had tons in my stash. Then I found several tutorials for earbud pouches. . . perfect! They take less than a half hour to cut out and stitch, and they’ll make fun mini-gifts for lots of kids I know. Here are some of the ideas I read about . . . thank you for the inspiration, ladies! ♥

Recently I had the privilege of making a sweater teddy bear for Sharon of Gentlestitches, both shown in the photo below. Sharon sent a well-loved carousel-horse-print sweater all the way from Australia to Kansas, USA and wrote such a lovely post when her bear (now named Eddie!) arrived home. Here’s to bloggy friends near and far! ♥ P.S. Click here and here for more bear love. 
After I won a Five Stones game from Sharon of A Chronicle of My Sewing Adventures, I decided to try my hand at making my own. It was SO easy! I have a stash of inexpensive pony beads for kid crafts, so I used those as stuffing to make the “stones” washable. Then I tried a drawstring pouch I saw on Bec’s Handmade & Home blog to store them in. These two fabrics were together in a fat quarter bundle I got as a birthday gift. I finished the whole set in about an hour, and it will be fun to make more by mixing and matching fabrics for different personalities. Click here for the game piece tutorial and game directions and here for the drawstring pouch tutorial. Thank you, Sharon and Bec! ♥ 
Sharon of A Chronicle of My Sewing Adventures had a giveaway, and I won! Just look at this lovely fabric and lace! If you read my previous post, you’ll see that I already used a bit of the fabric in my Quilted Front Zippered Pouch. Sharon also included the game pieces for Five Stones . . . click here for sewing and game instructions. I love it all. Thank you, dear Sharon! ♥ P.S. Sharon and I discovered that we both live in Kansas!

 For AGES I’ve been wanting to try the Scrappy Makeup Pouch tutorial on Noodlehead.
A little block of time recently appeared, and here it is! Anna’s directions are crystal clear, and the sky is the limit on fabric combinations for this cute little bag.
Thank you, Anna! ♥
P.S. Here are some of Anna’s other fun pouches . . . they’re on my list, too!
Look at this GORGEOUS clutch crocheted by Sarah of Photosarah Crafts! She had a recent giveaway, and I was the lucky winner! I love the color combination, and Sarah’s work is impeccable. Please check out her blog for all sorts of fun projects, like pouches, scarves and mittens, bunting, baby clothes, cards, and quilts. You are one talented lady, Sarah! ♥

Yes . . . I made THREE new aprons! For this one, I used a print with coffee words as the centerpiece and added other prints from my stash. Click here for a link to the free Ruffle Aprons Tutorial along with my tweaks. ♥

On a recent road trip, I found this charming village fabric in a quilt shop in Tennessee. It was fun to mix and match it with some other homey prints in my stash! Click here for a link to the free Ruffle Aprons Tutorial along with my tweaks. ♥

I’ve been in an apron sewing mood and dug into the pinks in my stash. So fun to mix, match, and make! Click here for a link to the free Ruffle Aprons Tutorial along with my tweaks. ♥

My sister took a crazy quilt class and made this fun block. I love the fabrics she chose and all the dashing embroidery stitches she added for a-la-mode. Then she gave it to me to make a pillow! I used a square of black and white striped fabric from my stash for the back. Thank you, Susan! ♥

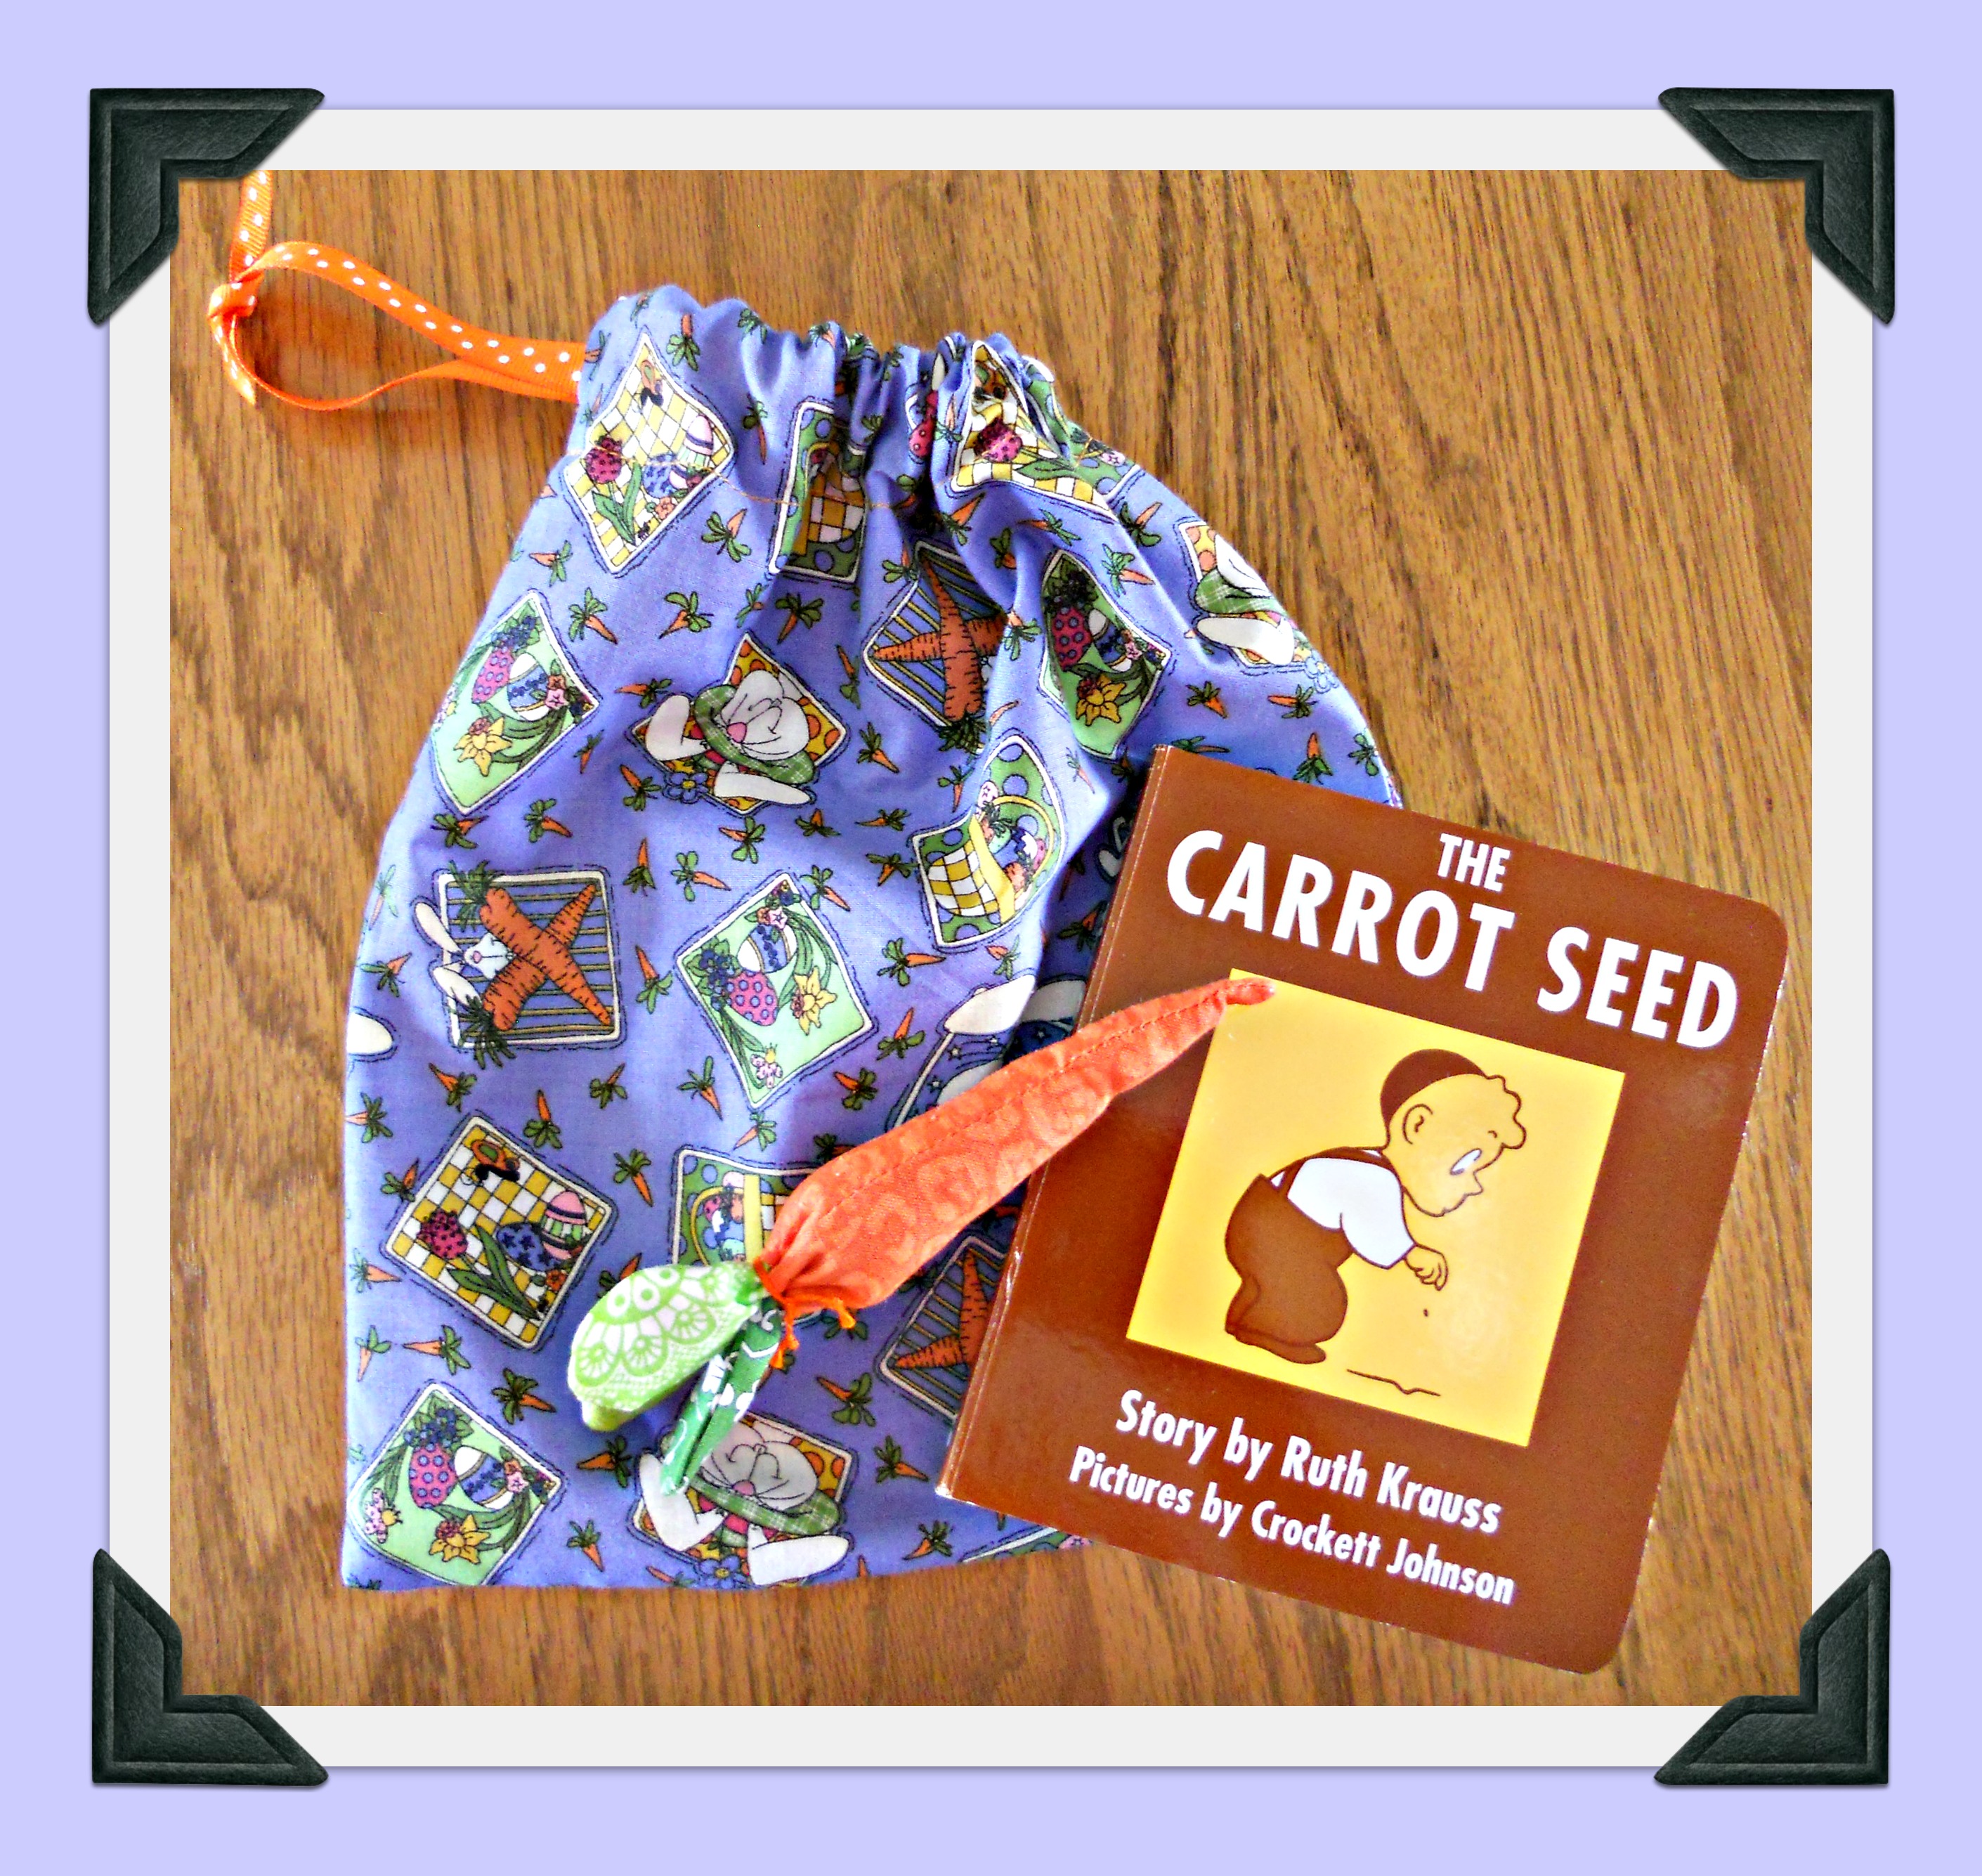
Fabric carrot + The Carrot Seed board book + carrot and bunny fabric drawstring bag = baby Easter gift! ♥
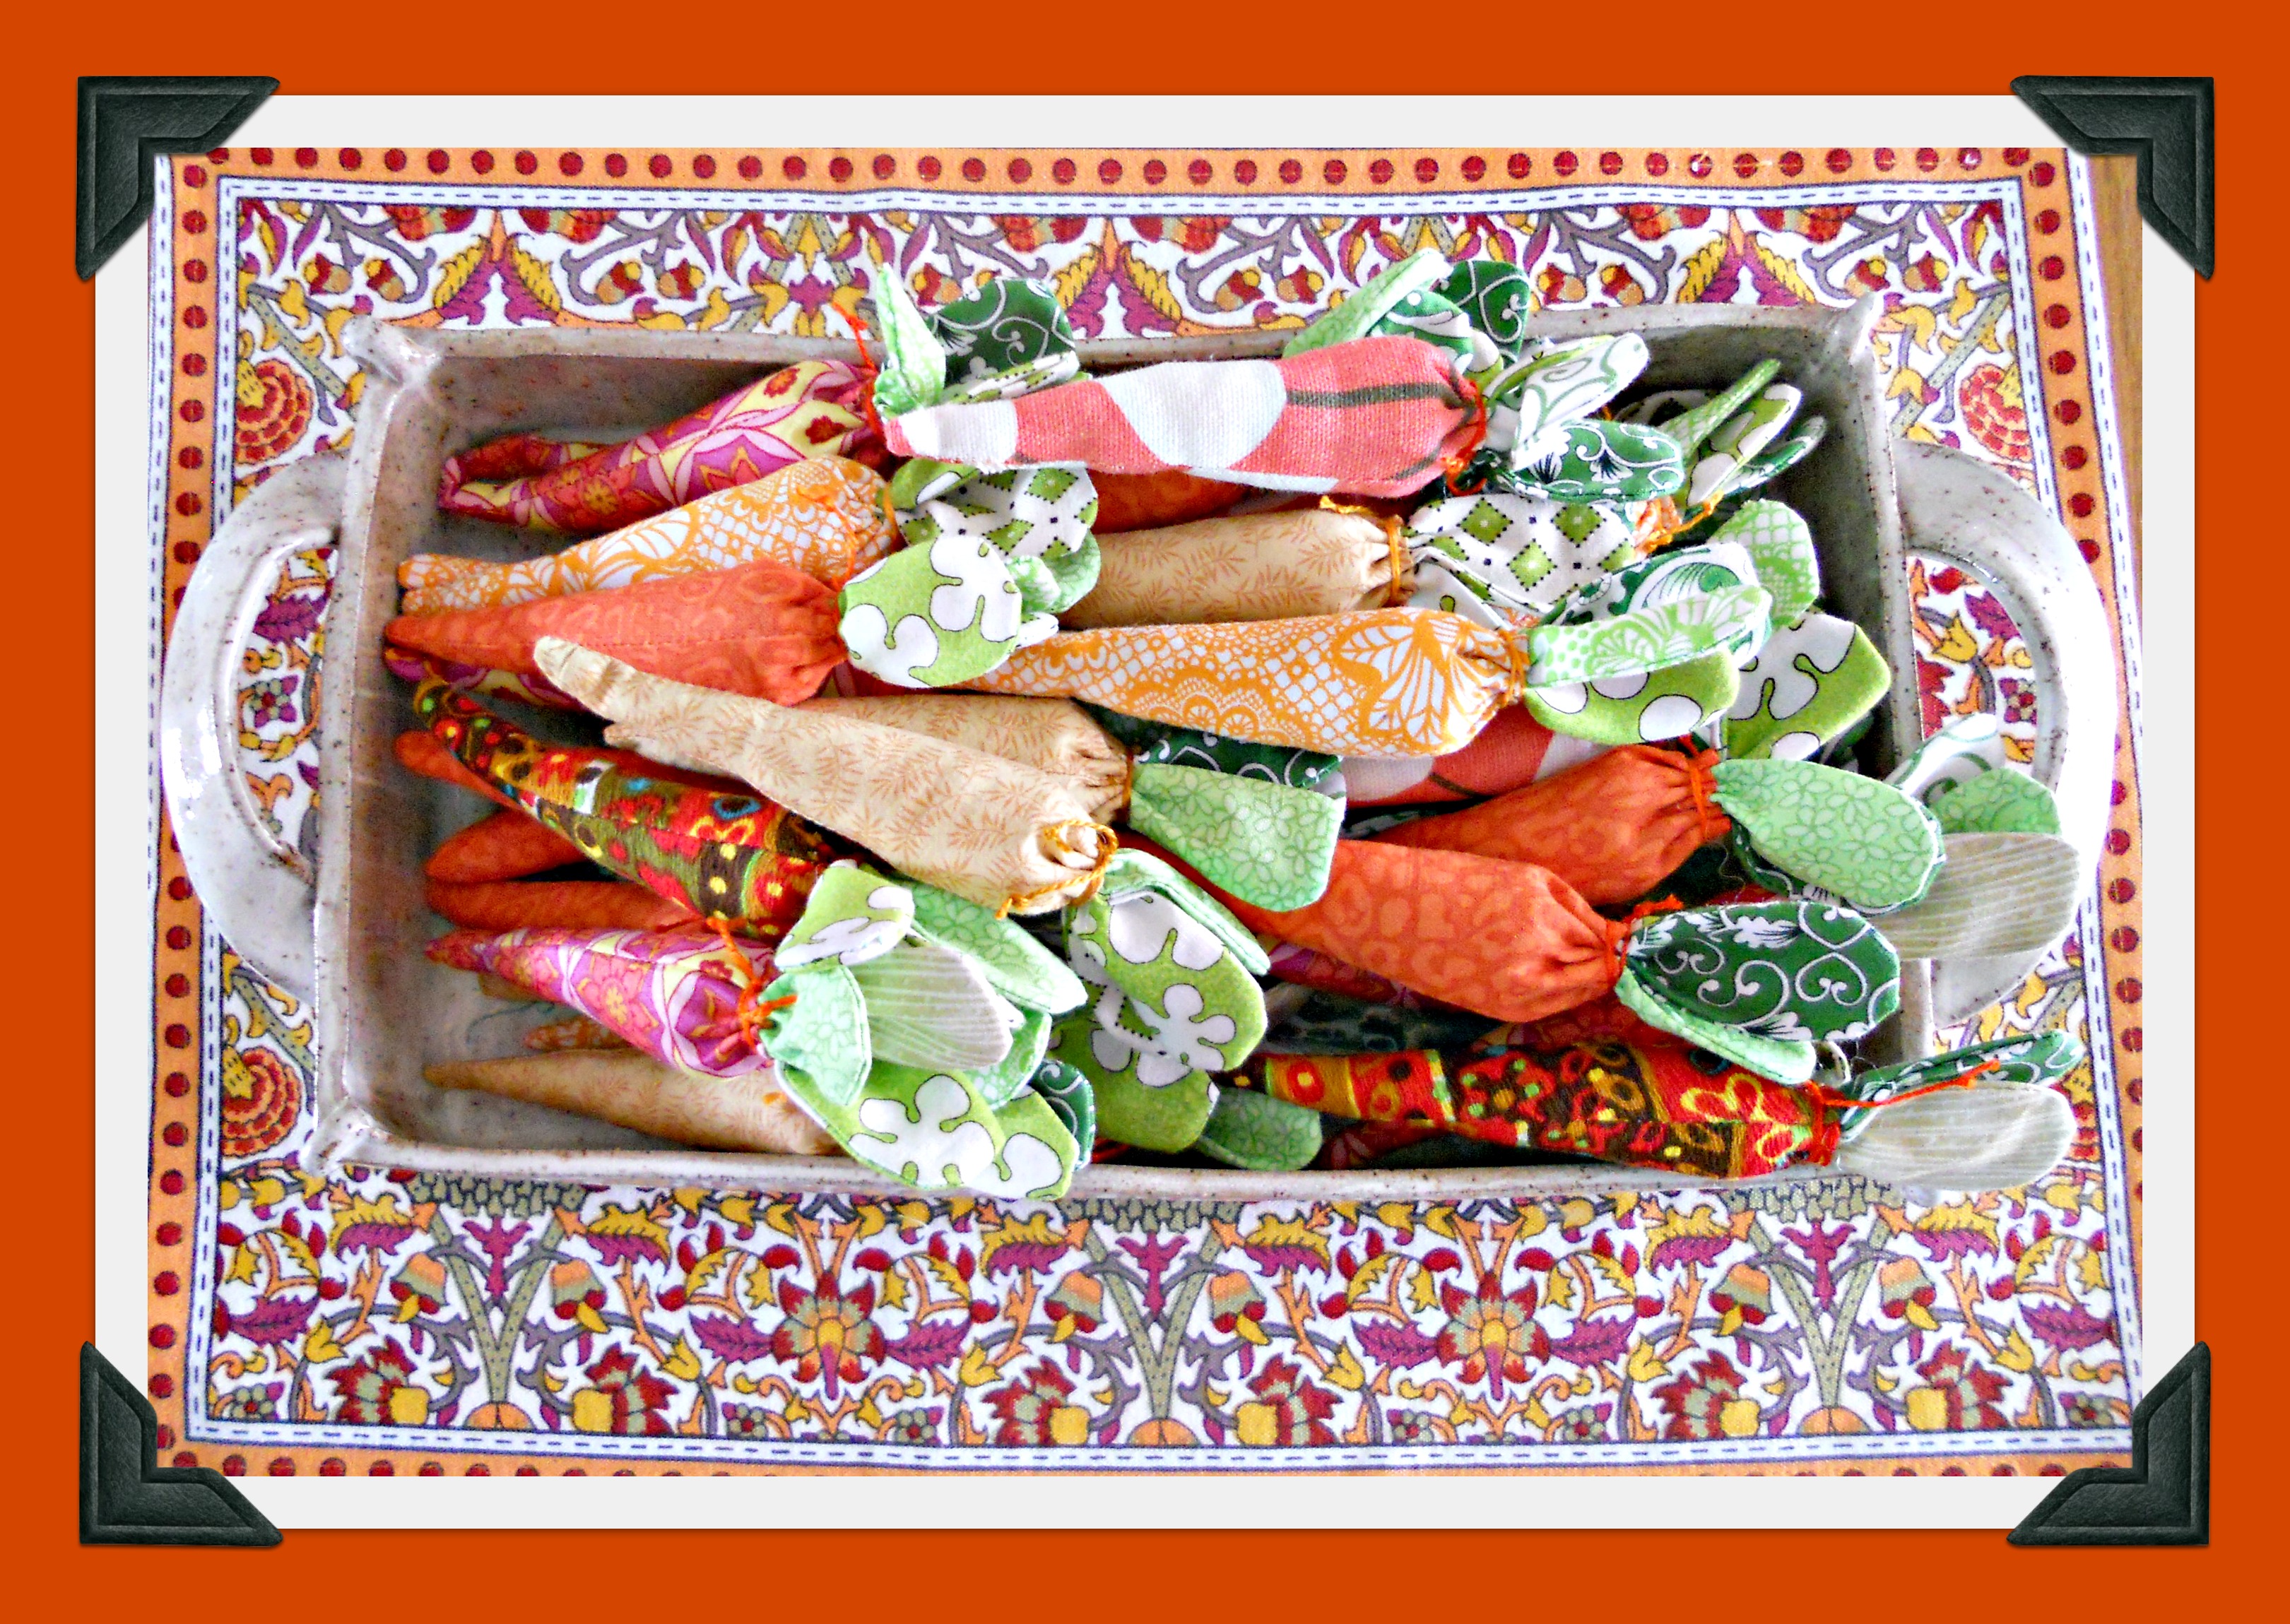
Soooooo . . . have you made your fabric carrots yet? I went a little crazy with mine! Now that I have enough to completely fill the tray, it looks like a little veggie patch! Find some orange and green remnants to mix and match, go to this tutorial at Clare’s Craftroom, and you, too, can have a garden growing on your dining room table! ♥

Our lovely daughter-in-law Mary Ann is a registered dietician turned physician’s assistant and sports a fun “Periodic Table of the Vegetables” poster in her kitchen. On a trip to Jo-Ann to buy a foam cushion for the toy box bench, I spotted this “Farmer’s Market” fabric—perfect for a decorative cushion for the kitchen window seat. The cat promptly nestled beside it for a nap . . . and Mary Ann loves it, too! ♥ 
On a recent visit, our eight-year-old granddaughter Miranda and I raided her mom’s fabric stash and put our heads together to design and sew a tote for her Nook e-reader—a colorful, lined bag with shoulder length handles and shabby chic roses for a-la-mode. What a fun project with a fun sewing buddy! ♥

It’s time to change up my Shantilly frame again! I’ve been making lots of rolled fabric rosettes from remnants—the perfect handwork project for road trips or watching TV. (I use this tutorial but stitch instead of glue.) So, while waiting for REAL flowers to pop out, I decided to bunch my fabric versions into a colorful garden with a peeping PEEP left over from my spring garland for a-la-mode. Happy April . . . and don’t pull TOO many April Fool’s tricks today! ♥ P.S. Here are the red frame restyles for November, December, January, and February and the green frame design for March.


I recently hung the Peeps garland I made last spring (out of felt, not the candy!). Here are the super-simple directions:
(1) Draw a simple bunny shape or find a free template online.
(2) Make the bunnies from felt, fabric scraps, construction paper, or scrapbook paper.
(3) Add the eye and nose dots with fabric paint, permanent marker, or embroidered French knots.
(4) Attach the bunnies to ric-rac, ribbon, rope, string, or twine using glue or hand or machine stitching.
You’ll soon have a cheery pop of color for your spring décor. Have fun! ♥
I was so happy when I got out my spring decorations and found a bunch of these left over from last spring’s bunny sewing bonanza that I promptly plopped them into a basket to display in the living room. You can find the pattern and tutorial from Angie on The Little Fabric Blog. And they’re so quick and easy that you can even make a whole Bag o’ Bunnies for a special little one in your life. Now . . . hop to it! ♥

Who knew that carrots could be THIS cute? I made this springy tray of rabbit food from orange and green remnants using this tutorial at Clare’s Craft Room. I’m pretty sure that a few of them will end up in Easter baskets, too! ♥
Even though I knew we’d have more snow this week (and we did!), I had a free day on Saturday so I went ahead and dressed our home for spring, including a new GREEN Shantilly frame! For March, I found a thought-provoking Emily Dickinson quote about luck, snipped a tiny calendar from a bookmark in a Better Homes and Gardens mailer, and made some rolled fabric rosettes (from this tutorial, only stitched instead of glued). Happy *almost* spring! ♥ P.S. Here are the red frame restyles for November, December, January, and February. 
What do you make on a winter day and you have a free hour? A SPRING apron, of course! The tutorial is from this post by Jona Giammalva on her blog Stop Staring & Start Sewing, and the fun fabrics are from my bloggy friend Laura’s LC’s Cottage Etsy shop. P.S. Click here and here for two other aprons I’ve made with this easy peasy pattern! ♥

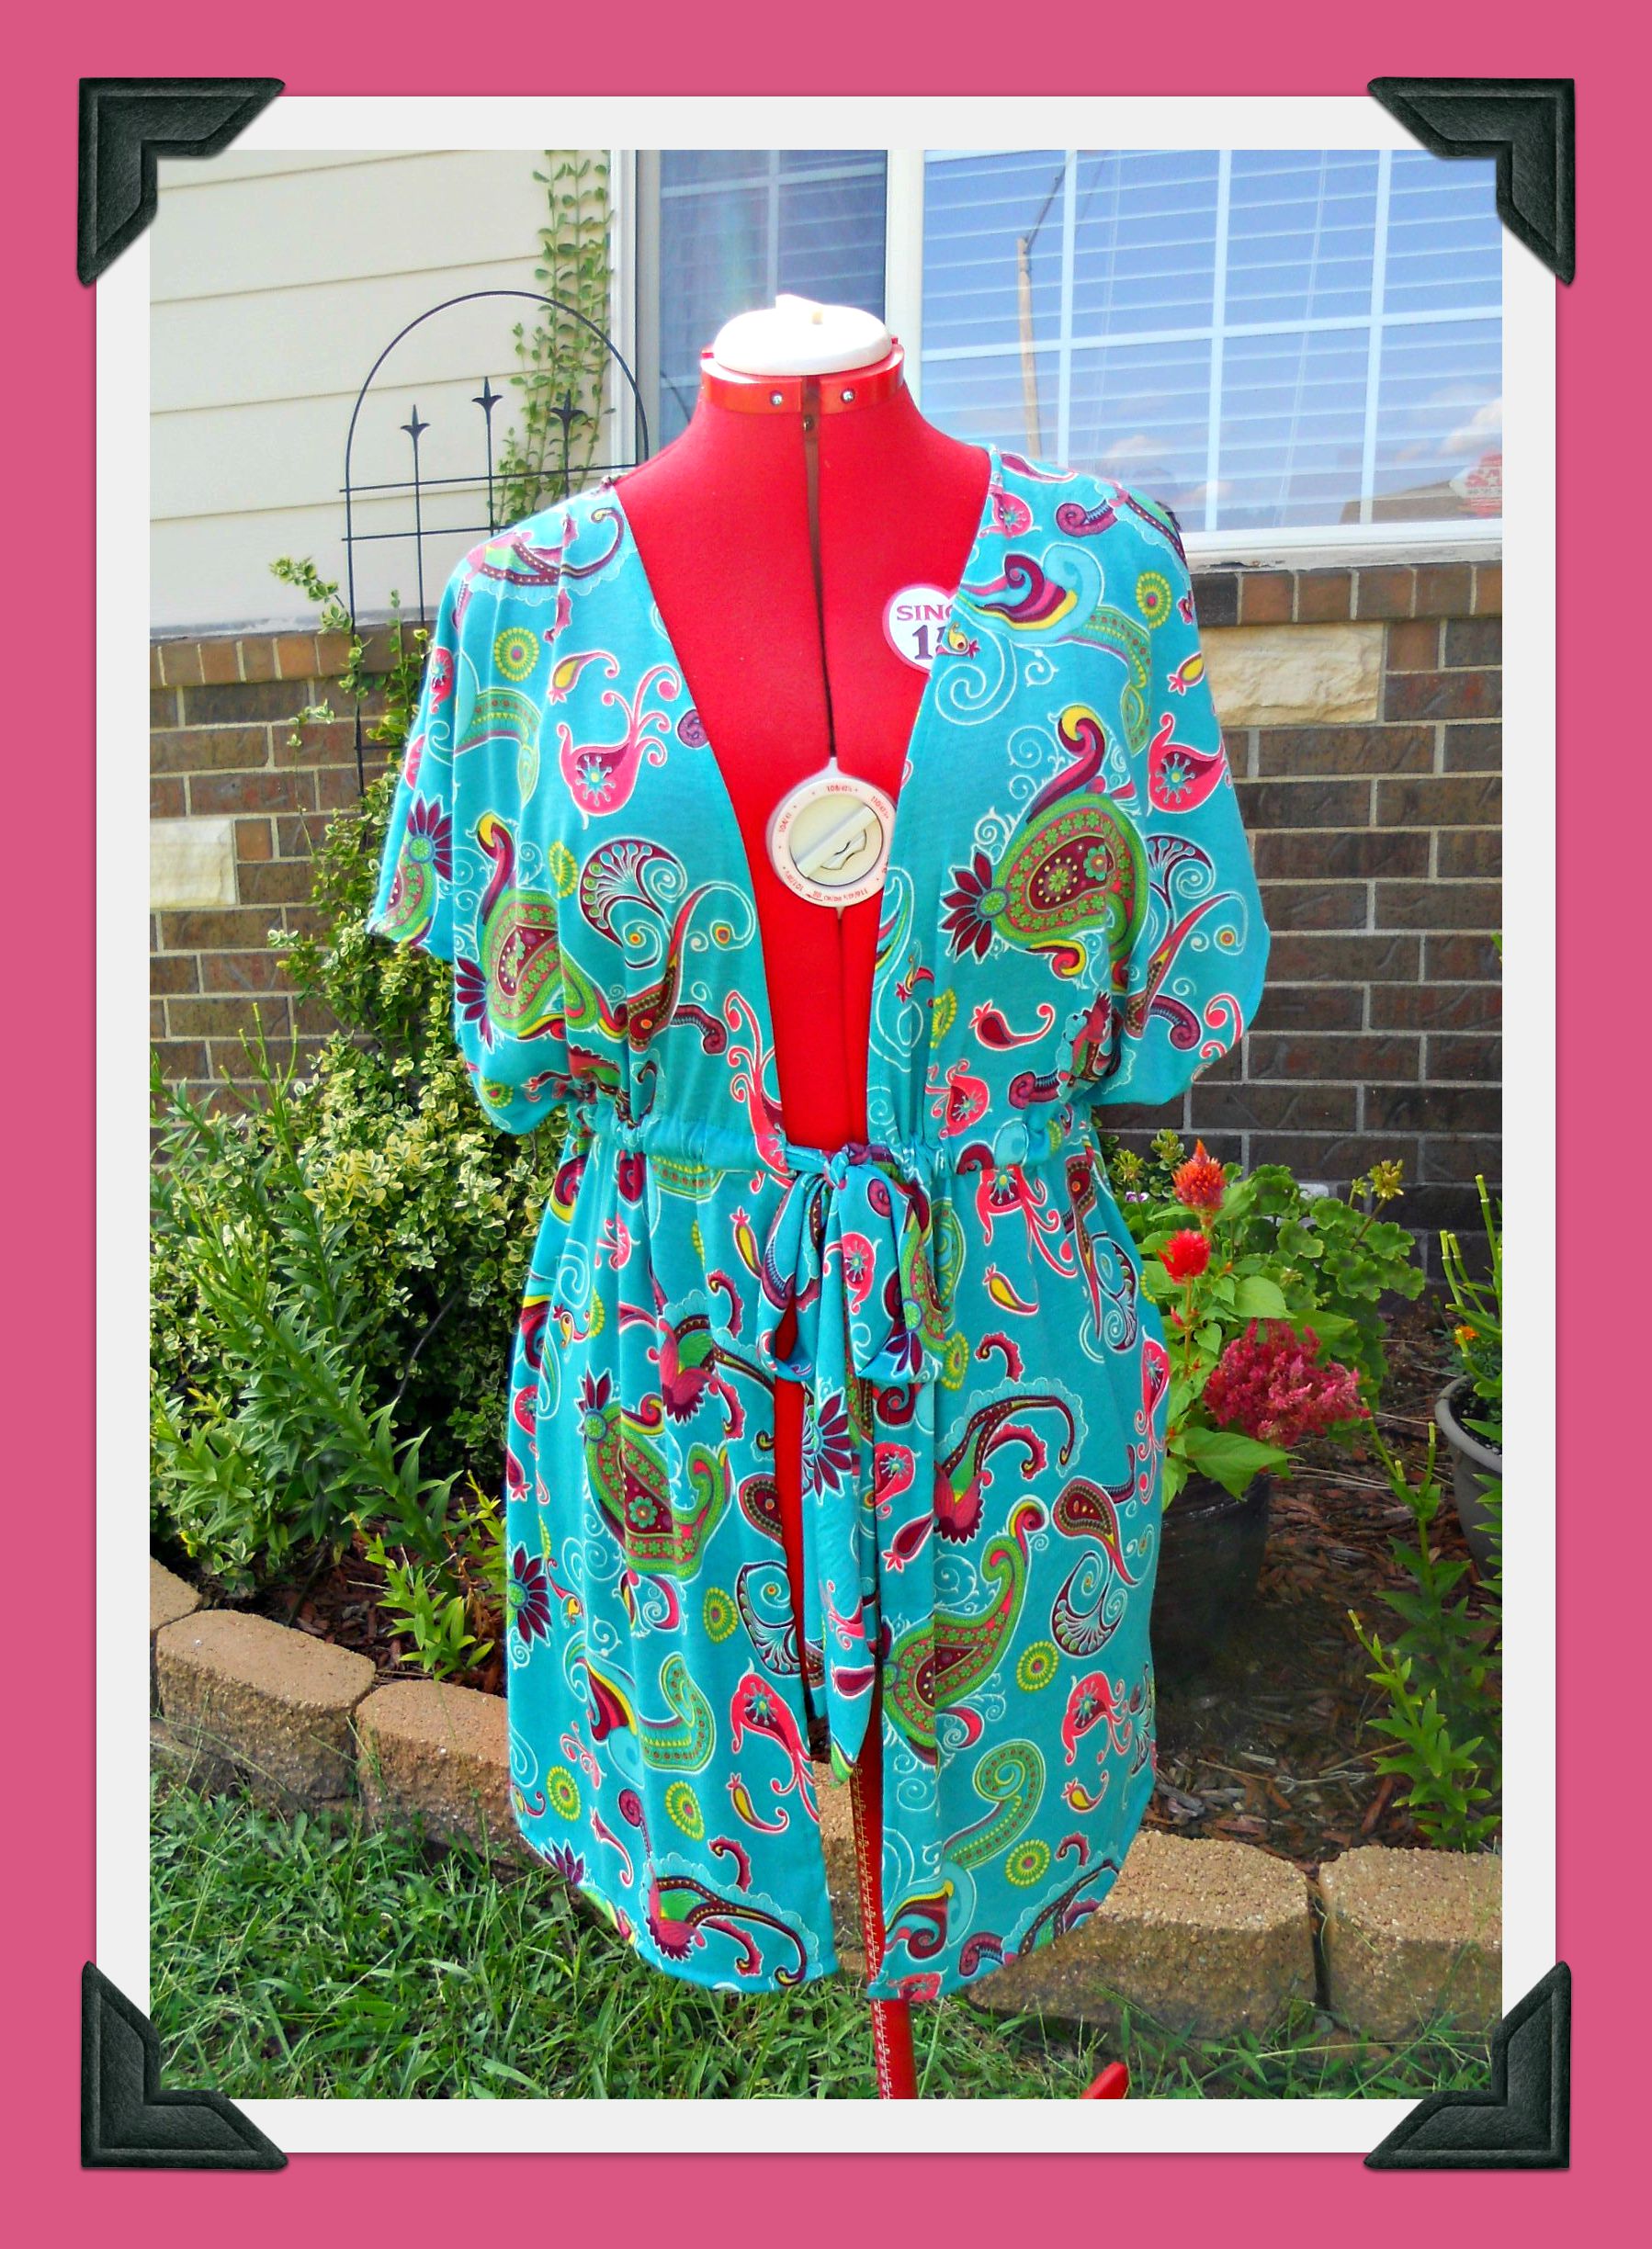
 It’s been a LONG time since I’ve posted a What Can You Make With A . . .? project, but I have one today! The inspiration was this blue dress. It was soft, swingy, and SO comfortable, with pockets in the side skirt seams, perfect with a black cardigan for chilly days . . . and what’s not to love about polka dots? But my mirror (and an “honest” family member) told me that this was not my best look and added more than a few pounds to my curves. So, out came the scissors.
Ahhhhh . . . much better! ♥


I have a cool new mini-laptop/tablet that’s super-easy to tote around, but I wanted to give it a little protection before adding it to my backpack on my way to the airport last week. I have a dress that I just turned into a skirt, so I decided to use the dress’s top for this project. I started with the elastic-ruffled sleeves, padded them with quilt batting, and folded and stitched them to size. Then I stitched the elastic ruffle from the neckline diagonally along the front, leaving it loose at the sides and back so I can pull it around the case to hold the laptop inside. A fabric flower from my stash made the perfect a-la-mode for traveling in style. ♥

When I saw a touching layout designed by Ellie on My Little Bunny Cupcake, I knew I’d found the perfect quote to put on my card when I give a fabric flower to a friend: Just living isn’t enough . . . one must also have freedom, sunshine, and a little flower. Thank you, Ellie and Hans Christian Andersen! ♥ P.S. My dress form is wearing my scarf crocheted by our bloggy friend Tamara. Isn’t it just lovely?

 For Tyler-the-matchbox-car-lovin’-kid’s birthday, I stitched up a car wallet . . . plus (surprise! surprise!) a pillow with the leftover fabric. I read TONS of tutorials for the wallet and ended up using bits of several of them. My version has four pockets, a road, a Velcro closure, an elastic band (aka stretchy headband cut to size) to hold it all together, and the birthday boy’s initials embroidered on the front. Here are my favorite links in case you’d like to make one for a small person you love! ♥

It’s birthday party time again in our family! Five-year-old Tyler chose Disney Planes for the theme. I had fun searching out a yard of DP fabric (found it on ebay and got it in two days!) to use for bunting and then sewing a big pile of red goodie bags for Tyler to fill with treasures and send home with his friends. Now for some cake and ice cream! ♥

This Christmas I had the opportunity to help Darilyn of Thehighnotedotnet surprise her brother-in-law with a Kansas State University guy apron to wear while serving as the family chef. (See the tutorial tutorial here at The Purl Bee.) She was sweet enough to write a lovely blog post about it, complete with photos, that truly put a smile on my face. If you haven’t had a chance to visit Darilyn’s blog, please check out her creative projects! She also has a My Fave DIY’s page and an Etsy shop specializing in items made with vintage sheet music, like these paper Christmas trees that I used while making my snowflake garland last winter. Thank you, Darilyn! ♥

In autumn I bought a fun chicken-wire frame at a craft show from Shantilly, and since then I’ve had fun restyling it for different holidays and seasons. November’s design reminded us to give thanks, December’s spoke of joy, and January’s is all about snow . . . a clip-art mitten illustration mounted on scrapbook paper, letters snipped from alphabet fabric, and tiny clothespins to hold everything in place. ♥

Since I have so many colorful red and green decorations and busy prints up for Christmas (like here, here, here, here, here, here, and here!) I decided to go completely the other way on my newest idea . . . somewhat of a visual trick since “Deck the Halls” is such a cheerful song! I used turquoise chevron flannel with the same color embroidery floss, then I played around with the size and placement of the words to replicate the chorus’s inflection, pauses, and pitch. I love the way it makes your eyes say, “Ahhhhh . . . ” Oh, and the embroidery hoops were hand-me-downs and I already had the fabric and floss in my stash, so this was a “free” project. I love those, don’t you? ♥

Another favorite Christmas decoration at our house is the “fabric forest” I made last winter. I enjoyed getting these colorful little trees back out to display on top of the china hutch again! You can make the trees any size, and they’re a great way to use up some remnants that might not work for other projects. For a step-by-step photo tutorial, click here. ♥

Ever since I found the perfect giant sunflower paintings by a local artist at one of my favorite little shops, I’ve enjoyed them in spring, summer, and fall. However, when December rolls around, they become Christmas decor! In the past, I’ve always wrapped them in Christmas paper, but this year I purchased some pretty $1/yard cotton fabric that I can use year after year for a little more Earth-friendly approach. Click here and here for the 2011 and 2012 versions! ♥

I’m going to take off the rest of November from blogging to finish a big writing assignment (for my “real” job!), host Thanksgiving dinner, and attend some family events. But first, here are my new strings of Christmas bunting! Last year I cut out bazillions of squares of Christmas fabric to make mini-pillow ornaments but didn’t use them all, so I turned the rest into triangles that I could stitch into seam binding. Simply turn under the ends and fasten them with buttons to create loops, and they’re ready to hang. Thank you for stopping by, and I’ll see you in December! ♥


Once upon a time, a Pennsylvania girl married a Kansas boy . . . and now they’re living happily ever after in Georgia. But they still need their own aprons!

When my boys were little, they loved Mr. Men books. My first-graders loved them, too. Now my grandchildren love them! The stories are odd and quaint and preachy, but the characters are totally loveable . . . and we can all relate to their funny foibles. After Mr. Men Books became so popular, the author/illustrator Roger Hargreaves also started writing Little Miss books. Imagine how excited I was to find Mr. Men fabric at Fabric.com! I ordered a yard to make a drawstring gift bag for a set of Little Miss books for an upcoming birthday girl (there’s even a birthday book in the set!) and had enough for a pillow, too. Oh, and this drawstring bag was so much fun! I’ve made dozens of these bags in my life, but never with this super-cool design by Jona of Stop Staring & Start Sewing. Thank you, Jona! ♥


I bought the fun Anny Bag pattern from my blogging friend Anny of It’s Sew Anny, and I decided to make my first one using Christmasy remnants. Although the pattern calls for ruffles on both sides, I left the back unruffled to show off this fun print. The pattern has fabric measurements for two different sizes, and the lined bag has a flat base and two large inside pockets. It was REALLY fun to sew, and I’ll definitely be making more! Check out the Anny Bag and Anny’s other great bag patterns at the It’s Sew Anny Etsy Shop . . . thank you, Anny! ♥

I won the CUTEST business card holder in a recent giveaway by Barbara of Zibergirl Sews! (Click here for a tutorial if you’d like to make your own!) If you followed Season 1 of Refashion Runway on The Renegade Seamstress, you’ve already met Barbara! You can also see an amazing gallery of her sewing projects here. Thank you, Barbara . . . and keep inspiring us with those fabulous creations! ♥

A couple of weeks ago I showed you the tutus and tops I made for Ally and Kira, and you made me promise to post a photo of them in costume. Here they are with their mom! (I have many amazing daughters-in-law, including Catwoman!) Click here for a link to the tutututorial. ♥

Even though I named my blog for pillows, I haven’t made many lately, have I? But here is my latest cushiony creation concocted from scraps of last year’s Halloween pillows, a fun black and white remnant for the back, and some of my grandma’s mismatched black buttons. I knew I wanted to do a chevron design, and I found a perfect tutorial from Nicole at Modern Handcraft. Thank you, Nicole . . . and have a fun Halloween, everyone! ♥ P.S. The other one is a sweater pillow from my earliest blogging days . . . it’s the softest, coziest cushion in my house, and I love getting it out when autumn arrives!

No, it’s not the Halloween kind of shocker . . . it’s the Wichita State University Shockers (as in a shock of wheat . . . click here to see our mascot, Wu Shock!). I had some fabric left over from the WSU apron I made for the fundraiser silent auction, so I made a half apron for one of my friends who is a huge fan and follower of WSU’s volleyball and basketball teams. The “Shockers” logo on the pocket is snipped from the same t-shirt that I used to get the Wu Shock for the bib of the original apron. The tutorial is from this post on Jona Giammalva’s amazingingly inspirational blog Stop Staring & Start Sewing, and the black/yellow fabrics are from my bloggy friend Laura’s LC’s Cottage Etsy shop. Here is the finished apron blowing in the Kansas wind! ♥

Ally and Kira found some adorable “superhero in tutu” photos while checking out Halloween costume ideas on Pinterest, and of course I said, “Let’s make some!” The girls decided on Batman and Robin, so first we poured over illustrations of the real characters to figure out our colors and designs. For our versions, their mom first bought appropriately-colored tank tops. I found logos on Bing Images, which I traced onto fabric, cut out, and appliqued onto the fronts of the tanks. Next, I made short capes (so they won’t get in the way of the tutus), ruffled them at the tops, and attached them from shoulder to shoulder along the backs of the tanks. Then I studied dozens of cut-and-tie and sewn tutu tutorials (tutututorials???), and I decided on this this lovely version from Rachael Rabbit. Now all the girls will have to do is add simple black masks, tights, and boots . . . plus long-sleeved t-shirts for warmth (black for Batman and green for Robin, which their mom has ready to go). Here are the finished pieces . . . I can’t wait to see them on my little superheroes! ♥


If you followed the Good Neighbor Award, you know that Crafty Staci is the giveaway winner . . . a “What Can You Make With” redo of a loved but no-longer-worn garment. I received her choice in the mail last week—so beautiful! I’ll save that photo for the reveal, but today I want to share the gift Staci sweetly included. She makes lots of adorable coffee cup sleeves (as well as fun camera accessories!) to sell in her Etsy shop, and she sent me this fun pencil sleeve. It’s perfect for my “real” job, and I just love it! She even has a new bat sleeve for Halloween! Plus, Staci’s packaging is so tasteful and professional, including printed sleeve holders and lovely fabric tags. Thank you, Staci, and I’ll be starting on your project very soon! ♥


When the lovely Simona of Sewing Adventures in the Attick decided to downsize her pattern collection, she hosted a giveaway . . . and I won two! I can’t wait to try them out! If you haven’t met Simona yet, please click below to read about:
Thank you, Simona! ♥


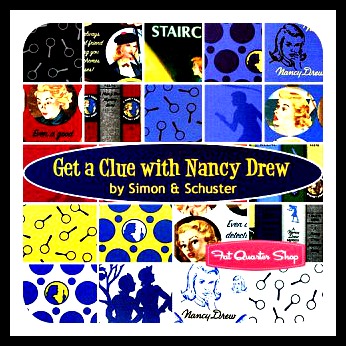 Remember my “Get a Clue with Nancy Drew” coasters? When I bought the charm pack, I also bought a yard each of two different Nancy Drew fabrics to make lined tote bags for a couple of cutie-patootie girls in my family . . . and fill with their first sets of Nancy Drew books!
I used a tutorial from Quick Stuff to Sew (Volume IV), a publication of Craftstylish.com, for the totes (like this one, minus the stripes). I hope there will soon be two new Nancy Drew fans in the world! ♥


I got my undergraduate degree at Wichita State University here in Wichita, KS where Dave and I now live. WSU has a huge basketball following, which grew even larger when the Shockers went to the Final Four last year! So I decided to make a WSU apron for a youth group silent auction fundraiser this fall. I love how it turned out! Then I made aprons for the other two state favorites–the Kansas University Jayhawks and the Kansas State University Wildcats. Fingers crossed that they raise lots of money! P.S. Both black/yellow fabrics and the three ruffle fabrics on the purple apron are from my bloggy friend Laura’s LC’s Cottage Etsy shop. All other fabrics are from Jo-Ann. ♥

Clear back in January I posted about the Mini-Screen Bag pattern I bought from Sew Michelle. I finally found the perfect spot of time to make it! It was really fun, and I learned some new-to-me techniques, such as making and inserting piping and making zipper tabs. The pattern uses screen (which is why it’s see-through!) and two coordinating fabrics. And did I say that it’s REALLY fun to make??? 🙂 You can find the pattern here along with other bags, totes, purses, and notebook covers. And . . . Michelle even has some F-R-E-E patterns for us on her TUTORIALS page! Thank you, Michelle! ♥

Do you follow Awesome Sauce and Asshattery? If you haven’t discovered it yet, please pay Sheri a visit soon! Her creative projects and fun-loving writing style are guaranteed to inspire you and make you smile. Sheri has also written TWO books now! I previously reviewed the first one, Life on the Zig Zag, which is now available in a Kindle version. And Sheri is offering the second book in her “Confessions of a Refashionista” series called Bewitched Bedsheets FREE from Friday, August 30 through Sunday, September 1! It’s on Kindle, too . . . but remember that you can read Kindle books on any PC or tablet with the free Kindle App. I can’t wait! Click HERE for complete details and worldwide links, and thank you from all of us, Sheri! ♥

 I bought this purse pattern from my talented bloggy friend Laura at LC’s Cottage Etsy shop and couldn’t wait to try it!
The pattern comes in four different sizes and has very clear directions. It was perfect for my first try at sewing a real purse!
This project was really fun to make and I plan to try it again . . . although maybe with fabric that doesn’t need matched next time. 🙂
The purse has a large outside pocket and two smaller ones inside, and I used one of my grandmother’s vintage buttons for the closure.
Since I had some fabric left over, I designed a little tote with the patterned fabric on the bottom, inside, and handles and some vintage bead a-la-mode. ♥

 I’m taking a month off from blogging to finish a big writing assignment and go on a little trip. (Will I have the willpower not to click on my WordPress reader with my morning coffee??? We’ll see . . .) But first, I want to share my latest “What Can You Make With A . . . “ project. I got this dress from my friend Liz who bought it at a rummage sale for ONE DOLLAR! (Click here to meet her.) The color and fabric were perfect for some shabby chic projects, like . . .
Here are the creative bloggers and authors who inspired me. See you in August! ♥
Fabric Rosettes: Sweet C’s Designs and Diary of a MadMama (except I stitched instead of glued)
Zipper Flowers: A Creative Princess and Awesomesauce and Asshattery
Apron: Page 51 of One-Yard Wonders by Rebecca Yaker and Patricia Hoskins (“Granny’s Clothespin Apron” designed by Elorie Bechtel)
Lace-Decoupaged Pot: Urban Comfort

I LOVED my houseful of little boys! But I was also super-excited when my niece Amanda was born. She used to come for an Amanda-Aunt Kathy overnighter every summer where we’d play, sew, craft, embroider, bake, and shop. Now Amanda is grown-up, married, and a high school math teacher several states away (besides being beautiful, she’s also S-M-A-R-T!), but on a recent visit back home she came to sew with me! She loved the blog posts with the ruffly aprons (here and here), so that’s what we made. Amanda picked these lovely, summery fabrics from my stash, which are all from my bloggy friend Laura’s LC’s Cottage Etsy Shop. Isn’t it just perfect on her? ♥

I LOVE my new “5-Minute Skirt” designed by Amy at Angry Chicken. It took me a little over an hour to make the pattern, sew, and press it. It’s a perfect fit, and I get lots of compliments every time I wear it, including raves about the fabulous fabric from my bloggy friend Laura’s LC’s Cottage Etsy shop! This was my first time using foldover elastic, too, and I’m now a fan . . . especially when it has a fun design like this (from Jo-Ann)! Following are a few tips to go with Amy’s excellent tutorial:
P.S. I just saw another fun pattern called a “10-Minute Skirt” on The Frugal Crafter. You can check out a cute finished version made of vintage fabric by Stefani at Jewels for All. ♥

Since I donated last year’s 4th of July pillows (here and here and here) to a charity auction, I whipped up a new one over the weekend using a remnant from the last Wonder Woman apron and some ric-rac and embroidery floss from my stash. I love how the red pops on the bright blue and silver fabric! The finished pillow is 11 inches tall and 20 inches wide. To all my U.S. bloggy pals . . . have a safe and fun holiday with your family and friends! ♥

 As much as I love to sew, I couldn’t resist this dress I found at Old Navy.
The color! The print! The lightweight, summery, flowy fabric! The neckline! The tucks! The matching belt! The price!
But . . . after “almost” wearing it several times, I decided it was too short for 5′ 10″ me.
So, out came the scissors and off came 6 inches from the hem. After a quick pinning and hemming on the sewing machine, I had a PERFECT tunic to wear over capris or skinny jeans!
The drapiness made the remaining fabric perfect for an infinity scarf, too. All I had to do was hem the raw edge . . . quick, easy, and a fun “freebie” accessory.
P.S. My grandmother made these beautiful crocheted hangers for me when I was a new bride. I AM going to learn how to do this someday! ♥

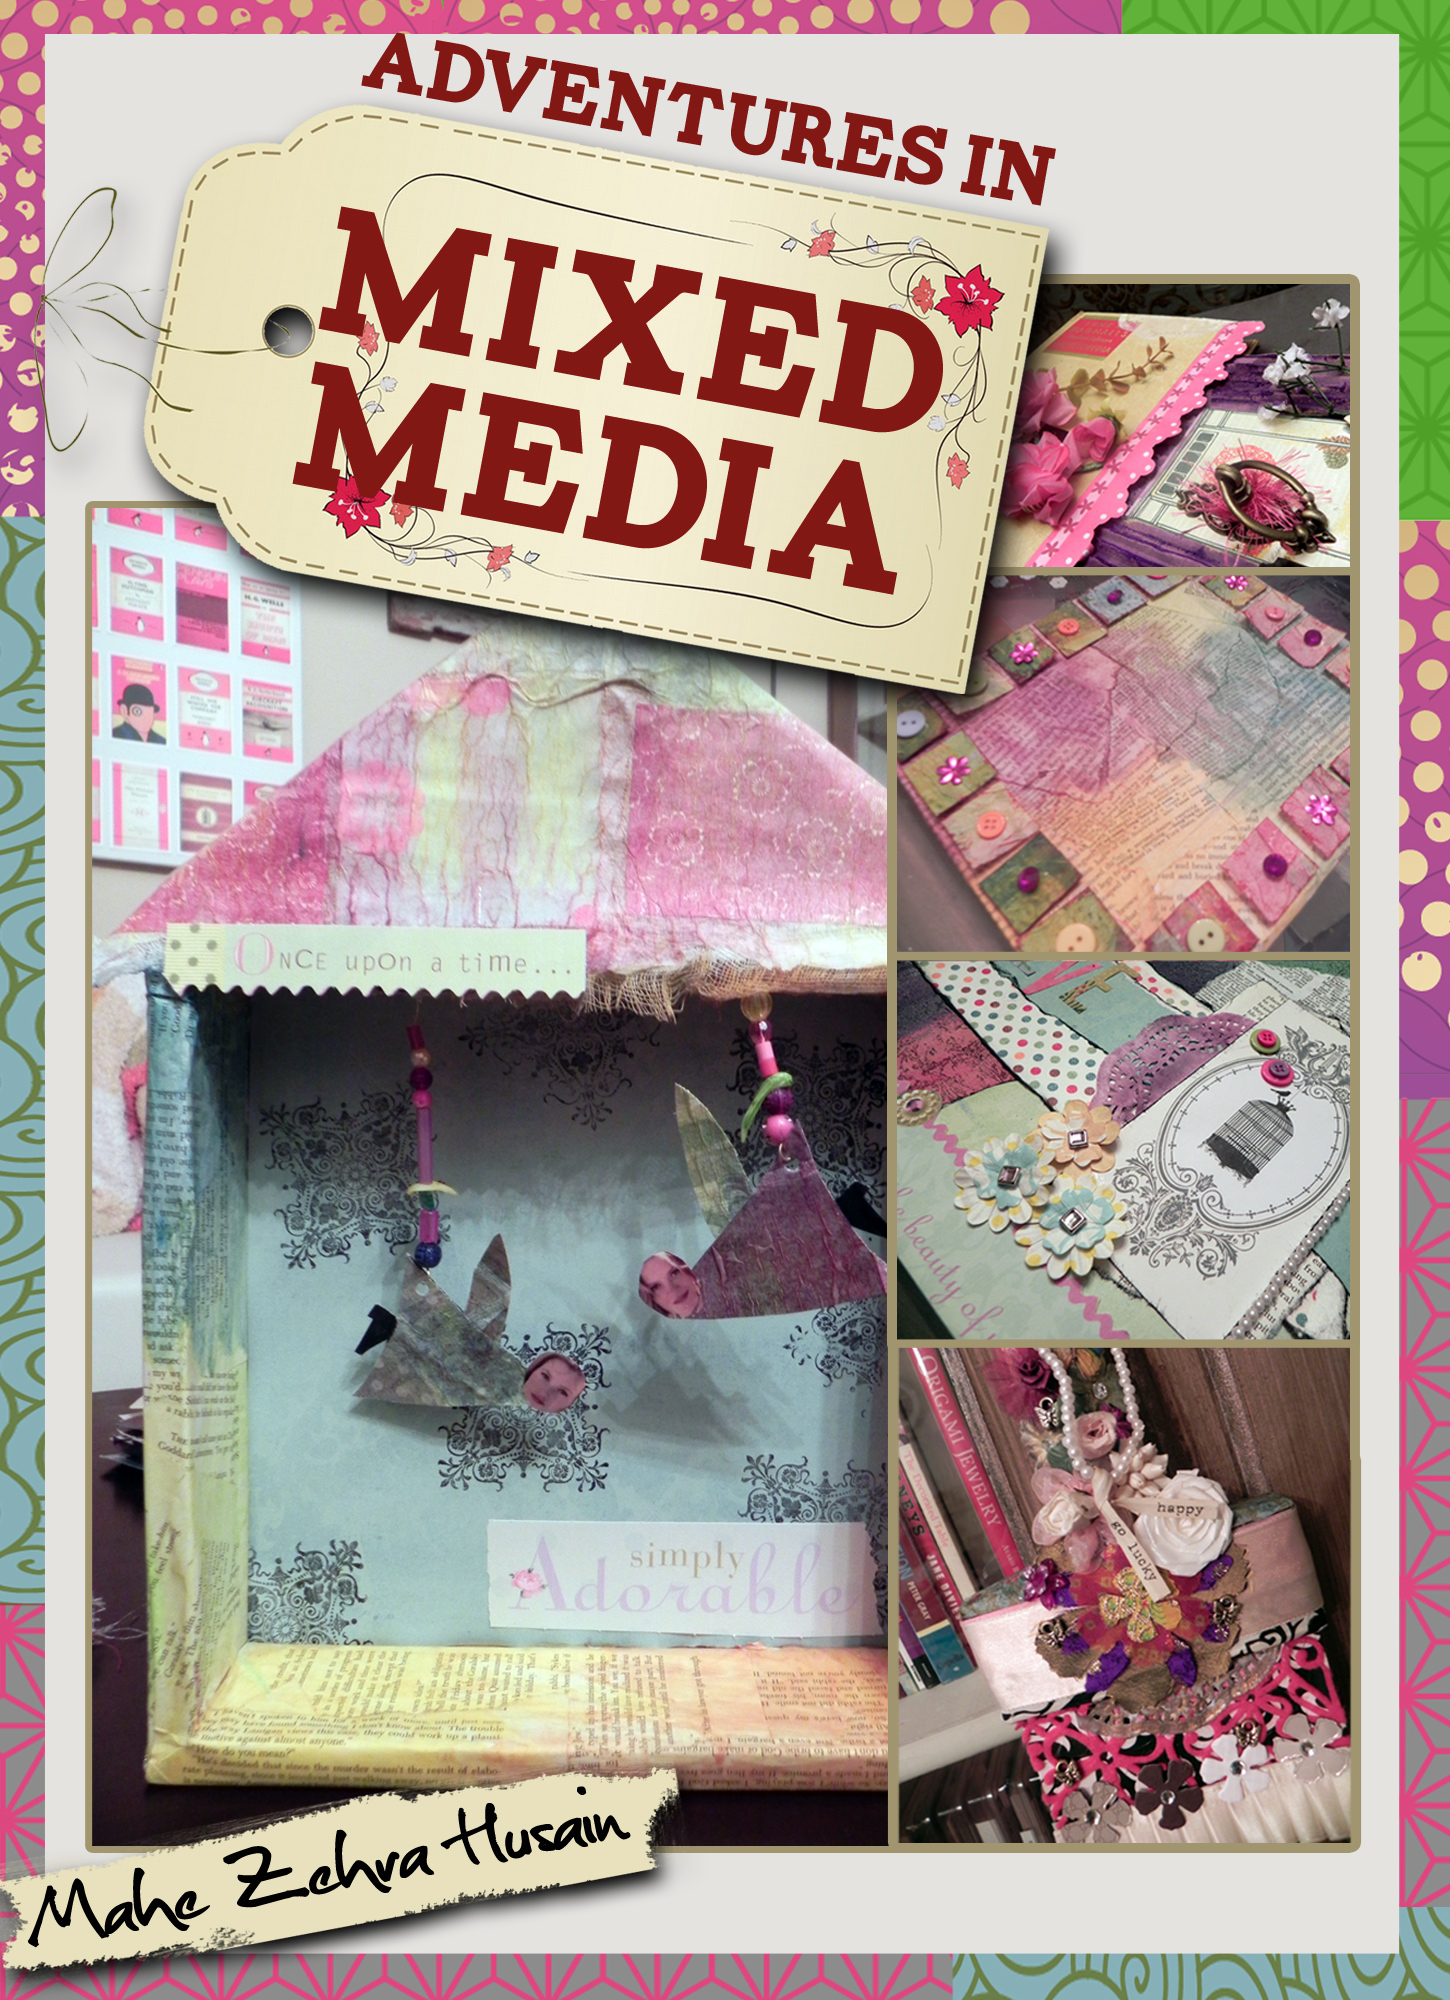 In the past, I’ve shared reviews of two of Mahe Zehra Husain’s fabulous upcycling books, The Ultimate Guide to Upcycling and Make a Card Awesome. So, when she asked if she could send a preview copy of her newest publication, I was more than happy to agree! This one is called Adventures in Mixed Media: A Step-by-Step Guide to Creating Beautiful Pieces of Art. It includes chapters on:
I love the way Mahe describes how she organizes her craft room to store “found” items, and the sections on “7 Unusual Sources of Paper” and “Let’s Go On a Treasure Hunt” had my creative juices flowing! Mahe includes YouTube videos for each of her techniques, as well as complete written directions and photographs of all papers and projects. You’ll love Mahe’s friendly, conversational writing style, too! You can get your copy by clicking here at Amazon.com or any time from my Shop Love! page above.
Oh, and remember that Mahe’s first book is ALWAYS available for FREE at her web site, Altered Upcycling. Thank you for all you do to care for Earth as you create, Mahe! ♥
 Look at this BEAUTIFUL apron I won in a recent giveaway from Deb and Kathy at Second Hand Roses! It’s vintage! And embroidered! And PINK! I just LOVE it!
If you’ve never read the Friday morning posts at Second Hand Roses, you MUST subscribe to their blog! Deb and Kathy give a tongue-in-cheek play-by-play of their visits to local second-hand shops and sales, like Be Kind to Animals, Please and Another Friday, Another Estate Sale. They make me laugh every time! They’ve even invited me to go shopping with them next time I visit Colorado . . . it’s on my bucket list!
Thank you, Deb and Kathy! ♥
P.S. Click here to read about Deb’s apron collection!

I had just enough fabric left to make one last Wonder Woman apron to give to an amazing Wonder Woman I know. But, even though I’m moving on to new designs, I’ll definitely keep using this pattern! Click here for links to the free tutorial along with some of my own tweaks. And, speaking of aprons, I’m taking a week off from work (and sewing! and crafting! and blogging!) and donning an apron to play hostess to our family while everyone gathers in to celebrate Dave’s milestone birthday. The house is clean . . . the party and meals are planned . . . the decorations are made . . . the toys and crafts are ready. . . the cookie jar is full . . . I can’t wait! See you next week! ♥

 When I went through my mom-in-law’s fabric box, I found a burlap square stamped on the right half with this lovely floral design.
I couldn’t wait to embroider it!
Then I paired it with one of the fun fabrics from my Make & Mingle kit and stitched them together into a lined eyeglass case.
I’ll really love carrying this summery, sentimental handiwork! ♥

After updating the guest bathroom with a painted and decoupaged kids’ stepstool and a few other decorative touches, I decided to finish it off with a piece of fabric art. First I “shopped my house” and came up with a 17 x 21 black poster frame and a remnant of black/white/lime green fabric (from this crib skirt) that perfectly matches the colors of the room. Then I . . .
Perfect! Now . . . bring on those guests! P.S. I laid the picture on one of my mother-in-law’s quilts to take this photo . . . such beautiful handiwork! ♥

