Tag Archives: Homemade

Sweater Wreath

Standard

BearHappy 2014! I hope everyone had a lovely Christmas season. I had extra fun with my family celebrating Christmas, New Year’s, AND my birthday! And, with several days off from work, I enjoyed some extra sewing and crafting time, too.

Remember my sweater teddy bear? For my first holiday break project I wanted to use up the leftover sweater parts, and I found the perfect idea in the January, 2014 Woman’s Day magazine, submitted by Anna of Lasso the Moon. For mine, I . . .

  • cut the scraps into two-inch squares,
  • folded them in half,
  • strung them on stiff wire,
  • tied off the wire, and
  • added a ribbon.

It’s always fun to have something new to hang after undecorating for Christmas! ♥

Wreath and Ribbon

Give Thanks

Standard

In my Sleepover! post I told you about Shantilly, a new crafty business launched by my daughter-in-law Shannon and her sweet mom and sister. Their popular handmade items include different sizes and colors of chicken-wire frames to use for memo boards.  (My friend Karen bought one for each of her nieces for Christmas!) With mine, I made a new wall decoration for our upcoming Thanksgiving dinner. The letters are snipped from a remnant of the burlap I used for my mini-screen bag, the teeny wooden clothespins are left over from my t-shirt garland kit, and for a-la-mode I pinned on one of my fabric flower brooches. I just love it, and the best part is that I can update and reuse it for Christmas, Valentine’s Day, and more! Thank you, Shantilly! ♥

Give Thanks

The Good Neighbor Awards and Giveaway Winner!

Standard

Good Neighbor AwardTHANK YOU for helping me celebrate my second blog anniversary with another amazing outpouring of nominations for the Good Neighbor Award! For every blogger listed below, an avid reader (or more than one!) took time out of her busy schedule to send me an email telling me how much she would love to have you for a neighbor and why. Isn’t that just the most lovely compliment?

  1. First, I’ll share the comments, in no particular order.
  2. Then I’ll list the blogs that were nominated in ABC order. (Be sure to click on the links to find some new friends!)
  3. Finally, I’ll announce who got the most nominations and wins the giveaway. Here we go!
  • Living next door to this blogger would be great. She could help me with my photography skills and I know I would learn so much from her.  She is such a sweet person and I feel a kindred spirit with this lovely lady.
  • She’s my twin but she doesn’t know it . . . we must have been separated at birth!
  • She’s so stinkin’ funny!!!
  • Her home sounds like quilt heaven. Imagine being able to visit any time I’d like!
  • Because of her, I can’t throw ANYTHING away without first pondering how to reuse it in a creative new way.
  • I would like to have her as my next door neighbor to have a cup of tea together because she is so friendly and cheerful.
  • I love the ideas she has for different crafts, plus she just sounds like the kind of person who would make a great neighbor.
  • She’s Wonder Woman in disguise!
  • Her tips make my life easier.
  • She makes me look forward to getting older because she has so dang much fun!
  • Her patterns and tutorials inspire me, teach me, and stretch my limits.
  • Her DIYs are to DIE for!
  • I so admire how she balances her family, job, and creative pursuits. I hope to be able to do that someday, too!
  • She’s SO sweet! What’s not to like???
  • Her cards and paper crafts are a delight to the eyes.
  • I’ve learned so much about how to make my home more company-ready and hospitable from her, something that’s very important to me.
  • Her OOTDs are so inspiring! I’d love to be able to recreate something similar from my own closet. If she lived next door, she could help me!
  • Her blog is WAY better than Pinterest!
  • I love, love, LOVE the jewelry she designs and sells! It would be so much fun to watch her in action!
  • She has given me lots of good advice, both knowingly and unknowingly. I just love the way she thinks things through.
  • She’s so creative, yet so humble . . . I can’t imagine a nicer neighbor to have.
  • She was one of the very first supporters when I joined the blogging world and has been a super bloggy friend. Even though we live in different countries, I feel that we are close friends and close neighbours. I am always inspired by each one of her posts. She always leaves me thinking a bit more deeply about the simple things in life.
  • She’s REAL! And not many people are real these days.
  • Her sense of humor never fails to brighten my day.
  • She always takes wonderful photography and it would be so neat if she was my neighbor and could teach me how to take better photos!
  • She makes me laugh every day.
  • I would love for her to drop in for a cup of tea and show me her latest ideas. I would like to tell her some kids’ craft ideas of my own and she could use them in her own work.
  • Her gentle, loving personality comes through her art.
  • I want her craft room! Please, please, please move next door and help me!
  • Her blog is many things to many people (crafty, witty, funny, sweet and always, always kind and caring).  I never would have dreamed that a woman I met through blogging would one day become one of my dearest friends.
  • I wish she lived next door for a hundred reasons:  we have an amazing ‘kindred spirit’ connection. If she lived next door we would share walks, talks and cups of tea.  We would craft together, visit antique shops, eat falafels and be there for each other (as we are now) through thick and thin.
  • She makes me laugh. She makes me smile.  She loves animals and children and shows her care through words and deeds.  I would be one lucky woman to have her living next door.
  • Her life seems to be a lot like mine was 15 years or so ago, when the youngest kid was just starting school and the oldest was starting the teenaged years. I’d love to have her next door so I could say every morning “You’re doing a great job! They’ll be fine!”
  • I love how she weaves her faith in God into her everyday life. It’s hard to do that without being preachy, but she nails it.
  • She’s always nice and encouraging and seems like a fun person to be around.
  • She has a variety on her blog but what I would love to learn from her is paper piercing. She has done some amazing birds and I have bought one of her cushions, so beautifully made.  Very inspiring and very creative.
  • I’ve learned so much from her about how to promote my business through my blog.
  • Her recipes are so amazing that I just want to lick my computer screen. If she lived next door, I’d always leave my window open so I could enjoy the good smells coming from her kitchen.
  • They make me laugh!!! They need to move to my neighborhood so we can go shopping together.
  • She could check my patterns and find the errors! (That’s selfish, I know . . . LOL!)
  • She has a great blog full of wonderful craft projects to do with your children.  They are inexpensive and fun projects that promote lots of creative play. She would be fantastic to have as a neighbour, endless ideas for me!
  • She cares for the world and everyone in it. I admire that.
  • There are actually two ladies that I would like to have as neighbors. They are both so generous with their time and talents. I look forward to their posts. They lift my spirits and make me laugh. They are also wonderful at teaching their particular craft.
  • She’s so open about sharing the ups and downs of her life . . . I need someone like that next door!
  • She helps me so much over at my blog. When I get stuck with how to do things, she just writes me a lovely clear instruction and I am away. She is kind, generous with her time, has a terrific sense of humour and talented at crochet! I wish she lived nearby.
  • Her writing voice is so witty. I’ve learned a lot about writing AND life from her!
  • I’m so much more organized since I’ve “met” her through her blog. If she lived next door, I’d hire her to help me get my whole house in ship-shape.
  • I never heard of “refashioning” until I read her blog. Now I see it everywhere, but hers are the best of the best! I’d so love to learn from her.
  • I want her to move next door so I can see her collections and so we can go thrifting together. What fun we’d have!
  • I’d invite her over for coffee and get her advice on redoing my living room . . . or kitchen . . . or family room . . .
  • Her tablescapes never cease to amaze me. They make me want to entertain every night just so I can create such prettiness!
  • She could teach me to crochet and make me laugh!
  • She helps me keep things in perspective. I need a next door neighbor just like her!
  • She ALWAYS “likes” and comments on my blog posts. That means SO much to me!
  • Her refashions are beyond words! Maybe, just maybe, she could teach me to do that!
  • It is one of many grandparenting blogs I read, but it is above and beyond because of her exceptional photography, quilting, decorating, gardening, shopping skills, and it is an all around fun blog. She has a great sense of humor and I could picture myself sharing a cup of coffee and dessert with her and enjoying the conversation immensely.
  • Where do I begin? I use her recipes! I try her decorating ideas! I pin her crafts! She simply inspires me with each and every post. How wonderful it would be to have her as my next-door neighbor!

Blondies BEARista

Boomdeeadda

Crafty Staci

Crafty Sorcha

Crochet with Tamara

Curtain Queen Creates

DaniellaJoe’s Blog

Diary of a MadMama

Easy Crafts for Children

Empty Nest Feathers

Factotum of Arts

Fashion and Fun After Fifty

Gardening Nirvana

Grab a Coffee

Grandparents Plus 2

Green Door Hospitality

Homespun

Horsemark Cards

House of 34

Images by T. Dashfield

It’s Sew Anny

J.E. Creations

Jewels for All

LCs Cottage

Lightly Crunchy

Lili and Mums

Made with Hugs and Kisses

Memories-Keepsakes-Gifts

Neaten Your Nest

Nice Piece of Work

Now at Home Mom

North Story

On the Upcycle

Pride in Photos

Projects by Mtetar

P.S. I Love Soap Co.

Rainbow Junkie Corner

Second Hand Roses

Spilled Cookies

Stacy Sews and Schools

Swistle

The Adored Home

The Frugal Crafter

The Little Room of Rachell

The Original Thread

The REmissionary

The Renegade Seamstress

The Thinking Closet

Time with Thea

Treadlemusic

Vicky Myers Creations

Winter Owls

Please pick up your button above to display on your blog (if you wish). Nothing is required. I just want you to know that you’ve made a big impression on someone (or many someones!) and that we’re all grateful you’re sharing your life with us. Aaaaaaaaaaaaand . . . the blog with the MOST nominations is . . . Crafty Staci! Click here to read about your prize, Staci, and if you choose to accept it, please email me and I’ll send you my mailing address to get the ball rolling. CONGRATULATIONS! ♥

Three more days until the awards and giveaway . . . and some free books!

Standard

It has been SO much fun to get SO many email nominations for the Good Neighbor Award this week! I’ll be posting the results this Sunday, September 22, so you still have time to send me the names of your favorite neighborly bloggers! Click here for details . . . and remember that the blog with the MOST nominations wins a prize like the one below! (Click here for a description . . . all made from last year’s winner’s beautiful but no-longer-needed sundress!) Also, I got an email from author/blogger Geraldine Hartman of Veggies, Yarns & Tails and she is offering Kindle versions of ALL of her books for FREE this Saturday and Sunday, so be sure to check them out! (Remember . . . you don’t have to own a Kindle–you can download the app here for your smartphone, tablet, or PC.)  Thank you, Geraldine! ♥

Prize Collage

It’s “Good Neighbor Award” Time Again!

Standard

Good Neighbor AwardFor my first blog anniversary last September, I celebrated by hosting the Good Neighbor Award and giveaway. It was so much fun that I want to do it again this year!  Here’s the scoop:

AWARD: Simply put, the Good Neighbor Award is for someone you’ve met in the blogging world you wish could be your real-life neighbor.  To nominate a blogger, simply email me (to keep it a surprise!) at k_scraper@hotmail.com, including a link to the blog and why you’d like this blogger to live next door. Is it to cook, sew, craft, shop, or write together? To learn to do something new? To be inspired? To visit over a cup of tea? Nominees will receive the award button on my second blogiversary, Sunday, September 22. (Click here to read about last year’s nominations!)

GIVEAWAY: The person with the MOST nominations will be invited to send me a formerly-loved garment that I’ll make into some fun treasures and return. (Click here and here to read about last year’s winner!) Thank YOU for being MY good neighbors the past two years, and I hope to hear from you soon! ♥

Get a Clue with Nancy Drew!

Standard

Nancy DrewStackWhen Linny J Creations posted last fall about the upcoming Nancy Drew fabric at The Fat Quarter Shop, I was in! I bought my first ever charm pack just so I could see a tiny sample of everything.  Thanks to inspiration from  Feathered Nest Studio, these fun little designs are now a set of 24 coasters. It was so easy . . . just stitch two squares right sides together along with a square of quilt batting (leaving a small opening for turning), trim the corners, turn, and topstitch. We’re having a B-I-G family get-together at our house in June (more on that to come!), so I’m all ready in the coaster department!  P.S. The beautiful basket is from 1840 Farm Mercantile. ♥

Basket

Dizzy Izzy (I just love saying that!)

Standard

Ribbon

Dizzy Izzy RibbonAnd, speaking of love . . . I just had to share this gorgeous fabric ribbon I bought from The Dizzy Izzy Shop.

It’s full of hearts with a sweet saying for Valentine’s Day or any day.

It will be so much fun to use for projects, wrapping, and labels!

The shop also sells bias binding, button, felt, felt balls, notions, and other supplies.

If you haven’t yet met Helen of Dizzy Izzy, please check out her blog, her shop, and her FB page from this post or anytime from my Shop Love! page above.

Thank you for my lovely purchase, Helen! ♥

Heart to Heart

Standard

Garland from side framed

Bowl FramedWelcome to the Collectively Creative Lovey-Dovey edition, hosted by Kelly of Cobwebs, Cupcakes & Crayons! My project this month is felt conversation heart mini-pillows. They were so much fun to make! Here’s how:

(1) Buy a bag of candy conversation hearts for . . . um . . . er . . . research. 🙂

(2) Create a pattern with a free-hand drawing or googling a heart template—or do like I did and use a heart-shaped cookie cutter.

(3) Trace around your pattern on two pieces each of white and various pastel felt.

(4) Lightly pencil a candy saying on a heart of each color, then embroider all the sayings in red.

Garland Short framed(5) Put the hearts of the same color back to back and attach the edges with a blanket stitch using a coordinating color of embroidery floss. Stop a couple of inches before you’re done to add a bit of fiberfill stuffing, then close them up.

(6) Use your hearts for valentines, brooches, magnets, hair accessories, sachets, mobiles,  or gift-wrap, wreath, or pillow a-la-mode; display them in a pretty bowl or shadow box; or . . . make GARLAND! I added in some of my red-sweater hearts as well for the perfect Valentine mantel decor.

The Lovey-Dovey Edition LogoBefore you get started on YOUR mini-pillow hearts, be sure to visit all the amazing Lovey-Dovey blog posts below. Enjoy! ♥

The Penguin Theory

Standard

CollageClaire of The Penguin Theory made these lovely earrings, which will someday become a birthday gift for a lucky girl in my family!

Claire has other jewelry and fun sewn items in her Etsy shop.

I you’ll get a chance to check out her links from this post or anytime from my Shop Love! page above.

Oh, and be sure to click here to read how Claire came up with such a clever name for her blog and shop!

Thank you for my fun purchase and top-notch customer service, Claire! ♥

Nicky Grace

Standard

Have you discovered the Nicky Grace Vintage Fabric & Gorgeous Things blog? It’s a feast for the eyes! And when I checked out Nicky’s Etsy shop, I just had to buy this beautiful set of 10 fabric collage cards, two each of five designs. Look . . . some of them even have HEARTS on them . . . perfect for Valentine’s Day! Nicky also has other fabric collages, embroidery, hearts, ceramics, paintings, bunting, pillows, bags, dolls, pincushions, and even shapes cut from vintage fabrics for crafting. Click here for Nicky’s blog, here for her FB page, and here for her Etsy shop from this post or anytime from my Shop Love! page above. Oh, and you MUST check out these photos of Nicky’s amazing Pop-Up Shop! Thank you, Nicky! ♥

Cards

Stitching Hearts in Planes, Trains, and Automobiles

Standard

Red Sweater Hearts FramedLast week I had a work-related training meeting in NYC. By the time I came home to Kansas I’d been in four planes, one train, and numerous cars and cabs, including a four-hour airport layover. Luckily, I’d brought along a project that hardly took up any space in my bag . . . hand-stitching little hearts made from the sleeve of an old red sweater. (If you predict a What Can You Make With A . . .? post coming up, you’re right!) I cut the shapes at home using a small cookie cutter for a template, then joined each pair together with a blanket stitch on my travels, leaving a small opening for stuffing and closing when I returned. What will I do with them? So far I’ve thought of:

  • adding a pin to the back for a Valentine brooch,
  • tying them onto baker’s twine for gift-wrapping,
  • displaying them in a pink heart-shaped bowl,
  • sewing or tying them onto a small wreath,
  • sewing them onto a pillow, and
  • stringing them together for garland.

Your ideas are welcome! ♥

Country By Design

Standard

Gift Card Case and BookmarkToday I’d like to introduce my blogging friend Linda of Country By Design.  I checked out Linda’s Etsy Shop and ordered this beautiful handsewn gift card case . . . but she also sent me a matching quilted bookmark!  How sweet is that???  Linda also has quilted table runners, place mats, pencil cases, cosmetic bags, pouches, tea wallets, and other fabulous fabric items.

Click here for Linda’s blog.

Click here for Linda’s Etsy shop.

Or, find them anytime on my Shop Love! page above.

Thank you, Linda! ♥

Gone Rustic and Stitched Up Mama

Standard

I absolutely love to send people cards made from original art and photography reproductions, so I was very excited to find these in the Redbubble Shop of my blogging friend Rita from Australia! Rita has her own studio and gallery, teaches classes, hosts exhibitions, and has MANY creative irons in the fire including quilts, fibre and textile art, mixed media, and collectibles. Here are Rita’s links, which you can locate anytime in my Shop Love! page above:

Thank you for the beautiful cards, Rita! ♥

Collage

Stitch Knit Shop Love

Standard

PackageHere’s my new prized possession . . . a knitted cup cozy in bright red (perfect for my morning coffee in my black, white, and red home office!) made by my blogging friend Sue of Stitch Knit. Sue sells all kinds of beautiful knitted, crocheted, and sewn items in her Etsy Shop, including scarves and other accessories, gifts for babies and children, and fun things to use in your home. Her customer service is superb, too . . . she even sent this lovely yellow crocheted soap saver as a free gift!

Click here for Stitch Knit’s blog, here for the Etsy shop, and here for the FB page, and remember that you can always find these links from my Shop Love! page above. Thank you, Sue! ♥

Confessions of a Refashionista

Standard

PackageMy blogging friend Sheri of Awesome Sauce and Asshattery was kind enough to send me a complimentary copy of her new book Confessions of a Refashionista: Life on the Zig Zag.  Sheri autographs the books AND includes an item to refashion to get you started! My gift was a beautiful thrifted scarf, which Sheri suggested making into a scarfigan (page 6), crisscross vest (page 63), infinity scarf (page 64), or even a new neckline or sleeves for a shirt (pages 44 and 58). How cool is THAT??? You can read all about her book (and see fun photos of Sheri!) in this post  . . . but here are some of my favorite parts:

  • You can learn to refashion/redesign/embellish shirts, pants, shrugs, skirts, and flip-flops and make amazing accessories like ruffled flowers, scarves, wristlets, and bangle bracelets.
  • You can learn to make a dress form from duct tape, sleeves from socks and aprons, a boho blouse from a vintage nightgown, a skirt from a tablecloth, and an amazing tunic from a BEDSHEET!
  • Do you have neckties . . . doilies . . . dishtowels . . . lace? You’ll use them in amazing new ways!
  • You’ll even learn to make an instant, no-sew skirt from a man’s shirt!

You can read a review of Sheri’s book at Designers Against AIDS (where Sheri donates a portion of each sale) and purchase Sheri’s book at Sew Much Fun or Dawanda. Oh, and Sheri has another store, too: Mensch T’s. And remember that you can find Sheri’s book anytime in my Shop Love! page above. THANK YOU, Sheri! ♥

Collage - ALL

Cul-De-Sac Shop Love!

Standard

ClutchI’m SO fond of my blogging friend Josée of Cul de Sac! She’s always so kind and encouraging about my sewing and crafting projects, and once she even sent me a box of laces as a surprise gift! Her blog is full of amazing creativity, too . . . and when I found out she has an Etsy shop, I couldn’t wait to visit it! I chose this adorable necktie clutch, which a special girl in my family will LOVE for her birthday this year!  Josée also creates lots of other purse, tote bag, and pouch designs as well as dolls, mittens, scarves, and iPad sleeves, using upcycled materials whenever possible. Oh, and she sent me some “Chocolatey Chai” herbal tea bags, a coupon, and a sweet note along with my purchase . . . totally unexpected “extras”! Please check out Josée’s shop from this post or anytime on my Shop Love! page above. Thank you, Josée! ♥

Sincerely Liz Boutique

Standard

DressOne of my VERY favorite bloggers is Liz from a A Ponytail Kind of Day. Every time I saw one of her unique creations, I’d think, “I sure wish she had a shop!” Well, now she does! It’s the Sincerely Liz Boutique, where you’ll find all kinds of beautiful handmade items for your home. Since I was looking for gifts for specific people, I ordered these fabric hangers, a set of rag coasters, and this way-cool bowl made from a Christmas record album. Then, friend that she is, Liz also put in this “Keep Calm and Sew On” framed art AND an AMAZING vintage dress and lace overlay that she bought for one dollar because she knew how much I’d have fun using it for a “What Can You Make With A . . .” project! What a sweetie! Please check out Liz’s boutique from this post or from my Shop Love! page above, and THANK YOU, Liz! ♥

Collage

More Shop Love!

Standard

Today I’d like to highlight three more of our WordPress blogging friends who have lovely handmade items you’ll want to check out! Read about them here today and anytime on my Shop Love! page above.

(1) I Love Cards & Design: Click here for Patricia’s lovely blog and here for her Etsy shop. I LOVE these chevron cards! You can choose your own colors (or a mixture like these) and get any name or message on the front. I asked for “Happy Birthday” so I can use them for extra-classy greeting cards in the new year. Patricia also has other fun items, such as calling cards, favor boxes, and birth announcements. Plus, her customer service and packaging are SO professional! Thank you, Patricia!

(2) Jewels for All: Click here for Stefanie’s fun, creative blog and here for her Etsy shop. These gorgeous red earrings will be a gift for someone special . . . if I can part with them! 🙂 Stefanie also has many other one-of-a-kind earrings, bracelets, and necklaces. I really love your work, Stefanie!

(3) I’d Rather Be Crafting: I just met Eleanor, a new WordPress blogger here, but she makes the cutest coin pouches and matching keychains (along with other crafty items) that she sells on her Eleanor’s Creations Facebook page. To order, simply write “Sold” in the comment section and message her the email address associated with your PayPal account, and she will email you an invoice. I’ll have fun gifting these to some girls on my list, Eleanor! ♥

1-I Love Cards

2-Earrings

3-Evelyn's Bags

More Shop Love!

Standard

1-CalendarLast week I put out my first “Shop Love!” post.

I wanted to start promoting our blogging friends’ small businesses.

I’ve done a little more shopping . . .

and I won a giveaway . . .

so today I’d like to highlight four more bloggers and stores.

Once again, each one impressed me with both their BEAUTIFUL products . . .

and their QUALITY customer service.

Here are their contact links!

You can also check them out ANYtime on my new “Shop Love” page above. ♥

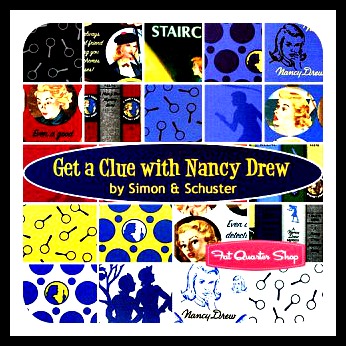
(1) The Original Thread: I fell in LOVE with this inspirational 2013 calendar, which is designed by Melanie of The Original Thread blog and sold as a fabric panel in her Spoonflower shop at Madex Designs. She has many other gorgeous fabrics as well!

2-pdf Patterns
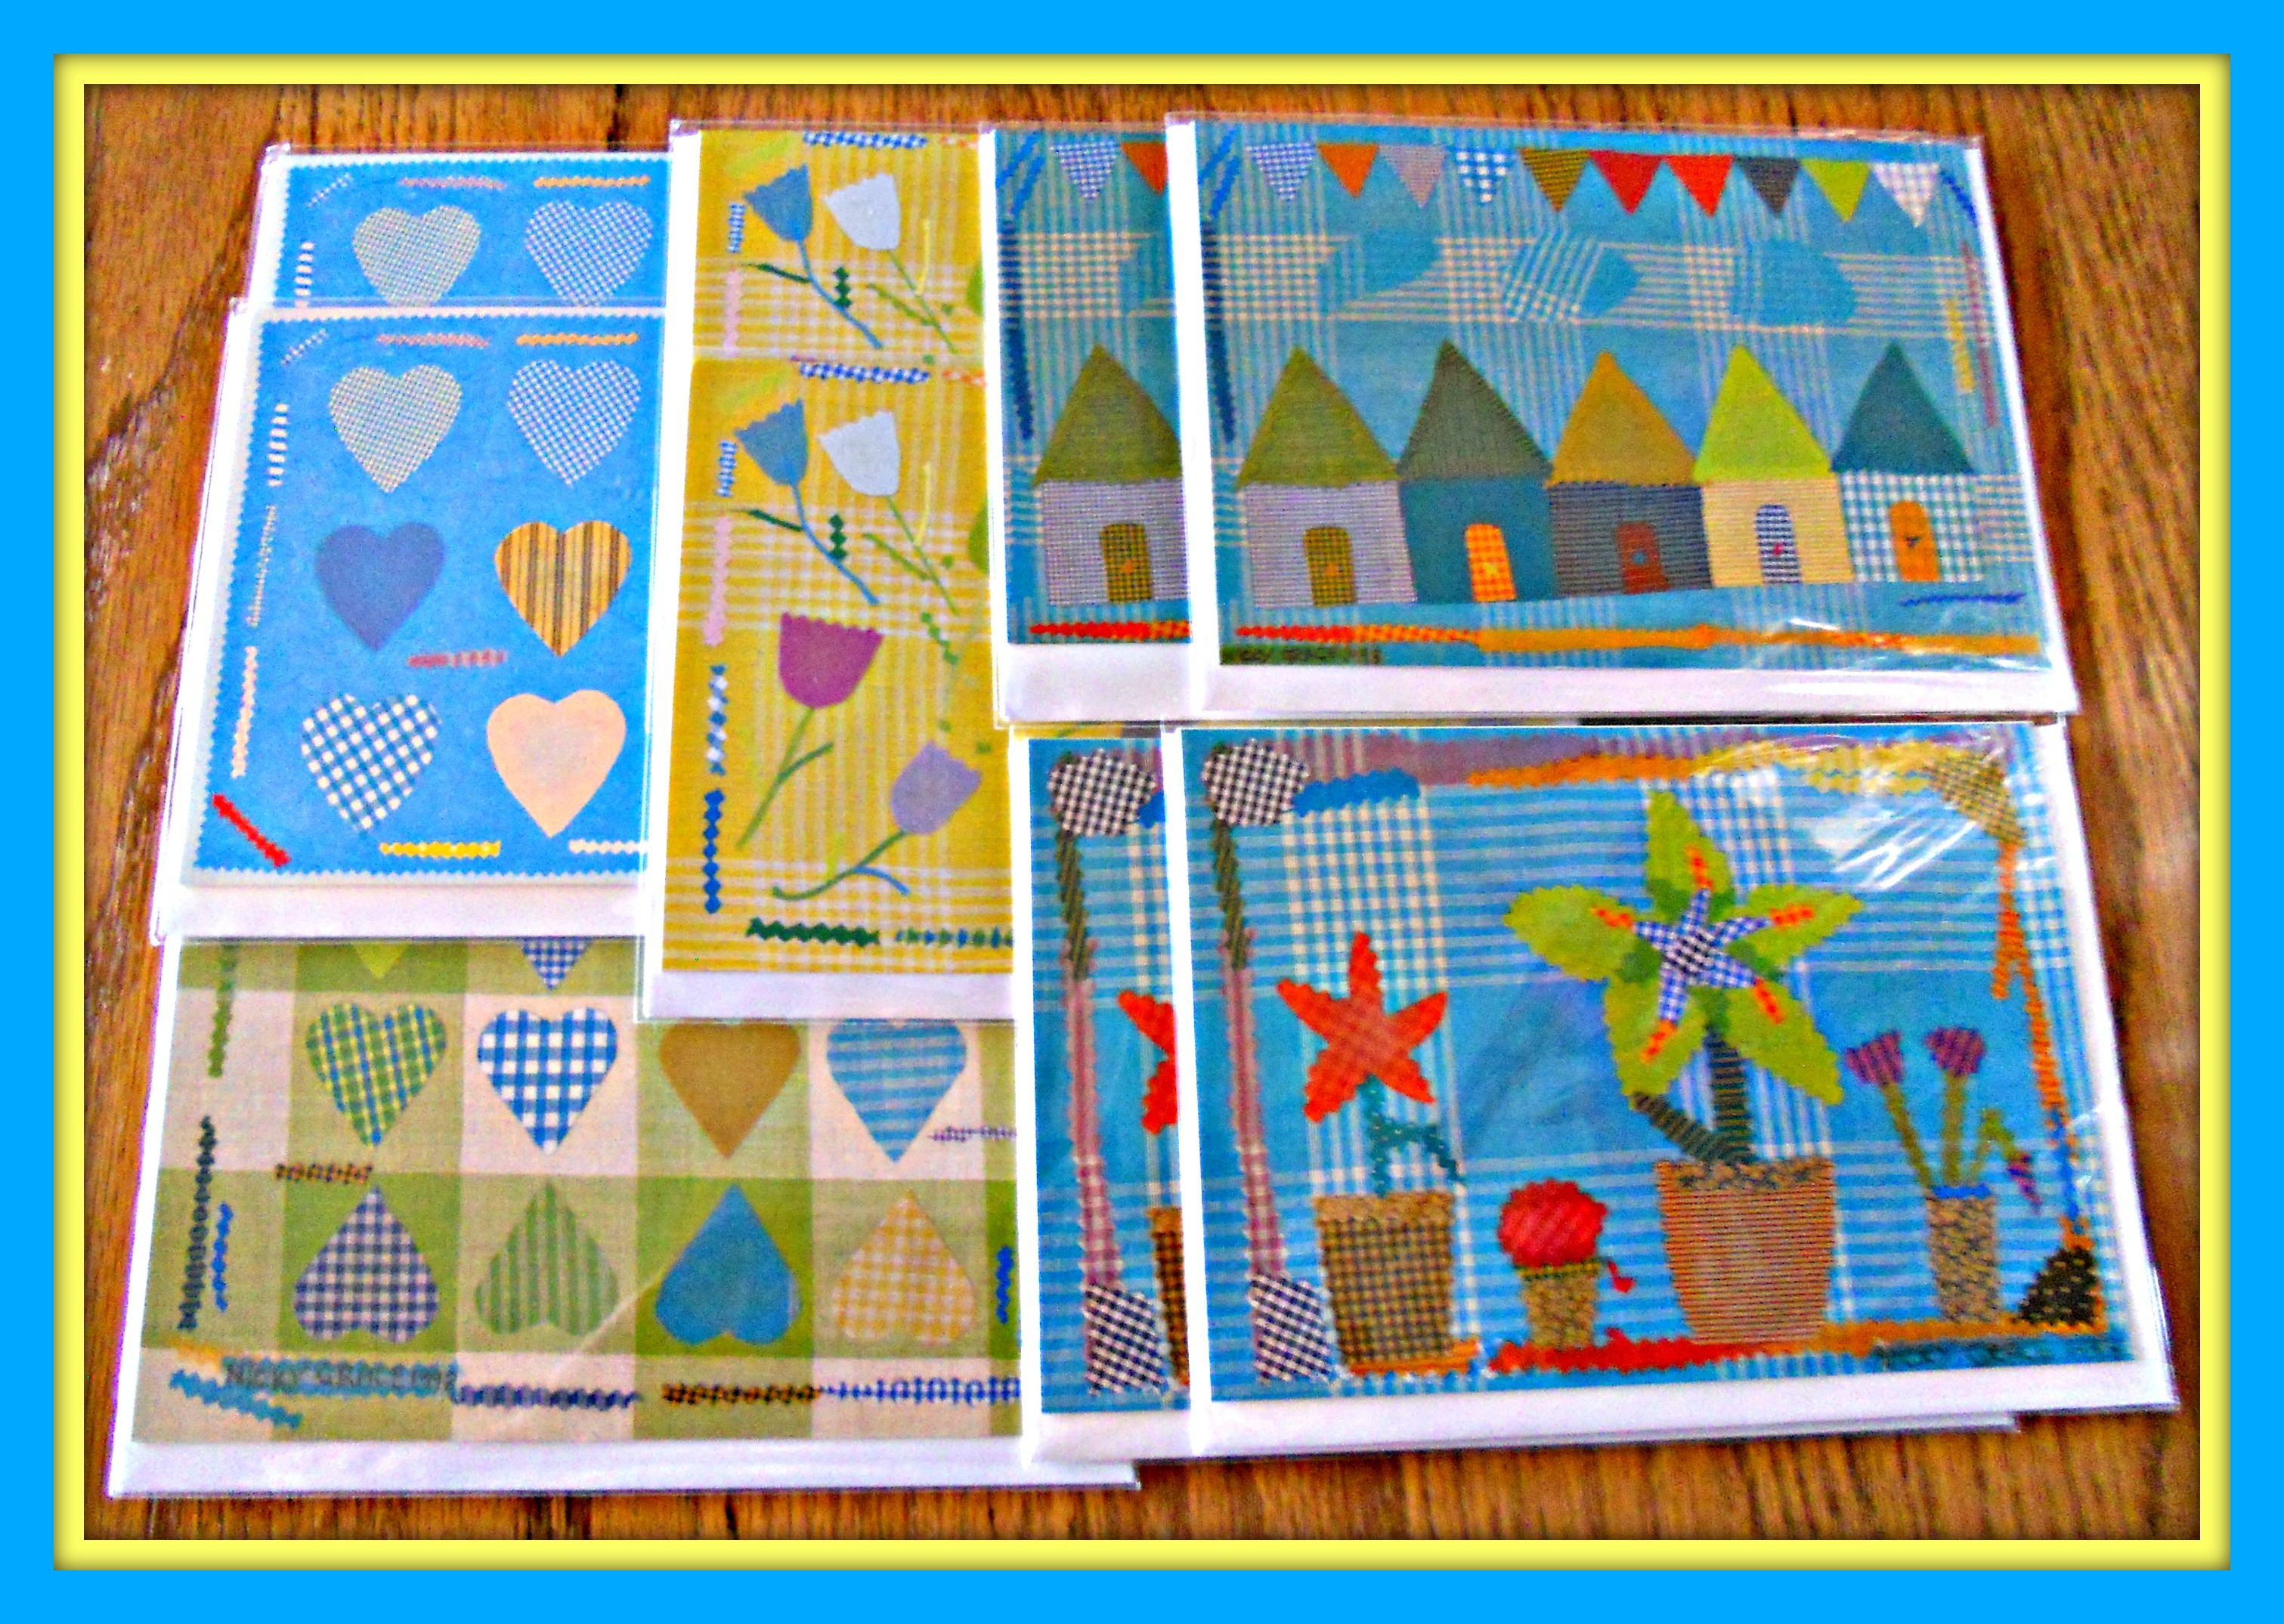
(2) Terri’s Notebook: I recently won a lovely giveaway from Terri’s Notebook—two pdf patterns. I was going to wait until I made the items to share them . . . but that hasn’t happened yet, so I’ll share what they WILL look like. 🙂 The first pattern is for Stuff Baskets and the second is for a Checkerboard Set, and both are for sale at her Patchwork Trails Etsy Shop. You can also visit Terri’s portfolio here and her paper goods shops here. Terri’s motto is “Explore. Dream. Create.” Don’t you love that? ♥

3-Apron(3) A Kitschy Kitchen: I’m just starting to make aprons myself, but I know someone on my gift list who will LOVE this one! It’s from Megan of A Kitschy Kitchen: The Life and Studio of an Apronista who sells her creations at her Etsy shop. Notice, too, the adorable fabric gift card holder! Stressing quality as well as beauty, Megan’s motto is “Buy Well, Buy Once.” She also has some other lovely items in her shop, such as embroidery, cocktail napkins, and coasters.

4-Tags(4) TheHighNoteDotNet: I’ve followed Darilyn’s lovely blog thehighnotedotnet for a long time now and was so excited to receive my first purchase from her Etsy shop, which specializes in vintage music projects. Darilyn even included a little gift . . . a copy of my favorite quote, which I embroidered on a pillow and she offers to all of us for free to make an iron-on transfer. She graciously provides tutorials for her projects as well. And check out her craft room . . . it’s amazing!


Peppermint Mini-Skirt

Standard

Mini-SkirtNo, not for me . . . for a mini-Christmas tree! 🙂 I used this small tree in my classroom when I was an elementary teacher and decided to put it on a side table this year to showcase some of our homemade-by-family-and-friends ornaments. To make the skirt, I:

  • Tree
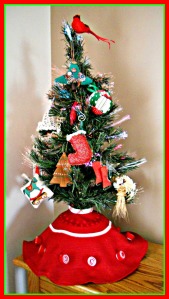
cut a 24-inch diameter circle from the thrifted red tablecloth I used for my argyle pillow and opened one side,
  • cut a 3-inch diameter circle in the center,
  • used a remnant from my snowman pillow to make a bias edging for the top,
  • sewed on some fancy red and white rick-rack from my stash,
  • machine-hemmed the sides and bottom, and added my no-sew felt peppermints.

It was a “free” project for me since I already had all the materials and adds a festive touch to a favorite little spot in our living room. ♥  P.S. Three peppermints to go . . . one more project!

Audrey’s Bierocks

Standard

As you know, it has been raining surprises in my mailbox lately!  Then my doorbell rang, and it was my friend and faithful Pillows A-La-Mode reader Audrey with a container of her world-famous bierocks  . . . “just because.”  They’re BEAUTIFUL to look at and MOUTHWATERING to taste!  She was also gracious enough to send me her recipe to share with my blogging friends.  Click the link below for a printable pdf, and prepare to be amazed!  Thank you, Audrey! ♥  P.S. Update: For those new to this dish, a bierock is a mixture of beef, cabbage, and other goodies baked in a pocket of bread dough.  Mmmmmm . . .

Audrey’s Bierocks

Crafts ‘n Coffee

Standard

I want to thank my blogging friend Sharon of Crafts ‘n Coffee for the WONDERFUL blog giveaway gifts she sent to me—THREE Christmas craft magazines, three mini-magazines with even more crafting ideas, and a STAK tree kit . . . plus she added a button, Starbucks coffee packet, and full-length pocketed apron from Styrofoamflorals.com! THANK YOU, Sharon . . . I can’t wait to try all these ideas! ♥

Facebook: http://www.facebook.com/StyrofoamCrafts
Pinterest: http://pinterest.com/craftsncoffee/
Twittter: https://twitter.com/craftsncoffee

Mini-Pillow Ornaments

Standard

In late summer I started on my Christmas mini-pillow ornaments, and I finally decided to stop . . . for this  year! (They’re addictive!) All they take are little bits of fabric and ribbon, plus buttons, bells, lace, and embroidery . . . oh, and your imagination!  P.S. Please check out these links for some more ornaments to try! ♥

Arts and Crafts Mission Market

Standard

Here are the tags for this year’s donations to the silent auction at the Arts and Crafts Mission Market at my church. It’s such a worthy cause . . . all the money goes to a local daycare center for families in need. Click here to see how to make the Christmas wreath pillow and here to see the Americana pillows.   P.S. Below are my gift baskets from markets past, each based on . . . you guessed it . . . a pillow! ♥

That Kara Lynn is SO Creative!

Standard

I got the sweetest giveaway gift in the mail today . . . stationery, notecards, and a memo pad designed by the fabulous designer Kara of Karalynn Creative . . . plus, the most amazing pencil I’ve ever seen made by Anthropologie! Besides Kara’s WordPress blog, she has a lovely Etsy shop for you to visit, too. Thank you, Kara! ♥

A Pretty Pumpkin Pin! (And Flowers!)

Standard

Today is a GREAT day! I finished the editing project I’ve been working on day and night for weeks. I had my first weigh-in at Curves (I started October 1) and I’m off to a good start on my new healthier lifestyle. I went out to breakfast with my husband Dave. AND . . . we stopped at Lowe’s to get a couple of 2 x 4s on the way back home and I was admiring the mums out front and a clerk came and told me that all their plants are on sale for ONE DOLLAR!!! each (because their Christmas trees are coming in soon!) so we got these eight beautiful pots of blooms for EIGHT DOLLARS!!! But . . . the REAL reason I’m writing this post is to thank my blogging friend Dianne Faw for the lovely handmade copper foil pumpkin pin she sent me from her recent giveaway! Please check out Dianne’s amazing craftiness here . . . I absolutely love visiting her blog.

Meeting a Blogger For Real!

Standard

I follow the Empty Nest Feathers blog and really fell for this blogger. We have so much in common! All sons . . . check!  Writers and editors . . . check!  Play the piano . . . check!  And on and on and on! Since we live less than an hour apart, I thought it would be fun to meet in person. So I emailed her and we met for coffee (two regular coffees with cream), talked for an hour and a half (it seemed like five minutes), walked to our cars (the same color), and parted ways with a hug. If you ever get a chance to meet one of your blogging friends in real life—go for it! ♥  P.S. Here is the funny blog post my new friend wrote about our meeting. (She’s WAY wittier than I am! But, for the record, my red hair is from Clairol too, I’m NOT mrhmpher narrower, and she’s most definitely not evil!)  Oh, and to see what’s in the package, click here and here and here!

One Year Award and Giveaway!

Standard

UPDATE on 9-22-12: Click HERE to read the heartwarming results of this post!

One week from today is the anniversary of my first WordPress blog post! Since I’ve discovered how many people around the world I’d love to have for next-door neighbors, I’d like to celebrate with a new award and giveaway!

AWARD: Please nominate a WordPress blogger (or lots of them!) for the “Good Neighbor Award” in an email to me at k[underscore]scraper@hotmail[dot]com (to keep it a surprise!), including a link to the blog and why you’d like this blogger to live next door. To cook/sew/craft/shop/write together? To learn to do something new? To be inspired? To visit over a cup of tea? Nominees will receive the award button on September 22.

GIVEAWAY: The person with the MOST nominations will be invited to send me a formerly-loved garment that I’ll make into some fun treasures (a-la “What can you make with a flannel shirt?” or “What can you make with a lace tank?” or “What can you make with a polo shirt?“) and return. THANK YOU for reaching out in friendship this past year, and I hope to hear from you soon! ♥

Rock and Wire Photo Holder

Standard

When I was digging through my treasure box and found these pretty rocks that some sweet kiddos gave me, I immediately thought of a super-creative craft I’d bookmarked on What Katie Made.  Thank you, Katie, for such an easy-to-follow tutorial! Now I have treasures holding treasures. ♥

Vintage Earring Magnets

Standard

Have you checked out the crafting ideas on the Country Living web site? I want to try them ALL! But I started with an easy one . . . frig magnets made from vintage jewels. I don’t have the brooches they suggest, but I have LOTS of clip-on earrings. Simply remove the backings and glue on a magnet . . . easy peasy and SO pretty!  P.S. You can also click the blue dot on the CL home page to vote for the Reader’s Choice 2012 Blue Ribbon Blogger Award. It was really fun to check out all the finalists! ♥

Thimble Necklace

Standard

I recently saw thimble necklaces posted by two creative bloggers on imacraftaholic and Dollar Store Crafts.  Since I have a small collection of thimbles from my grandma, I decided to use one for a necklace charm.

(1) Make a hole in the top of the thimble with a hammer and tiny nail.

(2) Poke a jewelry wire through the hole.

(3) Bend the end of the wire inside the thimble with jewelry pliers so it won’t come back out.

(4) Curve the other end of the wire through the opening on the charm bar and tighten with jewelry pliers. (See lost earring necklace  for another example, and click photo for a larger view.)

(5) Wear the thimble alone or with other charms. I love combining it with my scissors!

I hope you’ll get to use one of these ideas to make your own thimble necklace. Enjoy! ♥

Colorful Fabric Memo Board

Standard

Once one of my teen-age sons accompanied me to a teacher supply store. The next thing I knew, he was sitting on a bench outside. When I asked him why he left, he said, “Mom! It looks like a rainbow threw up in there!” So, if you’ve ever felt the same way, it’s probably best to move on to another blog now. 🙂

Today’s project is a fabric memo board . . . but for holding girly hair things, like:

Click here for a tutorial (starting with a cardboard box!) and here for a photo of the zebra-print version filled with flower hair clips and pins. I can’t wait to give this one to a special little girl for her birthday! ♥

Black Beaded Bracelet Beauty

Standard

Today I’d like to feature ANOTHER amazing blogger who had a giveaway . . . Evgenia of Being Zhenya. Yes, I was the winner of one of her three handmade beaded bracelets! (I got the skinny one!)  The other two winners were Brande of Victory Vintage Style and Beth of The Renegade Seamstress. We’re SO lucky!

When you visit Being Zhenya, you’ll read about “Fashion, Beauty, DIY, Thrifting, and so much more!”  Thank you, Evgenia! ♥

Scrabble Tile Pillows

Standard

When I saw some scrabble tile pillows in a photo on Get In My Home, I knew I just had to try making some! Here’s how:

(1) Find some khaki colored fabric. (Lucky me, my husband had just handed me an old polo shirt in just this color that he no longer wanted!) Cut out two squares for each letter of the word you want to make. I started with 8-inch squares because I just wanted to make some small pillows to put on a shelf, but you could go much larger or smaller.

(2) Go to Fuzzimo, scroll down to where it says “Download Wooden Scrabble Letter Tiles Image,” and download the photo.

(3) Go to PicMonkey and use their tools to crop and enlarge the desired tiles.

(4) Print the tiles, cut out the letters and numbers, and tape them onto a piece of black felt.

(5) Cut out the letters and numbers, pin them on the pillow fronts, and glue or sew them into place. (I machine-sewed mine using the zig-zag stitch.)

(6) Sew each pillow front to a pillow back, right sides together, leaving an opening at the bottom for stuffing.

(7) Trim the seams, turn, and stuff, then pin and handstitch the opening. ♥

More Mini-Notebooks!

Standard

I’ve gifted my first set of mini-notebooks one by one, so it was time to make more.  If you haven’t tried this craft yet, you must give it a go!  Why?

  • They’re quick and easy, and it’s so much fun to mix and match scrapbook papers for the covers, spines, and labels.
  • A notebook costs less than $1 to make and less than $2 to mail, so by adding a handwritten message on the first page, it makes the perfect economical yet pretty and useful greeting card/gift combination.

You can find a complete tutorial here. I can’t wait to start giving these away, too! ♥

Girl’s T-Shirt Dress with Necktie Skirt

Standard

I found a hot pink girl’s T-shirt on sale at Target and thought it would be lovely with some of my necktie fabrics! To make the skirt, I cut off the wide ends of the neckties, unstitched them, took off all the linings and interfacing, evened them out at the bottom, stitch them together, then stitched them onto the bottom of the T-shirt. I also made a mini fabric/button flower for a little a-la-mode. Here it is! (Click photo for larger view.) Oh, and here are a few other necktie projects to try! ♥

Necktie Onesies

Necktie Ruffle Pillows

Necktie Wristlets

Necktie Flower Pillows

Reversible Lace Belt

Standard

Although I found this intriguing lace belt tutorial by Toni of Make It Perfect quite awhile ago, I hadn’t tried it yet . . . until my gift of lace inspired me to hop to it! Along with the lace, I used a strip of the denim from the tote bag in the same post and a strip of the floral cloth ribbon from my spiral zipper wristlet. I made a few adjustments to the instructions based on the widths of the materials I had at hand, but it was just as fun and easy as Toni said. I can’t wait to make more! ♥

Laces . . . And Another Placemat Tote!

Standard

I got the most wonderful gift in the mail today . . . a collection of laces from  Cul de Sac! Thank you, Josée . . . and you’ll be seeing lots of them in future projects and posts! The first one that caught my eye was this bright purple crocheted lace. I remembered that one of the placemats in my stash included this beautiful color, so I paired the mat, lace, and some denim to make another tote bag. I followed the same procedure as the last one (click here for tutorial) except for stitching the lace at both ends of the fabric before attaching it to the placemat halves and handles. I love how it turned out and can’t wait to try another lace on something new! ♥

Clutch and Tote

Standard

I am the SO lucky winner of Homespun Haley’s recent giveaway . . . a handmade clutch! It hasn’t arrived quite yet, but isn’t it lovely? Please check out Haley’s blog and her Etsy shop as well. Thank you, Haley! ♥

And then . . . I must have dreamed about the fabric, because this morning I woke up with an idea for a tote bag that includes pink flowers and teal. I patiently waited until after work and dinner to start on it, but here it is! I used a two-sided placemat and some sturdy duck cloth I had in my stash.  The easy-breezy directions are on the photos . . . click if you’d like a larger view.


Diaper Clutch

Standard

Remember the placemat pouches I made earlier this year? Today I turned one of them into a gift for a new mom by:

(1) making a super thin, soft, washable changing pad from a $1.99 child’s paint apron from Michaels (with enough fabric left over for one more pad and some other projects, too!)
(2) adding a small package of wipes and a diaper, and
(3) composing this poem (click to enlarge) to pin to the clutch.

Super fun, super easy . . . and I think she’ll like it! ♥

What can you make with a lace tank?

Standard

A few years ago I found this beautiful lined stretch-lace tank for $5 on a sale rack at JJill! But . . . it turned out that the color made my already-pale skin looked even more washed out . . . and it got several snags from a clothes-eating teacher’s desk . . . so I decided to get out my trusty scissors to rescue it from its lonely existence at the back of the closet. Here’s what I made:

  • A headband
  • A flower pin and hair bow (each with a vintage earring in the center)
  • A mini origami lotus bag (paired with a bit of coral velvet from a robe my mom-in-law made and some thin gold cord)
  • A bracelet purse (paired with a cotton remnant in the same color family for lining)
  • A luggage tag (lace back paired with the same remnant and some burlap ribbon)
  • A contrast-corner pillow (lace back paired with the same remnant and the lace from the tank’s neckline across the corners)

Loved it . . . hated it . . . now love it again! ♥

What can you make with a flannel shirt?

Standard

This was a perfectly nice flannel shirt . . . soft fabric, pretty colors. But it didn’t fit quite right, and I didn’t like the roll-tab sleeves, and even with the ribbon belt that came with it I felt more lumberjack than feminine when I wore it. So, rather than sticking it in the back of my closet, I took my scissors to it!

Vest: Remove the collar, button and buttonhole plackets, pockets, and sleeves. Roll under the raw edges (using lace seam binding for the armholes to help with the curve) and topstitch. Sew pretty buttons into the buttonholes on the pocket flaps. Cut the ribbon belt in half and stitch the pieces to the top fronts of the vest for a tie . . . great with a white T-shirt and button necklace!

Placket Pillow: Stitch the button placket to one piece of coordinating fabric and the buttonhole placket to another. Button the two pieces together to form the pillow front. Cut a piece from one of the shirt sleeves for the back. Sew right sides together, turn, and stuff.

Pocket Pillow: Sew the tabs from the sleeves to a piece of coordinating fabric, then stitch the pockets under them so that the buttonholes on the tabs fasten to the buttons on the pockets. Fold right sides together, sew, turn, and stuff.

Fabric Flower: Cut out seven circles from the sleeves and form them into a flower. Add a pretty button in the middle  and a pin on the back.

Fabric Gift Bag: Gather the bottom of the collar and wrap it into a flower shape. Add buttons in the middle for a-la-mode. Then stitch up a simple bag with a handle from the shirt sleeve fabric and sew the flower on the front.

Mini Origami Lotus Bag: Add a square of coordinating fabric to a square of sleeve fabric plus a complementary color of  craft string for pull cords . . . just like the larger version, but a perfect size for a tiny gift or piece of jewelry. ♥

X’s and O’s . . . er . . . Lemons and Limes

Standard

Do you have little ones in your family who LOVE to play tic-tac-toe? We do! Since I bought plenty of orange, yellow, green, and white felt for my citrus coaster project, I decided to use it to make a birthday gift for one of these sweet little girls with a giant orange slice gameboard and lemon and lime game pieces. And how serendipitous to find an orange slice notepad in the dollar bin at Michaels for keeping score! 🙂 At first, I was going to make a bag out of my citrus fabric to hold everything, but then I figured out that the gameboard itself could be the bag with the addition of ties. It worked! Now I’m imagining all sorts of other themes . . . a basketball gameboard with different colors of “team” T-shirts for the game pieces . . . a Disney fabric gameboard with Mickey and Goofy game pieces . . . the sky is the limit! You could also make them different sizes and even add velcro to the gameboard and pieces to play it in the car. Other ideas are welcome! ♥

Origami Lotus Bag

Standard

I always have a line-up of a dozen or so projects I want to try, but once in awhile something bumps all the way to the front. That happened when I saw this intriguing bag on the Empty Nest Feathers blog, who linked to the tutorial at Exchanging Fire. I couldn’t wait to make one for my embroidery floss, and I decided to use a couple of the black and white fabrics I already have as different elements in my office/sewing room. (Click on any photo for a larger view.) All you need are two 18-inch squares of fabric, two yards of cording or ribbon, and an hour or less of time. I can foresee a larger version for a beach bag, a tiny version for a jewelry bag, and every size in between for all different types of gifts and storage. It was SO easy and fun . . . you’ll want to try it! ♥

Thank you!

Standard

Like many Americans, I decided to deck out in casual red, white, and blue before heading out with family and friends for the 4th of July.

  • Denim capris and white peasant top . . . check!
  • Red leather belt and red canvas shoes and tote . . . check!
  • Silver earrings and bracelet with red beads . . . check!
  • Headband (because I LOVE headbands!) . . . UNCHECK!

So, I headed for my remnants and found this pretty red/white stripe left over from a snowman pillow I made last winter and a little strip of elastic and had it ready to wear in about 10 minutes.  But this isn’t a “what I wore” or “headband tutorial” post  . . . it’s a thank you to all of YOU who constantly inspire me with your creativity and resourcefulness so that I didn’t even think twice about figuring out how to make what I needed out of something I already had. You’re the best! ♥

Happy Birthday, America!

Standard

Here are the rest of the pillows I made from my Americana-stamped fabric. What a lovely gift that was!

Since the cloth is loosely woven, I backed the words with a light iron-on interfacing before zig-zagging them to the pillow fabric. Other than that, I simply cut, stitched, and stuffed for a nice pop of red, white, and blue for the holiday.

Have a safe, fun, and happy 4th of July! ♥

Tablecloth + Napkins = Curtains

Standard

I was in the mood for some new curtains for two skinny bedroom windows, and I had some fabric that would work perfectly . . . a tablecloth and napkins!

  • Cut the tablecloth in half to make two curtains.
  • Cut a strip off the bottom of each piece.
  • Cut two of the napkins into fourths and sew the strips together to make long, narrow borders.
  • Sew the napkin borders to the tablecloth fabrics.
  • Hem all the unfinished edges.
  • Turn the tops under and stitch to make casings for the curtain rods.
  • Hem all the way around the two extra strips and use them for tie-backs.
  • Make a matching pillow with the other two napkins.

I love the new look! ♥

Button Necklace

Standard

Since my “lost earring necklace” worked out, I got brave enough to try one of the cute button necklaces I’ve been seeing everywhere! I decided to go with black buttons, so first I went through my stash and put these in a pile. Next, I made a new pile with the ones that were ½ to ¾ inches in diameter. Finally, I sorted out the ones that had the most interesting designs, and I was ready to go.

Here’s the tutorial for my version of this fun craft:

  • Cut three strands of cord 48 inches long. I used hemp cord from Michaels, where I also purchased a package of bracelet closures and crimp beads.
  • Thread the strands through a bracelet bar closure and pull it to the middle. (Click on the red collage for a larger view.) Clamp the cords 4 inches from the bar closure. This is where you will start adding buttons.
  • Separate the first of the six strands of cording. Slide on the first button and tie it at the back with a simple slip knot. Keep adding buttons, evenly spaced, until you get to within five inches of the end. Repeat with the other five strands.
  • Stretch the strands back out and knot the ends. Then add a crimp bead at each end and attach these to the circle closure.
  • You’re done . . . enjoy!  Oh, and please check out this adorable button necklace (with earrings!) at The Bead Den. I discovered it right after I made mine, and I LOVE it! ♥

Persian Plum Pillow

Standard

This is a fun week! I just posted about the great vintage apron I received from Moosewood Vintage, and now I am the lucky recipient of ANOTHER blogging give-away . . . this gorgeous Persian Plum quilt block kit from Books Quilts and Sewing! And, Michael (the quilter) added a $5 gift card to Michaels (the store) to the package . . . what a lovely surprise!  Truthfully, I’d never pieced a quilt block before, but I knew it would be perfect for a pillow so I eagerly dove in. It was sort of like putting a puzzle together . . . and I soon learned that when the directions say to press, DO IT! Here’s my beautiful new pillow, featured in a back porch photo shoot.  Oh, and Michael has ANOTHER give-away going on right now . . . you have until July 7 to enter. Click here for information, and plan to stay a bit to browse his blog. Thanks, Michael! 🙂

Stars and Hearts Button Pillow

Standard

I got these sweet stars and hearts wooden buttons for my birthday and was waiting for just the right project for them. When I found this remnant at JoAnn with stars the same size and color as my buttons, I knew just what to do. Here is my finished 18 x 18 inch pillow, all ready for the 4th of July! ♥

More Necktie Wristlets

Standard

I just finished six new necktie wristlets . . . so easy and fun! The only thing I changed from the original tutorial was to sew the decorative button on the front flap and use a snap closure rather a button/buttonhole.  Now I can’t wait to give them to some special girls in the family! ♥

Aprons!

Standard

You know how some of our lovely blogging friends give things away? Well, I just received this BEAUTIFUL polka-dotted apron from Moosewood Vintage Wearables & Sundries, specializing in vintage clothing & accessories, gently used formal dresses, and goat milk soaps. I LOVE it! Please visit Ruth’s WordPress blog, her FB page, and her Etsy shop. Thank you, Ruth! ♥ While I was photographing my new apron, I also pulled out my three other favorites. My mother made the one with the quilted top and pocket, and my grandmother made the tangerine print (which has a fancy cross-over back; it’s sort of like putting a puzzle together to get into it!). And the little half-apron was my VERY FIRST sewing venture when I was around eight years old, so if you’re looking for a beginning project, here’s the scoop: Grandma had me use tiny gingham so I could just follow the lines, and the “pattern” consists of a big rectangle with a casing at the top and a hem at the bottom and a self-fabric drawstring. It’s definitely one-size-fits-all, because I can still wear it today!  Someday I’d like to a-la-mode it a bit with a pocket and some embroidery. . . so many ideas, so little time . . . ♥

Button Hairbands

Standard

This project looked SO cute and easy that I just had to try it! Visit Dreampatch for my original inspiration (via Pinterest, of course!). I made all of these in an hour or so . . . but most of that time was spent enjoying sorting through my grandmother’s vintage buttons. We have LOTS of girls in our family now, so it will be fun giving them away! ♥

New Baby Burpies and Blanket

Standard

I’ve been making lots of rag-edge burpies lately . . . it was so much fun to shop for all those cute pink and blue flannel prints! This time, though, the parents-to-be had some very specific color requests: black and yellow burpies and a zebra-striped receiving blanket. What fun! You can check out HomemadebyJill for the burpie tutorial, and the receiving blanket is simply two squares of fabric stitched together with rick-rack in the seam (the way my grandmother often used to make them). Put on your sunglasses! ♥

Fireworks Barrette

Standard

Do you sew or craft while watching watching TV? I do! My latest project was sprucing up an old, plain, silver barrette by wrapping it with embroidery floss and adding a little *fireworks* a-la-mode at the end.  It had lots of openings for tucking and winding the floss, so I didn’t even need to use any glue . . . and . . . umm . . . yes, I just made it up as I went along. 🙂  I’ve now given it to my granddaughter (and my one and only piano student!) Ally as a reward for a GREAT lesson, and it turned out to be a perfect match for her school uniforms, too.  Now I want to find some more barrettes to decorate! ♥

Dragonfly Mini Notebook

Standard

One of my teacher/writing group friends just got her first publication acceptance, so I wanted to give her a gift that includes the dragonfly on her business cards. I traced the dragonfly on a small scrap of sheer fabric, triple-folded it for strength, and embroidered over the lines. Then I cut it out and glued the body onto a flower on the cover of one of my mini-notebooks, leaving the wings free. Oh, and I wrote a message for her to discover on the first page. I’m SO happy for Pam! ♥

Fabric Memo Board

Standard

I’ve always loved fabric memo boards and decided to try making one. It was easy and fun! Here are the directions:

1. Cut a sturdy piece of cardboard to size.

2. Use the cardboard for a pattern to cut a piece of quilt batting, adding a couple of inches all the way around.

3. Wrap the batting around the cardboard, squaring the corners, and tape it at the back.

4. Use this as a pattern for the fabric. You could repeat the step above and tape the fabric at the back, but I used enough to wrap all the way around and then handstitched everything together to help the fabric stay flat and tight.

5. Wrap coordinating ribbons, rick-racks, or other trims in a pleasing pattern. I tacked mine at the back with a few stitches.

6. Stitch a small scrap of ribbon at the back top center for hanging.

7. Tuck cards, photos, and clippings under the trims . . . no pins or tacks needed. Or . . . (see next post!)  ♥

Bracelet Purse

Standard

Recently I read a post from a fun blogger that included a link to an intriguing craft project I just had to try: bracelet purses for little girls. Aren’t they cute? And they’re easy, too, with the following qualifying remarks . . .

(1) The pdf for the pattern wasn’t quite true to size, so I had to enlarge it a bit.

(2) When shopping for the bangle bracelets, I was excited to find these colorful, floss-wrapped versions in the dollar bin at Michaels. Since they’re thicker than the ones in the tutorial, I added a couple of inches to the top of the pattern.

(3) I had to do a “practice run” to get it right. The first time, I sewed too far up the sides, so by the time I attached the bracelets I could barely open the bag. But the second time around (with a different pink fabric) went off without a hitch. And, after I had to cut off the handles from Attempt #1, I turned the bottom half into a cute basket for some of my vintage buttons, so no worries! ♥

Candy Legos

Standard

My lovely daughters-in-law never cease to amaze me with their talents and creativity, including birthday party planning. I couldn’t resist posting these candy Legos that Tiffany made. They looked so real that the children at the party studied them, gently licked them, and then finally nibbled the corners before digging in.  So cute! ♥

Monster Tooth Fairy Pillow

Standard

I needed to make a tooth fairy pillow for a special little boy, so I decided to transform one of my monster pillows. (Yes, it would have been MUCH easier to decide this BEFORE I made the pillow, but oh, well! :)) First, I cut two small pocket shapes out of red felt. Next, I embroidered one for the tooth and one for the money. Finally, I hand-stitched the pockets to the pillow. It worked! ♥

Ring Toss Game

Standard

I was wondering aloud what to make for one of our sweet little grandsons for his birthday. “A ring toss game!” piped up Dave. So we put our heads together. He’d make the wooden part from a round tabletop and dowels, and I’d make the rings from embroidery hoops covered in fabric. We even used fat quarters from Grandma Vida, so it was a true family affair. Then, elementary teacher that I am, I made a pad of scoresheets that utilize the concept of tallies and counting by fives to up the challenge when he’s ready. I hope he has as much fun playing with it as we had making it! ♥

Happy Spring!

Standard

I’ve seen lots of fabric-tied wreaths on Pinterest lately, so I decided to give it a try and create a spring version. First, I went through all my fabric scraps and made piles of pastel prints and solids–light browns, blues, pinks, purples, yellows, and greens–which I then cut into 6 x 1 inch strips. Next, I bent a wire hanger into a circle and wrapped the handle with yellow gingham. Finally, I started tying, choosing a strip from each group of colors in turn. This project took awhile, but it was worth it! Wouldn’t it be fun to have one for Valentine’s Day . . . St. Patrick’s Day . . . Easter . . . Fourth of July . . . Back to School . . . Halloween . . . Thanksgiving . . . Christmas . . .  ♥