
I always love to get out my felt conversation heart garland when February rolls around! Remember to show extra love to everyone in your life this month, and have a fun Valentine’s Day! ♥
Other Valentine’s Day Craftiness:
I always love to get out my felt conversation heart garland when February rolls around! Remember to show extra love to everyone in your life this month, and have a fun Valentine’s Day! ♥
Other Valentine’s Day Craftiness:
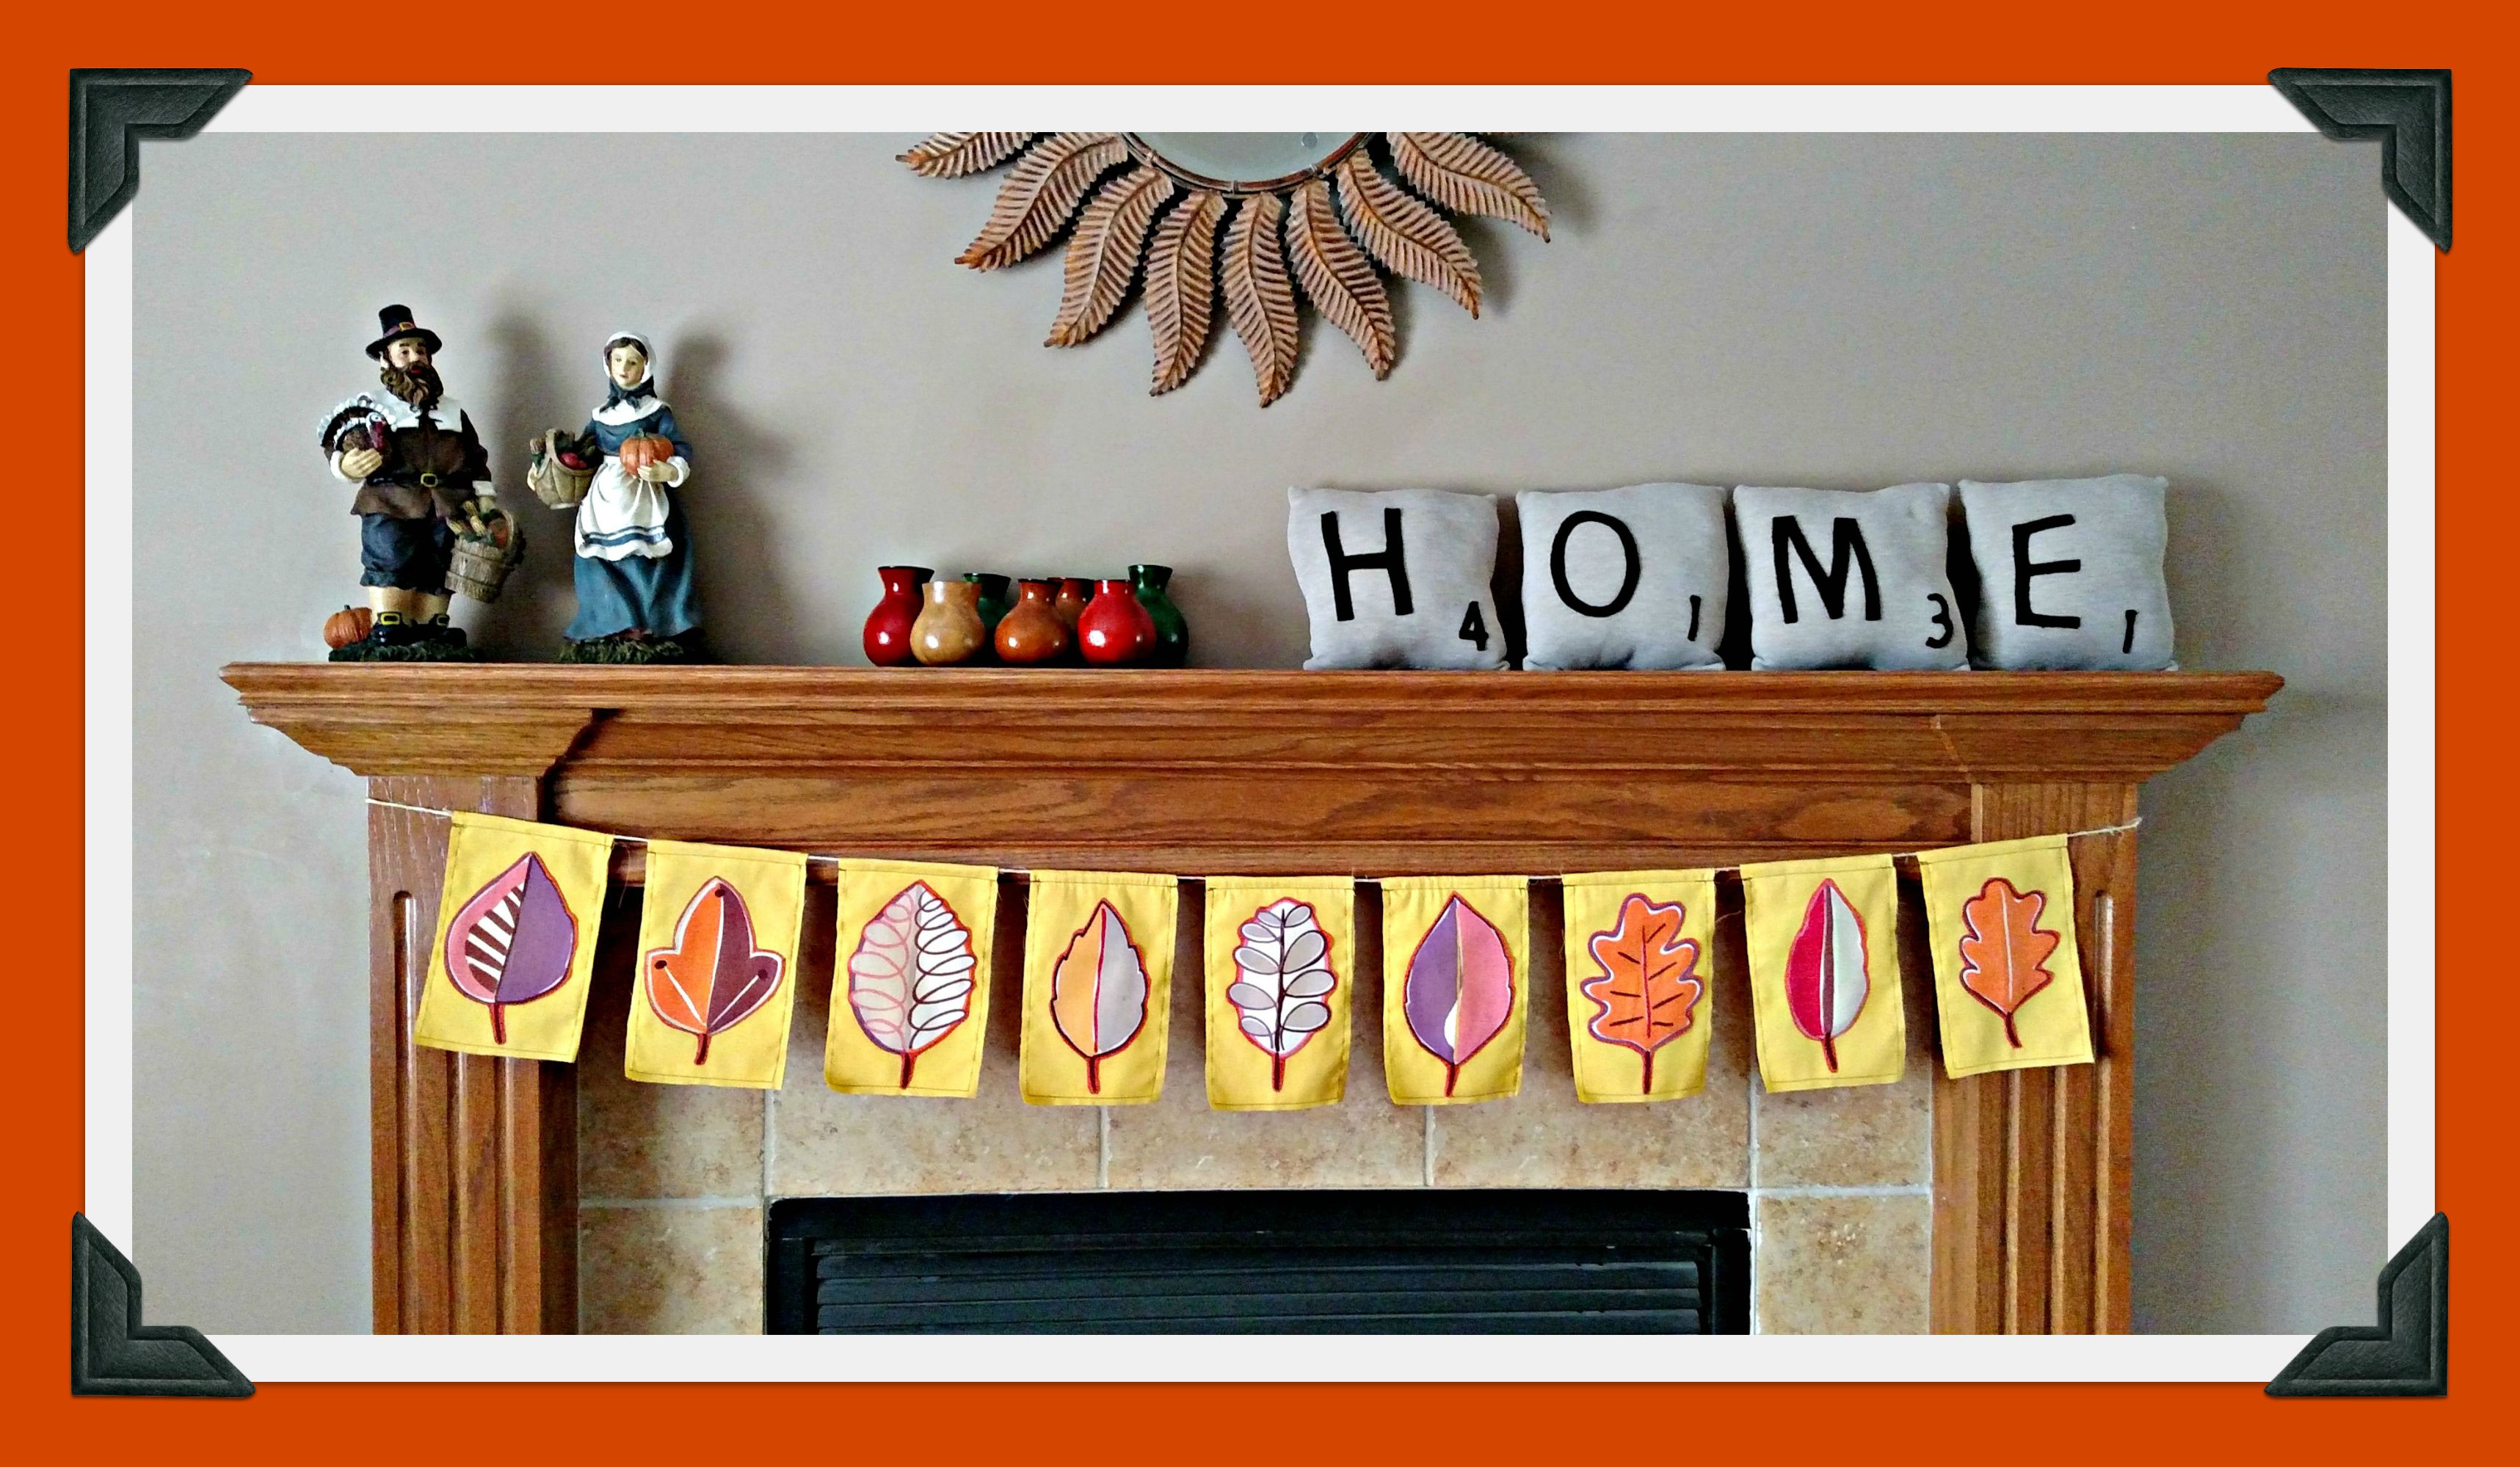
I decided to refresh my autumn garland this year. While digging through my fabric stash, I found a leaf print and cut out one of each leaf. Then I stitched each leaf to one half of a yellow rectangle, doubled the rectangle. stitched the sides together on the sides and bottom, and stitched a casing at the top. After threading them through a piece of baling twine (yes, I was raised on a farm!), it was ready to hang. It makes me smile when I walk in the room! ♥
Our granddaughter Ally asked to have her family birthday party at our house (happy face!), so I decided to make some colorful, festive, girly garland to offset the autumn décor. First, I put on a good movie and cut out a bazillion or so circles from my felt stash (using a peanut butter jar lid as a template). Then I arranged the circles in color patterns, moved to the sewing machine, and stitched them together down the middle with edges touching. Finally, I draped them around the room, ready to add table decorations, balloons, a cake, and gifts. She loved it! ♥


 . . . is only one week away! The only new things I’ve made for the occasion this year are some infinity scarves from red-on-white and white-on-red dotted chiffon that I had in my stash. They’re super-easy to sew (check out Pinterest for tons of tutorials!) and perfect for gifting. But it’s also fun to put out some treasures from previous projects, such as:
and my February Shantilly Frame.
Have a happy week sharing *a little extra* love with your family and friends. ♥


I recently hung the Peeps garland I made last spring (out of felt, not the candy!). Here are the super-simple directions:
(1) Draw a simple bunny shape or find a free template online.
(2) Make the bunnies from felt, fabric scraps, construction paper, or scrapbook paper.
(3) Add the eye and nose dots with fabric paint, permanent marker, or embroidered French knots.
(4) Attach the bunnies to ric-rac, ribbon, rope, string, or twine using glue or hand or machine stitching.
You’ll soon have a cheery pop of color for your spring décor. Have fun! ♥
During my last spring cleaning, I found NINE unopened decks of cards in the game chest. If they haven’t been claimed yet for their intended purpose, they’re up for grabs for crafting, right? So, when I saw several versions of Valentine garland made from hearts playing cards on Pinterest, I had to give it a try! I punched holes in the corners, strung them with red baker’s twine, and added a few hearts cut from the backs of the Jokers and advertising extras for a-la-mode. So easy, and they made great gifts for some special people I love! ♥ P.S. Here’s the red sweater heart pillow that’s sitting on my favorite chair this month and the felt conversation heart garland I hung across the mantle.


I’m going to take off the rest of November from blogging to finish a big writing assignment (for my “real” job!), host Thanksgiving dinner, and attend some family events. But first, here are my new strings of Christmas bunting! Last year I cut out bazillions of squares of Christmas fabric to make mini-pillow ornaments but didn’t use them all, so I turned the rest into triangles that I could stitch into seam binding. Simply turn under the ends and fasten them with buttons to create loops, and they’re ready to hang. Thank you for stopping by, and I’ll see you in December! ♥


 The main occasion for our big family gathering over Father’s Day weekend is my husband Dave’s *milestone* birthday. Since Dave has been a teacher, principal, and Superintendent of Schools throughout his career, we’re using a school theme for the party.
The Book Page Banner designed by Lauren of The Thinking Closet (one of the sweetest, most talented bloggers I know!) sparked the idea of using bunting shapes and book-page letters for the birthday banner. My version included:
It was easy and fun and will be a perfect complement to our other decorations. And, if you haven’t checked out Lauren’s amazing banner (complete with detailed tips, a C.S. Lewis quote, a free cut file for your Silhouette, and POM-POMS!!!), then click HERE right now! And follow her blog and FB page, too! Thank you for the inspiration, Lauren! ♥
 When our whole family gathers in over Father’s Day weekend, I want to have some fun crafts that work for *kids* from pre- schoolers to 80+. My latest idea is a decoration that everyone helps create—T-shirt garland! To keep everything handy, I decided to make a kit with all the necessary materials. Then I can simply hang some baker’s twine across the windows and we can pin on our paper T-shirts as we “customize” them.
 To make the kit, I first found an empty box that was just the right size. (This one once held a chocolate cake that came in an order one of our kids sent us from Omaha Steaks . . . yum!!!) I cut off the lid and then cut, folded, and glued the lid cardboard to divide the box into four compartments. Here it is with clips holding everything in place while it dried. When the inside was ready, I traced around the outsides and covered them with scrapbook paper, then made a simple word-processed label for the front using clip art and a text box.
 Next, I googled “printable t-shirt template” to find a pattern I like and watched a couple of movies while I traced and cut them out on light-colored paper. I also shopped for tiny clothespins and found these at Amazon.com. They’re REALLY tiny—about one inch long—but perfect for hanging paper items. I also found a small empty jar in the pantry to store them in since we’ll need to keep them safely away from the babies and toddlers. (I later glued three of the pins to the lid for a-la-mode.)
Finally, I added markers, crayons, and colored pencils for creating the T-shirt designs. Since I already had these and the paper on hand, my only expense was the clothespins—and they’re so cute I probably would have bought them anyway. 🙂 I’ll be sure to show you a photo of our garland after everyone is here! P.S. I think this would be a fun way to commemorate family activities over the summer, too . . . books the kids read, trips to the beach and zoo, special treats they get to eat, and that sort of thing. If only I’d thought of that when MY kids were little! ♥


I love PEEPS . . . even though they make most of the rest of my family go “Ewwwwwwwww . . . !” But who could resist some adorable PEEPS garland? It’s super easy, and as I made it, I realized I had lots of choices. So here’s a chart! Simply pick one thing from each column (which you probably already have around the house!), and soon you’ll have your finished garland hanging among your other spring decor. Here is mine with felt, fabric paint, ric-rac, and machine stitching. (Click on the photo for a close-up.) Oh, and you can find lots of free templates for the bunny shape on Google images. Have fun! ♥
| PEEPS Bunny |
Eyes and Nose | Garland | Attachment Method |
|
|
|
|

 I got this bright red, gently-used sweater along with a couple of other items for free at a consignment store with a Groupon gift certificate! It was too wide and too short and stretched out here and there, so I immediately knew it was going to become my next What can you make with a . . . project.
First, I made the heart mini-pillows I shared in this post. Then I made the big sweater pillow I shared in this post. After that, I made a business card/gift card/credit card/reward card case with floral pockets and a vintage earring button closure (click here for a great tutorial from The Crafty Cupboard) and three flower brooches with vintage earring centers. The neck and hem ribbing I hadn’t used up as ruffles on the big pillow will be package wraps (picture a small box wrapped in kraft paper with these pretty red buttoned bands stretched around them). Finally, I cut all the little bits into triangles and made bunting by stitching them onto the fun button-design ribbon I recently bought from Lizzie Rose Jewelry.
Another fun haul! ♥


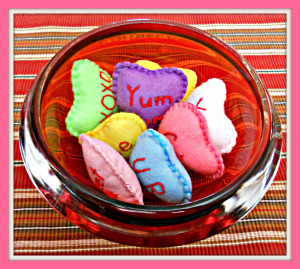
 Welcome to the Collectively Creative Lovey-Dovey edition, hosted by Kelly of Cobwebs, Cupcakes & Crayons! My project this month is felt conversation heart mini-pillows. They were so much fun to make! Here’s how:
(1) Buy a bag of candy conversation hearts for . . . um . . . er . . . research. 🙂
(2) Create a pattern with a free-hand drawing or googling a heart template—or do like I did and use a heart-shaped cookie cutter.
(3) Trace around your pattern on two pieces each of white and various pastel felt.
(4) Lightly pencil a candy saying on a heart of each color, then embroider all the sayings in red.
 (5) Put the hearts of the same color back to back and attach the edges with a blanket stitch using a coordinating color of embroidery floss. Stop a couple of inches before you’re done to add a bit of fiberfill stuffing, then close them up.
(6) Use your hearts for valentines, brooches, magnets, hair accessories, sachets, mobiles, or gift-wrap, wreath, or pillow a-la-mode; display them in a pretty bowl or shadow box; or . . . make GARLAND! I added in some of my red-sweater hearts as well for the perfect Valentine mantel decor.
![]() Before you get started on YOUR mini-pillow hearts, be sure to visit all the amazing Lovey-Dovey blog posts below. Enjoy! ♥
Before you get started on YOUR mini-pillow hearts, be sure to visit all the amazing Lovey-Dovey blog posts below. Enjoy! ♥
I can never take down ALL the Christmas decorations on December 31, can you? Instead, I like to “tweak” some of them for the winter. Here are some of this year’s gentle changes:
(1) Keep the giant winter wreath and snowflake garland, but trade the nativity on the mantel for family photos.
(2) Keep the Christmas cards nearby to enjoy again and again, but add a free New Year’s printable in a frame.
(3) Put a fun snowman on top of the kitchen cabinet by the antique milk bottles.
(4) Change out Santa for a snowman in the fabric forest and add a “Baby It’s Cold Outside” free printable in a frame.
(5) Get out the softest, squishiest, coziest sweater pillow I’ve ever made for winter napping. ♥


Garland:
Crocheted snowflakes: My Grandma Leona
Music Christmas Trees: TheHighNoteDotNet
Inspiration: Winter Owls
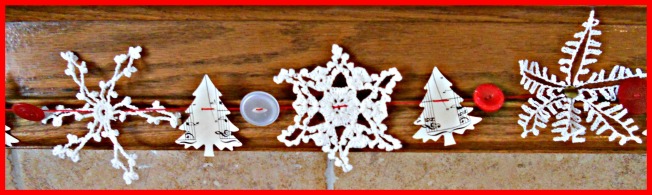

 I fell in love with this Christmas garland, adapted from an idea in Fa la la la Felt by Kathy Sheldon. Here are the steps:
(1) Cut red and white felt into strips. Mine are 1/2 inch x 8 inches.
(2) Lay a white strip over a red strip, then pull the white strip down about an inch. Begin rolling upward at the end you pulled down. This will give the “candy” a solid white center and a red outer layer.
(3) After the piece is rolled, put a pin through it to hold everything in place until you string the candies.
(4) Using a sturdy needle and extra-strength thread, poke the needle through the loose end of a candy, go through the middle of the candy and out the middle of the opposite side, and remove the pin. Pull the candies close together to keep the rolls tight.
(5) Hang your garland on the mantel, in a doorway or window, or on a Christmas tree or wreath! ♥


When I saw the gorgeous mantel designed by Mrs. Hines’ Class, I decided I MUST add some bunting to my autumn decor this year. I used up most of my fallish remnants making my fabric-tie wreath, but I DID have a reversible quilted placemat in just the right colors that hadn’t found its way into a project yet. I snipped it into triangles, zigzagged all the edges, then connected the tops with a strip of green fabric from my stash. I can’t wait to add it to the mantel! ♥


In my spare moments this week, I’ve been standing at the kitchen island turning the scrapbook paper circles I cut out on our recent road trip into garland for my class reunion this weekend. The first string I made was plain blue and gold, but I decided to have fun with this one and add some designs. Oh, and I also found some pretty blue and gold fabrics for the tables. It seems like only yesterday that we were wearing these colors for our high school activities! But I love “now” WAY more, don’t you? ♥

We spent fifteen hours in the car this weekend for a fun trip to see family. In my project bag I brought along . . .
(1) blue and gold scrapbook paper to cut into circles for garland for my class reunion next weekend,
(2) fabric and buttons to make flowers, and
(3) two embroidery projects to finish (posts to come!).
I also received these adorable earrings as a surprise gift from our hostess! They’re created by a nonprofit called Unboxed Art . . . please check out their website when you get a chance, and have a lovely week! ♥


 I’ve been trying to think of a fun way to display greeting cards rather than taping them to the frig (HO-HUM!). Seeing LOTS of garland (a.k.a. bunting) on Pinterest gave me an idea for our fireplace mantel. It was super-easy! I used some of the scrapbook paper from my mini-notebook project and the peanut butter lid from my road trip flowers project to cut out circles. I then folded them in half, unfolded them, dabbed them with a glue stick, and folded them back over some twine. I love how festive and colorful Dave’s birthday cards look now . . . I think I’ll leave them up for awhile! ♥

