
I always love to get out my felt conversation heart garland when February rolls around! Remember to show extra love to everyone in your life this month, and have a fun Valentine’s Day! ♥
Other Valentine’s Day Craftiness:

I always love to get out my felt conversation heart garland when February rolls around! Remember to show extra love to everyone in your life this month, and have a fun Valentine’s Day! ♥
Other Valentine’s Day Craftiness:
 What’s inside these upcycled scrapbook paper/washi tape/twine wrapped potato chip cans? Cookies! We received some lovely invitations for the Memorial Day holiday weekend, so I made treats for hostess gifts. Here is a recipe my sons LOVED when they were little that’s no-fail and easy to transport. Enjoy, and I wish you a happy time of remembrance with your family and friends. ♥
RANGER CRISPIES
1/2 cup + 1/3 cup butter
1 cup each sugar and brown sugar
2 eggs
1 teaspoon each baking powder, soda, salt, and vanilla
2 1/2 cups flour
3 cups crisp rice cereal
Heat oven to 375 degrees. Cream butter and sugars. Beat in eggs. Add dry ingredients and stir until well blended. Stir in cereal. Drop by rounded teaspoon onto prepared cookie sheet. Bake for 8-12 minutes. Let stand one minute before removing from pan. Makes five dozen.
Recently I had the privilege of making a sweater teddy bear for Sharon of Gentlestitches, both shown in the photo below. Sharon sent a well-loved carousel-horse-print sweater all the way from Australia to Kansas, USA and wrote such a lovely post when her bear (now named Eddie!) arrived home. Here’s to bloggy friends near and far! ♥ P.S. Click here and here for more bear love. 
I love to make tooth fairy pillows from well-loved baby or toddler clothes! To transform the Disney World hoodie that Tyler chose, I simply cut it into a square, embroidered a tooth on one pocket and a dollar sign on the other, and stitched and stuffed. So easy! Now he’s eagerly waiting for that first loose tooth! ♥ P.S. Click here for another hoodie tooth fairy pillow and here and here for two more designs.

 Last fall I shared my first sweater teddy bear, made from one of my mom-in-law’s special sweaters. One of the conversations in the comments (with the fun Evgenia of Being Zhenya) went like this:
I love it! Can I have it, pretty please?
If you have a favorite old sweater, you can send it to me and I’ll make you a bear! (I owe you a present anyway after winning one of your giveaways!) Shoot me an email if you decide to go for it!
Really really? And you don’t owe me anything! Let me see if I can find a sweater!
Yes, really! It’ll be fun!
Eventually, Evgenia got a chance to send a couple of sweaters, and I got to work. The large bear is from the same pattern I used before (McCall’s Crafts 703) and the smaller one is from Claire’s cute (and FREE!) Mr. Ted pattern on Craft Schmaft. After a bit of embroidery and button, ric-rac, and flower a-la-mode, they’re all ready to put in the mail to my bloggy pal. I hope you love them, Evgenia! ♥

 It’s been a LONG time since I’ve posted a What Can You Make With A . . .? project, but I have one today! The inspiration was this blue dress. It was soft, swingy, and SO comfortable, with pockets in the side skirt seams, perfect with a black cardigan for chilly days . . . and what’s not to love about polka dots? But my mirror (and an “honest” family member) told me that this was not my best look and added more than a few pounds to my curves. So, out came the scissors.
Ahhhhh . . . much better! ♥


I have a cool new mini-laptop/tablet that’s super-easy to tote around, but I wanted to give it a little protection before adding it to my backpack on my way to the airport last week. I have a dress that I just turned into a skirt, so I decided to use the dress’s top for this project. I started with the elastic-ruffled sleeves, padded them with quilt batting, and folded and stitched them to size. Then I stitched the elastic ruffle from the neckline diagonally along the front, leaving it loose at the sides and back so I can pull it around the case to hold the laptop inside. A fabric flower from my stash made the perfect a-la-mode for traveling in style. ♥

When I saw this post on Thrift Store Crafter, I suddenly remembered that I, too, have a journal upcycled from a vintage book! I also remembered that I’d promised the person who gave it to me (my BFF/sister Susan) that I would actually USE it and not put it away with my treasures, so I got it off the shelf and began listing all the crafts/sewing projects I want to make and tucking in clippings and patterns. Now, when I find myself with a little block of free time, I’ll be all ready to go. And besides . . . this journal just makes me smile! ♥ P.S. Be sure to check out Sarah’s tutorials on Thrift Store Crafter! 
 Happy 2014! I hope everyone had a lovely Christmas season. I had extra fun with my family celebrating Christmas, New Year’s, AND my birthday! And, with several days off from work, I enjoyed some extra sewing and crafting time, too.
Remember my sweater teddy bear? For my first holiday break project I wanted to use up the leftover sweater parts, and I found the perfect idea in the January, 2014 Woman’s Day magazine, submitted by Anna of Lasso the Moon. For mine, I . . .
It’s always fun to have something new to hang after undecorating for Christmas! ♥

Besides my felt peppermint wreath, another favorite decoration at our home is this set of decoupaged J-O-Y letters . . . I made them from upcycled Christmas cards! Click here for complete instructions as well as links to lots of other fun, crafty Christmas projects. ♥

 First of all, THANK YOU for all the lovely comments, good wishes, and over 100 LIKES on my Christmas Bunting post! I met my writing deadline for work and had an extra-special time with our Thanksgiving guests. Before I straighten the house and start decorating for Christmas, I want to make sure you’ve heard about our friend Mahe’s newest “green crafting” e-book that you can get TODAY through DECEMBER 4 for FREE by clicking here! (If you don’t have a Kindle, you can get a Kindle app for your computer—also for free—right here.) The book includes step-by-step photos and directions for a Christmas tree, snowman, package toppers and tags, ornaments, placecards, a mobile, bunting, cards, envelopes, gift bags, and LOTS of fun handmade gifts. Most of the projects are designed by Mahe herself but (as always!) Mahe welcomes guest artists, such as:
You can read about the rest of Mahe’s books here, here, here, and here. Enjoy the rest of your weekend, and I’ll be back with new posts starting Monday! ♥
I had a sentimental sweater from a beloved family member that always seemed to say “teddy bear,” so I decided to give it a go! I have a hand-me-down pattern that was a perfect fit for the sweater front and back (McCall’s Crafts 703), but otherwise I probably would have sketched my own. The eyes only required a bit of embroidery on two of the knit-in designs. Then, since the McCall’s pattern was faceless, I used Claire’s cute (and FREE!) softie pattern on Craft Schmaft to figure out the snout. After stitching and stuffing, the squeezable, huggable Teddy is in the arms of a sweet little one. Plus, I still have the sleeves and a few smaller remnants left for new projects . . . we’ll see what those bits say! ♥
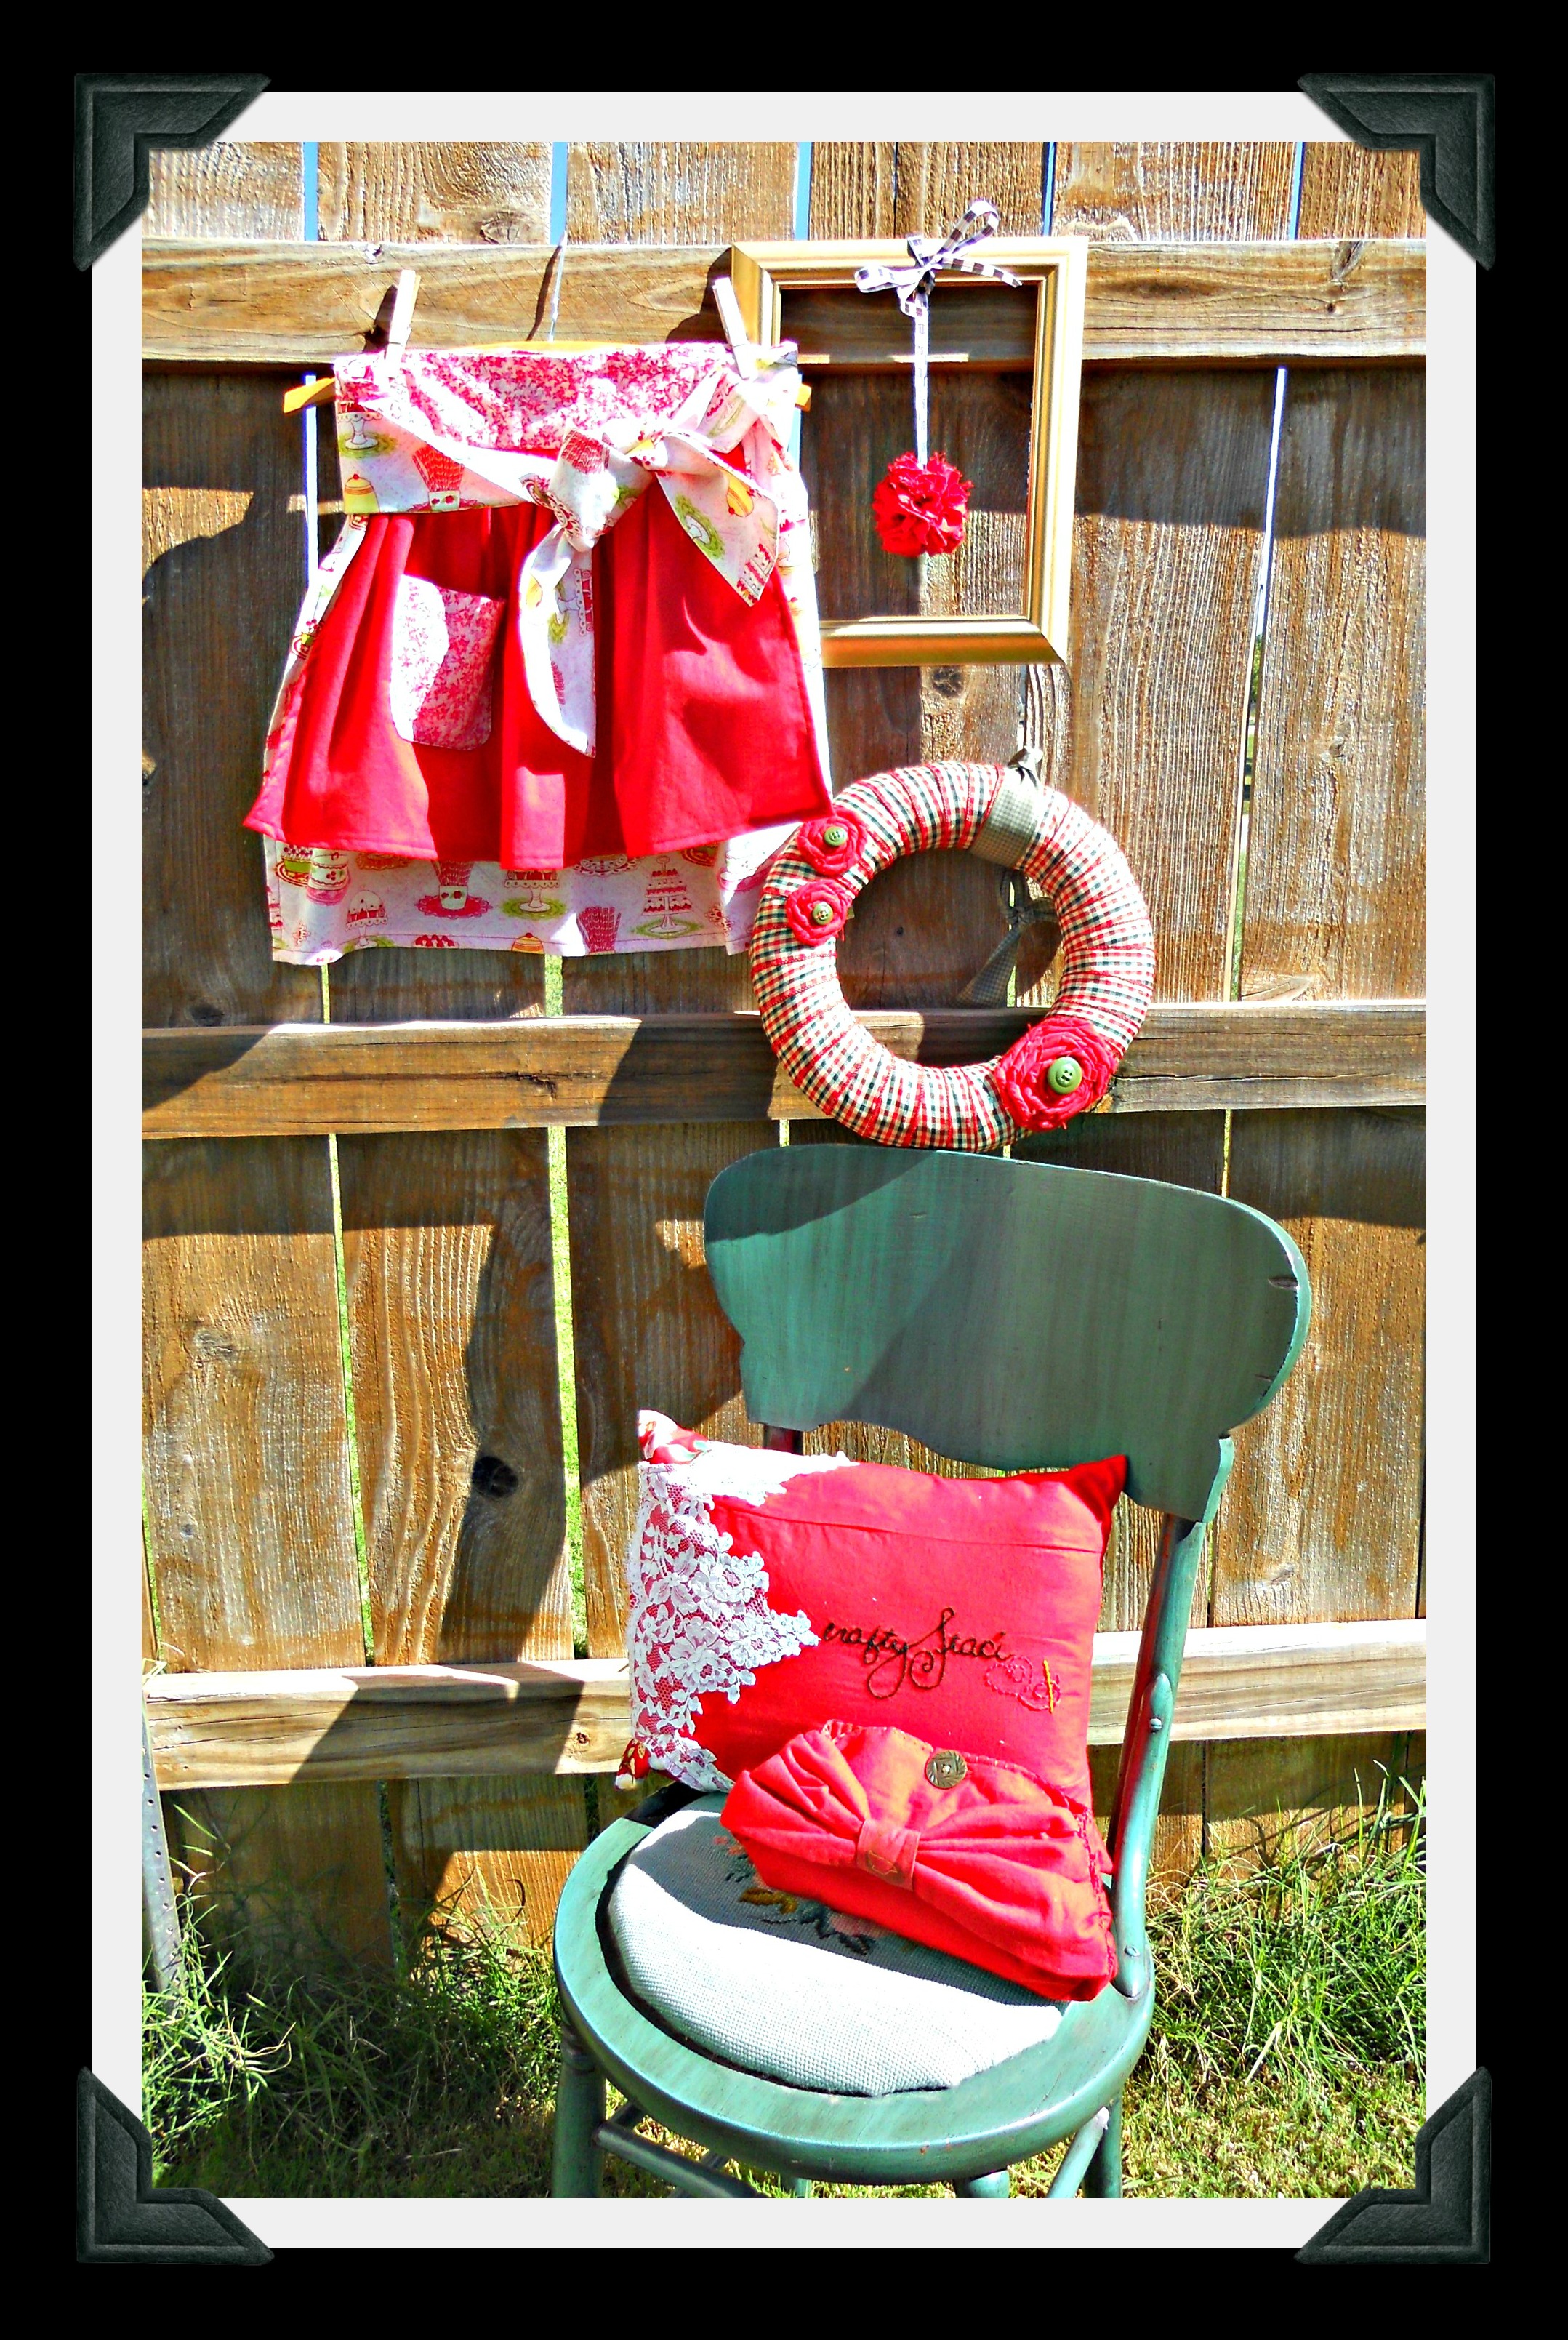
 For my two year blog anniversary, I invited you to nominate people you’ve met through the blogging world who you would like to have as next-door neighbors. It was SO heartwarming to read the lovely comments that came from around the world! The blogger with the most nominations was then invited to send me a once-loved garment to remake into some new treasures and return. This year’s winner was Staci of Crafty Staci, who decided to send her going-away dress from her wedding 22 years ago! She said, “It’s been stored under my bed ever since. I’d love to have it made into some things I could actually have out to enjoy, and red is still my favorite color, so that’s what I’ll be shipping to you.” I was so excited, and when this exquisite handmade dress arrived, my mind started spinning! So . . .today is the reveal! Here we go!
(1) I always like to start with a pillow, and the bodice of this dress was the perfect size to make a pillow cover for a 12 x 16 cushion. After detaching it from the skirt and shoulder straps and removing the boning, I traced and embroidered the logo from Staci’s blog and Etsy shop. Next, I put the pillow inside and nipped and tucked and pinned until I had a perfect fit, then took in the seams and stitched across the bottom. (The zipper is still in the back, just shortened a bit.) To fill in the armholes at the top, I made a lining with a coordinating floral fabric that could peek out at the corners, checked the fit again, pinned, then stitched the top closed. Then all I had to do was trim the seams, turn, press, and zip the pillow inside. I love that I got to showcase the lovely lace on both the front and back of the pillow!

(2) Next, I wanted to use part of the still-gathered skirt to make something to wear and decided on an apron! I found my inspiration on page 40 of my A is for Apron book by Nathalie Mornu which had a short skirt over a longer one. I used pieces from several different apron patterns along with some of my own ideas and two fun fabrics from my stash, and it came together perfectly. Here it is blowing in the wind on photo shoot day!

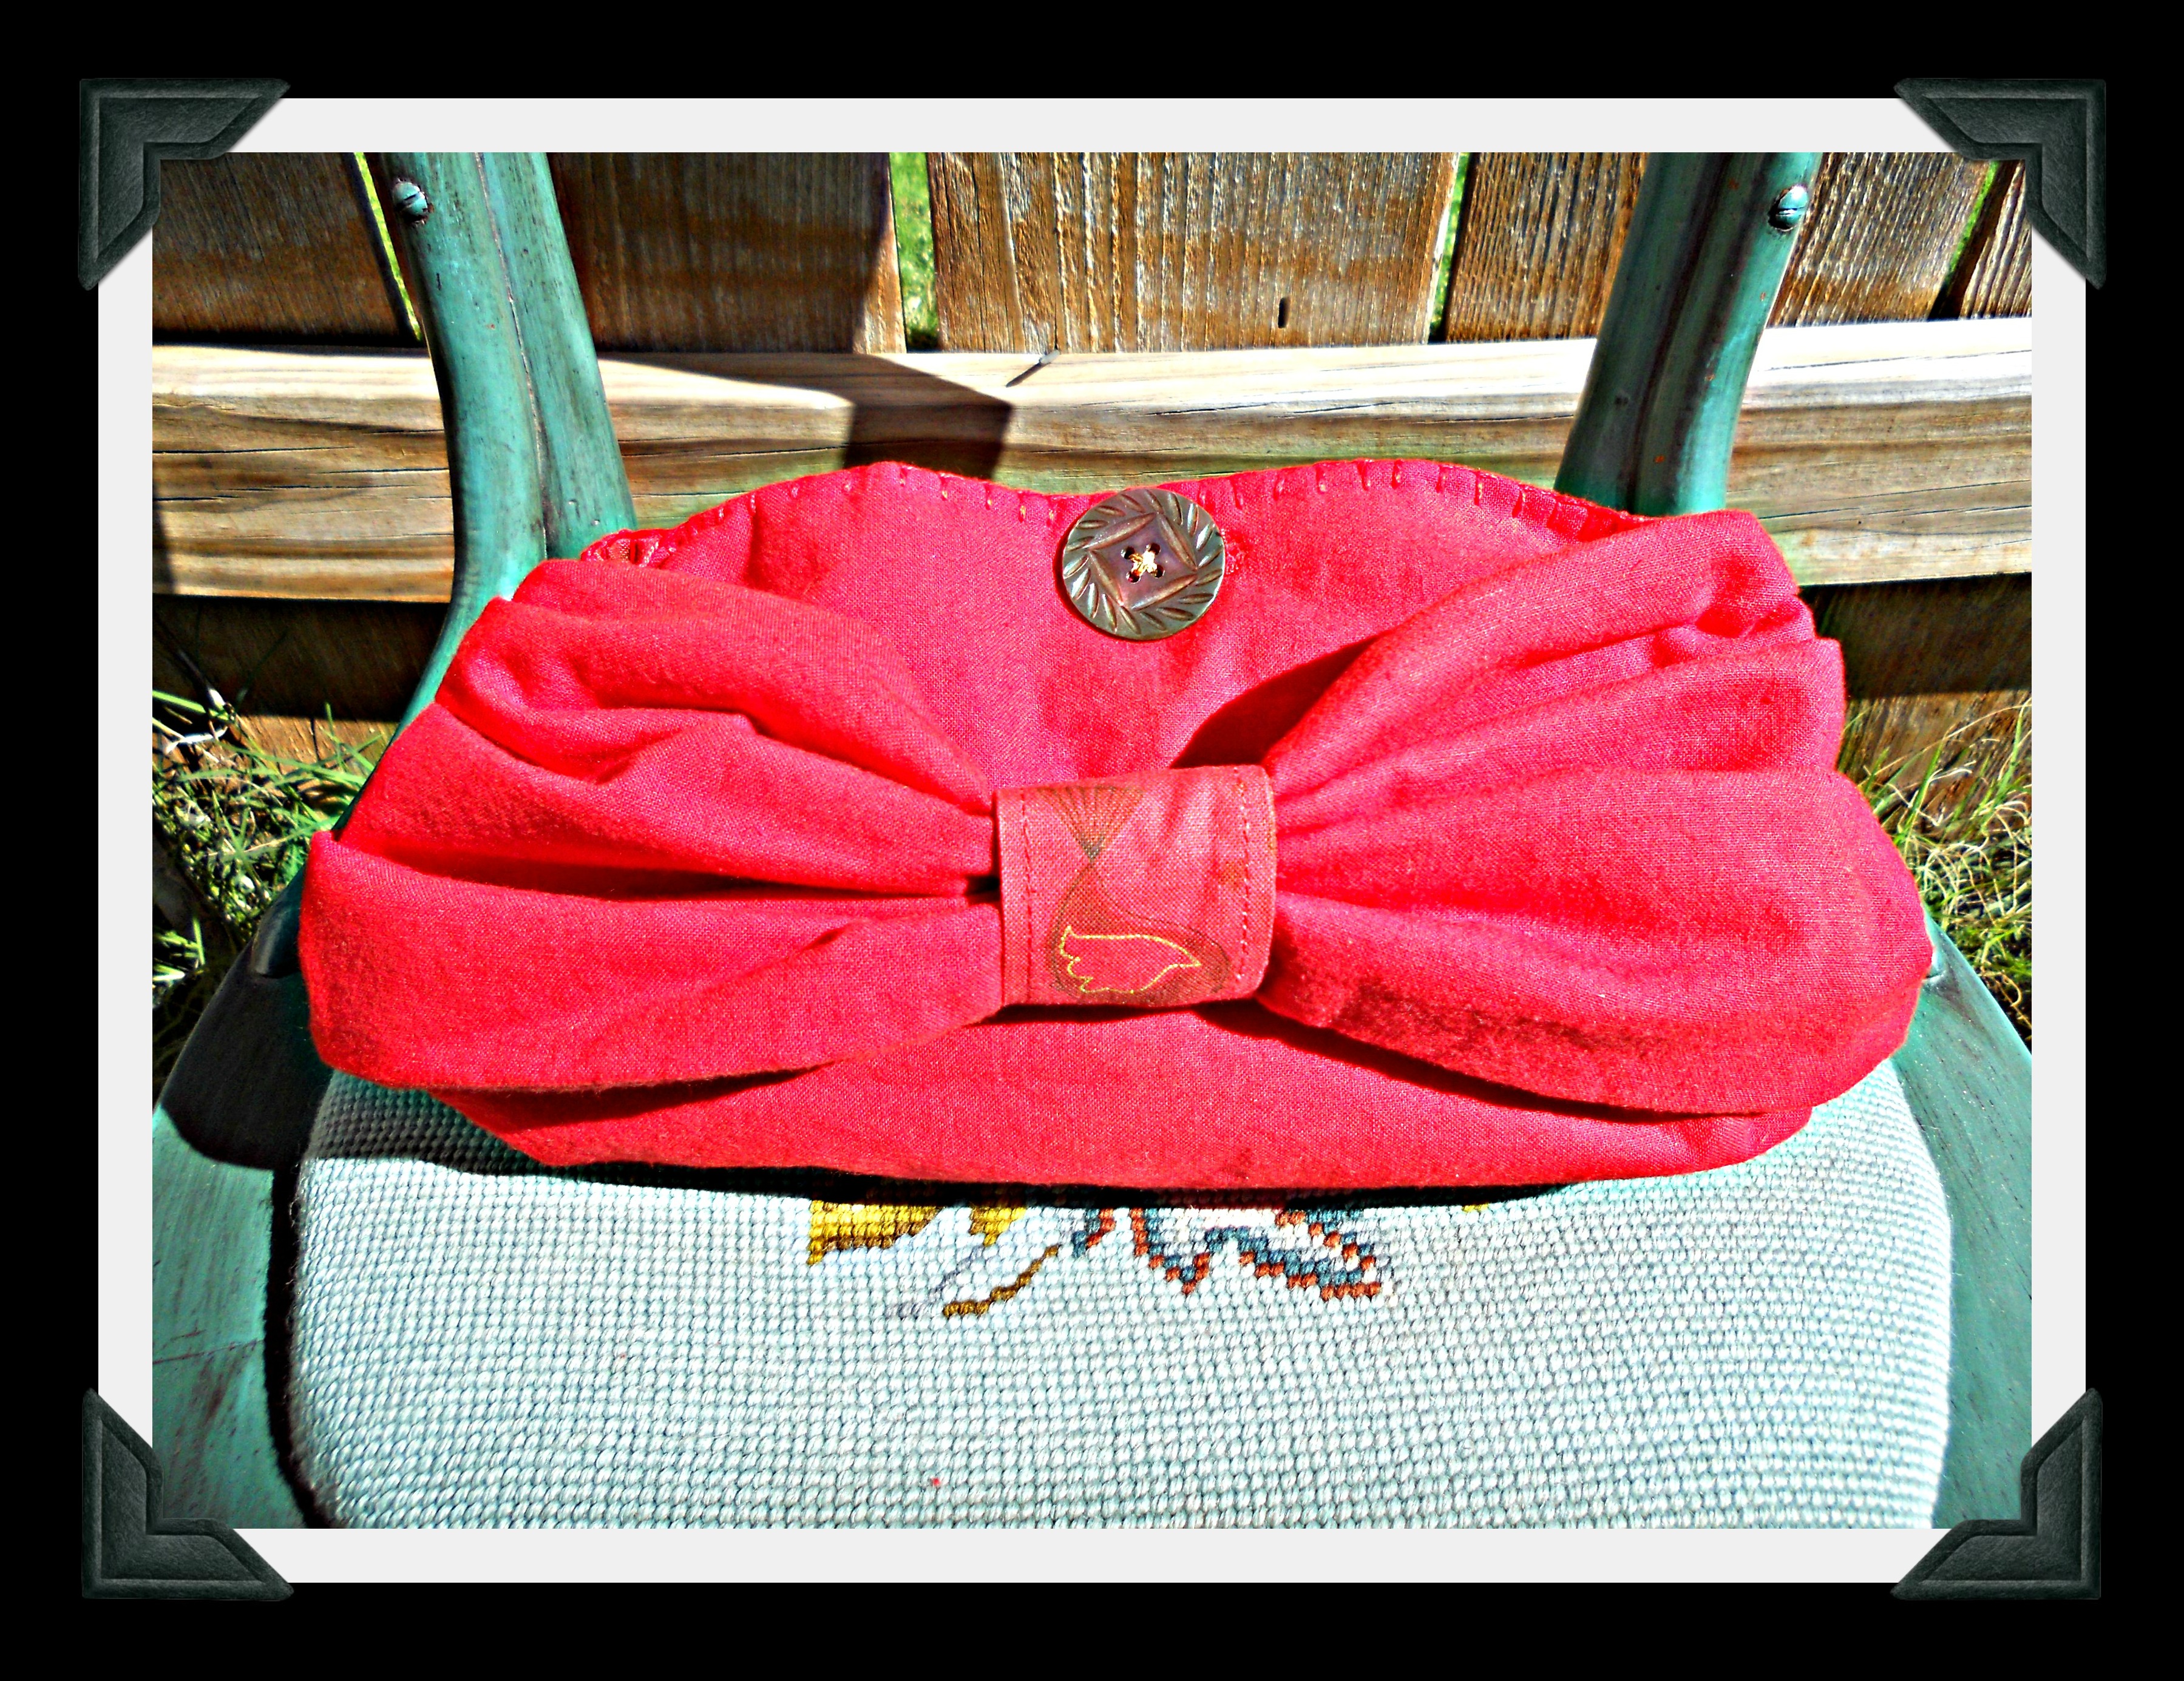
(3) When I saw the size and shape of the shoulder straps, I immediately thought of a bow clutch–one strap for the bag and one for the bow. However, this project turned out to be a little more challenging! I opened up one of the straps for the bag, made a lining from a coordinating fabric in my stash, and attempted to put in a zipper. Since the bottom was already closed up, that was a total fail! So I carefully removed the crooked zipper and simply blanket stitched the top and lining together, then added a button hole and vintage button for the closure. Next, I opened up the side seams and handstitched the other shoulder strap in on both sides, being careful not to catch the lining since I probably should have done this step first! (Since both pieces are padded, the seam was too thick for my machine.) Finally, I used another strip of the lining fabric to cinch the middle of the outer piece to form the bow. So . . . it’s not as perfect as I had envisioned . . . but maybe it will be cute for an evening event where the lights are low??? ♥
(4) The next step was to trim the hem from the skirt. With it, I made three of those fun “twist, coil, and stitch” flowers. I had a straw wreath and some red and green ribbon in my craft stash, so I wrapped the wreath, added green vintage buttons to the flowers, stitched the flowers onto the wreath, and added a coordinating green ribbon for hanging.

(5) Last but not least, I decided to make something kind of artsy and festive with a remaining piece of skirt fabric. I cut it into one-inch strips and made a pom-pom, then I hung it from ribbon on a gold wooden frame from my stash. I hope it will inspire the idea of “celebrating the everyday” as Staci lives her very creative life with her loved family and friends.

Thank you for being our good neighbor, dear Staci . . . and your package is in the mail! ♥
A year or so ago I had fun making some vintage earring magnets but I’ve given them all away, so it was time for another batch. Simply use pliers to pull the hardware from a clip earring, then superglue a sturdy magnet on the back! Then I had a chance to go to a new-to-me antique store last week, and I found a vintage metal tray to use as a magnetic memo board . . . a perfect match! ♥
P.S. What are the memos, you ask?

I found a cute brown and pink “saying” t-shirt for $1 at the crafter’s sale and just had to buy it to make into a pillow for a fun-loving scrapbooker I know! One of my handmade flowers covers up a small bleach spot on the fabric and adds a bit of a-la-mode. Easy peasy! ♥

 THANK YOU for helping me celebrate my second blog anniversary with another amazing outpouring of nominations for the Good Neighbor Award! For every blogger listed below, an avid reader (or more than one!) took time out of her busy schedule to send me an email telling me how much she would love to have you for a neighbor and why. Isn’t that just the most lovely compliment?
Please pick up your button above to display on your blog (if you wish). Nothing is required. I just want you to know that you’ve made a big impression on someone (or many someones!) and that we’re all grateful you’re sharing your life with us. Aaaaaaaaaaaaand . . . the blog with the MOST nominations is . . . Crafty Staci! Click here to read about your prize, Staci, and if you choose to accept it, please email me and I’ll send you my mailing address to get the ball rolling. CONGRATULATIONS! ♥
It has been SO much fun to get SO many email nominations for the Good Neighbor Award this week! I’ll be posting the results this Sunday, September 22, so you still have time to send me the names of your favorite neighborly bloggers! Click here for details . . . and remember that the blog with the MOST nominations wins a prize like the one below! (Click here for a description . . . all made from last year’s winner’s beautiful but no-longer-needed sundress!) Also, I got an email from author/blogger Geraldine Hartman of Veggies, Yarns & Tails and she is offering Kindle versions of ALL of her books for FREE this Saturday and Sunday, so be sure to check them out! (Remember . . . you don’t have to own a Kindle–you can download the app here for your smartphone, tablet, or PC.) Thank you, Geraldine! ♥

For my first blog anniversary last September, I celebrated by hosting the Good Neighbor Award and giveaway. It was so much fun that I want to do it again this year! Here’s the scoop:
AWARD: Simply put, the Good Neighbor Award is for someone you’ve met in the blogging world you wish could be your real-life neighbor. To nominate a blogger, simply email me (to keep it a surprise!) at k_scraper@hotmail.com, including a link to the blog and why you’d like this blogger to live next door. Is it to cook, sew, craft, shop, or write together? To learn to do something new? To be inspired? To visit over a cup of tea? Nominees will receive the award button on my second blogiversary, Sunday, September 22. (Click here to read about last year’s nominations!)
GIVEAWAY: The person with the MOST nominations will be invited to send me a formerly-loved garment that I’ll make into some fun treasures and return. (Click here and here to read about last year’s winner!) Thank YOU for being MY good neighbors the past two years, and I hope to hear from you soon! ♥
 When I did my spring cleaning this year, I found a few forgotten treasures in the closet. One was a “miniatures” shelf that we used in our last house.
When I saw this post, I knew just what to do with it! Even though Mandy re-purposed a cutlery tray instead, the idea worked perfectly.
All the leftover spools are still on their kabobs in a bowl. (I have a LOT of hand-me-down spools of thread . . . lucky me!)
I love the fun shots of color in my sewing room! ♥

Do you follow Awesome Sauce and Asshattery? If you haven’t discovered it yet, please pay Sheri a visit soon! Her creative projects and fun-loving writing style are guaranteed to inspire you and make you smile. Sheri has also written TWO books now! I previously reviewed the first one, Life on the Zig Zag, which is now available in a Kindle version. And Sheri is offering the second book in her “Confessions of a Refashionista” series called Bewitched Bedsheets FREE from Friday, August 30 through Sunday, September 1! It’s on Kindle, too . . . but remember that you can read Kindle books on any PC or tablet with the free Kindle App. I can’t wait! Click HERE for complete details and worldwide links, and thank you from all of us, Sheri! ♥

I have a super-lightweight coral cardigan that I made even more summery by cutting and hemming the sleeves to 3/4 length. You may have some cuffs lying around from your altering/refashioning projects, too! To turn them into pouches, simply stitch the ends, sew on buttons and cording loops, and fold them over . . . perfect for presenting a gift card or jewelry gift to someone special! ♥

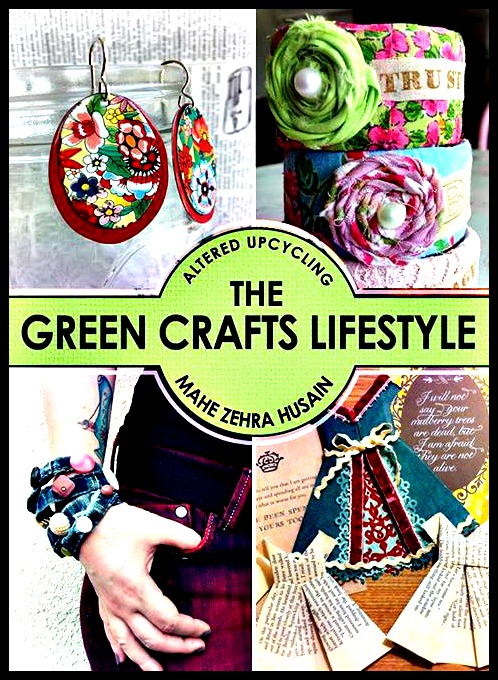 In June, I wrote in this post about our crafty upcycling friend Mahe (aka MZ) that included a call for submissions for her new upcycled craft book. The Green Crafts Lifestyle is now out, and it’s amazing! It includes sections on paper, plastic, wood, metal, and fabric and has projects from 20 artists around the world, including four of my bloggy friends:
Along with 35 projects detailed on nearly 200 pages of photographs and step-by-step directions, you’ll find author bios and photos with links to their blogs, websites, and other online contacts.
Now for the promotion! To provide all crafters with a chance to learn from these techniques, Mahe’s Altered Upcycling business will provide unlimited FREE Kindle copies of The Green Crafts Lifestyle this Friday, August 16 through Sunday, August 18! Kindle doesn’t restrict you to its device; you can read the book on any PC machine or tablet with the free Kindle App. Simply click HERE for your free copy.
AND . . . drum roll . . . MZ is looking for MORE submissions from MORE of you! In her words: “We need talented artists, crafters, and upcyclists to provide projects and tutorials based on upcycling and green crafting. Altered Upcycling will take submissions for Part 2 of “The Green Crafts Lifestyle” series, and the project submission deadline is August 31, 2013. Please make sure you send tutorials that upcycle wood, plastic, paper, glass, or fabric. The tutorials must be in MS Word format with the pictures embedded in the doc file. I will also need a photo of you as well as an artist bio and links to your blogs, Etsy shops, etc. Please email tutorials to thecraftycan@gmail.com. Let’s save the world one craft project at a time!”
Thank you, Mahe! ♥ P.S. If you haven’t entered my “Catch-up Giveaway,” please click HERE!
 I’m taking a month off from blogging to finish a big writing assignment and go on a little trip. (Will I have the willpower not to click on my WordPress reader with my morning coffee??? We’ll see . . .) But first, I want to share my latest “What Can You Make With A . . . “ project. I got this dress from my friend Liz who bought it at a rummage sale for ONE DOLLAR! (Click here to meet her.) The color and fabric were perfect for some shabby chic projects, like . . .
Here are the creative bloggers and authors who inspired me. See you in August! ♥
Fabric Rosettes: Sweet C’s Designs and Diary of a MadMama (except I stitched instead of glued)
Zipper Flowers: A Creative Princess and Awesomesauce and Asshattery
Apron: Page 51 of One-Yard Wonders by Rebecca Yaker and Patricia Hoskins (“Granny’s Clothespin Apron” designed by Elorie Bechtel)
Lace-Decoupaged Pot: Urban Comfort


 We had a small porch side table whose top recently met its demise. See the little suction cups in the first photo above? They don’t work! So, when the table tipped, the resin top fell out and broke into several unrepairable pieces. But . . . no loss! It wasn’t a family heirloom or cherished purchase, just a handy place to keep a cup of coffee and book while sitting on the porch. And now I like it even better! Last summer I acquired a wire serving tray by disassembling a floor fan whose motor burned out. I’ve used it a few times, but it mostly sits in the pantry WAITING to be used, and the metal was a perfect match for the table stand. So, I:
Now, come on over for a visit on my porch ANYtime! ♥
And, in the spirit of upcycling, please read the following call for submissions from our friend Mahe whom you’ve met here and here and here. She has an exciting plan to get your projects and name out to like-minded crafters and artists around the world!
Dear friends of Pillows A-La-Mode,
My name is Mahe Zehra, but I mostly go by MZ. I am a mathematician by training but an artist by nature, so in addition to my day job at a software company, I have a small green crafting company of my own called Altered Upcycling.
I chose this name because I think it explains my art style. I apply mixed media and altered art techniques to materials that are recyclable. I make art from paper scraps, soda cans, and plastic packaging. I have written several books and videos available on Amazon.com.
My latest venture involves putting together a book that brings upcycling projects to and from crafters and artists from all over the world! The book will contain 35-50 tutorials, each accompanied by the submitter’s photo, a short bio, and any other links you want to promote.
This book will be a great advertising opportunity, as I will be marketing it to my 5000-strong Facebook audience and my crafting mailing list as well as on my blog. In addition, I will run ad campaigns and offer free downloads on Amazon. Globally, the book will make its way to 10,000-20,000 readers!
I would LOVE for you to be included in this book! All I need is a craft project that focuses on upcycling. The tutorial should have pictures or a video and clear, step-by-step instructions.
Please sent your submission along with your photo, short bio, and links by Monday, July 22 to thecraftycan@gmail.com.
I’m looking forward to hearing from you!
MZ
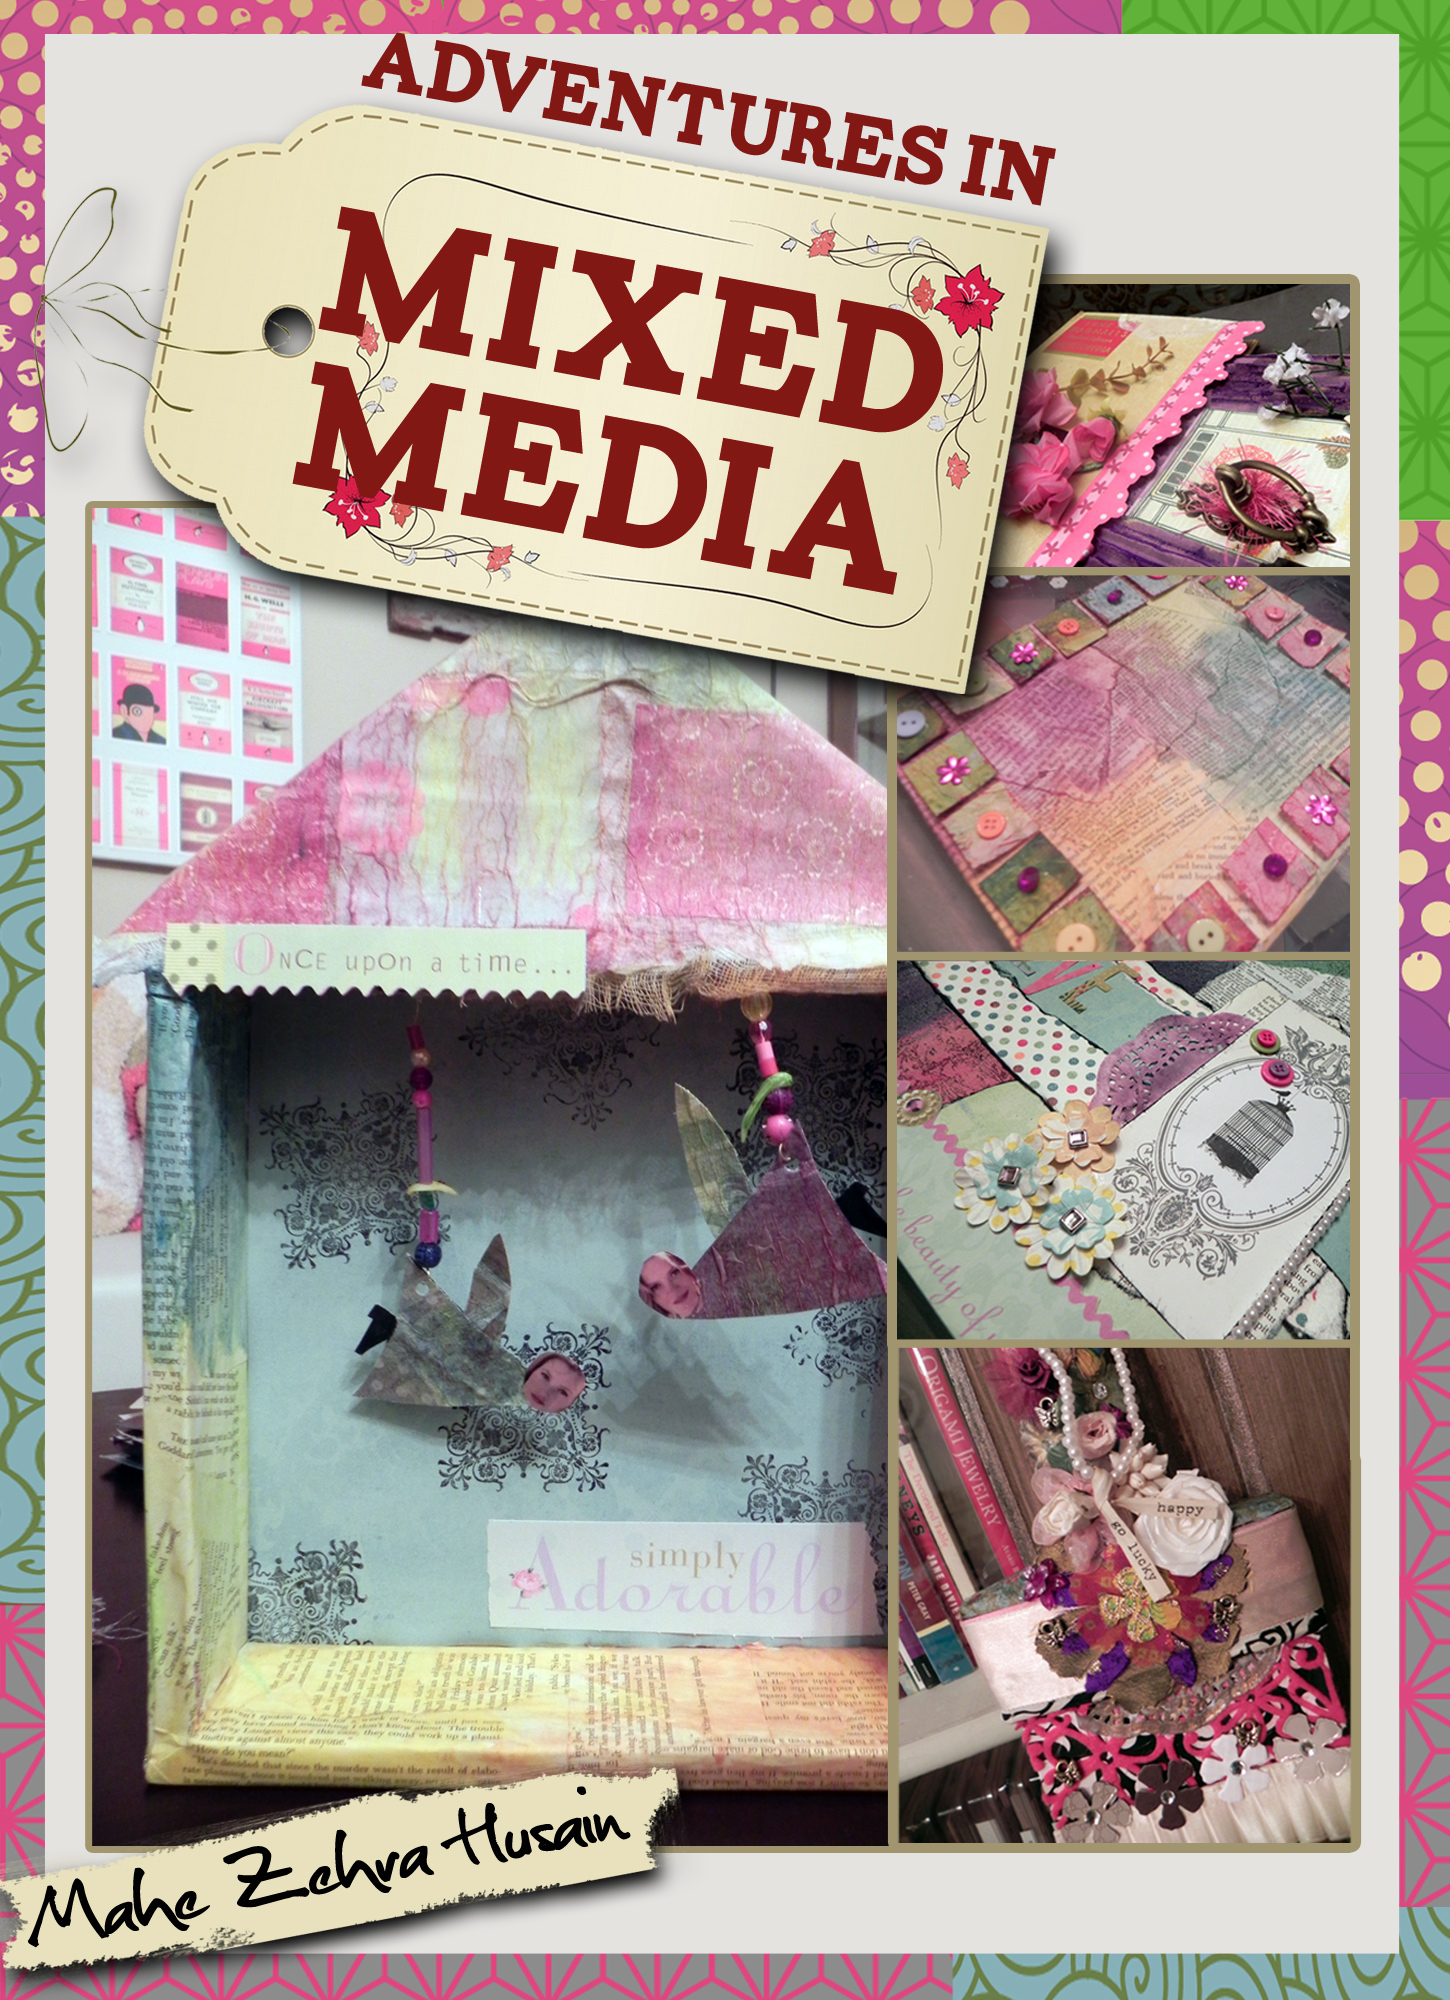 In the past, I’ve shared reviews of two of Mahe Zehra Husain’s fabulous upcycling books, The Ultimate Guide to Upcycling and Make a Card Awesome. So, when she asked if she could send a preview copy of her newest publication, I was more than happy to agree! This one is called Adventures in Mixed Media: A Step-by-Step Guide to Creating Beautiful Pieces of Art. It includes chapters on:
I love the way Mahe describes how she organizes her craft room to store “found” items, and the sections on “7 Unusual Sources of Paper” and “Let’s Go On a Treasure Hunt” had my creative juices flowing! Mahe includes YouTube videos for each of her techniques, as well as complete written directions and photographs of all papers and projects. You’ll love Mahe’s friendly, conversational writing style, too! You can get your copy by clicking here at Amazon.com or any time from my Shop Love! page above.
Oh, and remember that Mahe’s first book is ALWAYS available for FREE at her web site, Altered Upcycling. Thank you for all you do to care for Earth as you create, Mahe! ♥
 I am the VERY excited winner of the recent one-year blog anniversary giveaway by Linda (aka LubbyGirl) of the REmissionary! From a pair of jeans, Linda created this cute bag with two pockets on the front, a big pocket on the back, a zippered pocket and a snap pocket inside, and a tab and button closure . . . and I love the way she attaches the strap to the front on one side and the back on the other to make it lay perfectly flat against your body when you hang it over your shoulder. Linda doesn’t have an online shop yet, but I hope she opens one someday with her fun creations like this and this and this. She has also inspired me to start saving old jeans that family members no longer love so I can do some projects of my own. Besides collecting jeans, I’ve been collecting links from my blogging friends! If you have a jeans refashion/upcycle project that I don’t have on my list yet, would you be kind enough to put a link in the comments so I can add it? Thank you! And thank you to Linda for the lovely gift! ♥
 Denim Projects
 March 2 is Dr. Seuss’s birthday! When I taught first grade, we always celebrated by wearing Dr. Seuss T-shirts, cooking green eggs and ham in the classroom, and reading all the kids’ favorite DS books. But now that I’ve moved on to a different career, I decided to use this well-loved T-shirt for my next “What can you make with a . . .” refashion.

 In my “Meet an Upcycling Queen” post last month, I introduced Mahe of Altered Upcycling. Many of you picked up the free ebook she offers from her blog and loved it! Now Mahe has another free offer starting TOMORROW, February 23 and running through Wednesday, February 27—a card-making ebook available here on Amazon.com. (If you don’t have a Kindle, you can download “Kindle for PC” from Amazon.com here, also for free.) Mahe was kind enough to send me a preview copy, and I found:
Please take a moment to help yourself to this lovely gift which is regularly $2.99 but ours for free for the next five days. Thank you, Mahe! ♥

 I got this bright red, gently-used sweater along with a couple of other items for free at a consignment store with a Groupon gift certificate! It was too wide and too short and stretched out here and there, so I immediately knew it was going to become my next What can you make with a . . . project.
First, I made the heart mini-pillows I shared in this post. Then I made the big sweater pillow I shared in this post. After that, I made a business card/gift card/credit card/reward card case with floral pockets and a vintage earring button closure (click here for a great tutorial from The Crafty Cupboard) and three flower brooches with vintage earring centers. The neck and hem ribbing I hadn’t used up as ruffles on the big pillow will be package wraps (picture a small box wrapped in kraft paper with these pretty red buttoned bands stretched around them). Finally, I cut all the little bits into triangles and made bunting by stitching them onto the fun button-design ribbon I recently bought from Lizzie Rose Jewelry.
Another fun haul! ♥

I recently received a bag of vintage sweaters for pillow making, and I just fell in love with this fun print. I used everything from the armholes down, leaving the zipper in the middle for a-la-mode, stitched, and stuffed. It still has the side-seam pockets, too! I think I’ll give it as a birthday or Christmas present and tuck a gift card in the pocket. Then the recipient can use the pockets for . . . hmmm . . . the TV remote? Earphones? Tissues for a sad movie? Or . . . M&M’s??? (OK, I’m still thinking about chocolate after that last post!) ♥

In the spirit of Valentine week’s focus on pink and red . . . how cute is this??? It’s a little girl’s bag upcycled from a little girl’s smocked dress that will make a perfect gift for a little girl in my family! You can see creations like this one at my blogging friend Vicky’s Etsy shop called Vicky Myers Creations, including drawstring bags, corsage bags, messenger bags, shoulder bags, bucket bags, and knitting needle cases. As Vicky describes her business, “I love making new items out of recycled materials, upcycling fabric remnants and old clothes into new bags. Using many textures, colours, and patterns, I create unique handmade bags. Each bag has a label describing where the fabric has been sourced.” Please check out Vicky’s blog, her shop, and her FB page from this post or anytime from my Shop Love! page above. Thank you for my adorable purchase, Vicky! ♥

 Remember the little hearts I sewed on my recent travels—upcycled from a sleeve of a cozy old red sweater?
I used two of them for little-girl barrettes with pink button a-la-mode and all but four for my heart-to-heart garland.
Then I looked at the sweater again and decided that the body had to become a BIG red Valentine pillow, like this:
It’s the softest pillow ever! ♥
P.S. The drawing in my office is a print of I’m Into Art by Elizabeth “Grandma” Layton of Wellsville, Kansas. You can read a biographical sketch of Mrs. Layton’s life and see close-ups of her drawings here. She’s one AMAZING lady!
 Do your New Year’s resolutions include using more of what you already have in your crafting, gift-making, and home decor? Then you’ll want to meet Mahe at The Altered Upcycling Blog and Altered Upcycling. Mahe explains that she has a Master’s degree in Operations Research, works at a software house, and is an avid altered artist who is constantly looking for ways to make the world greener one small craft project at a time. And, if you sign up on her blog or web site, you’ll receive her FREE pdf book called The Ultimate Guide to Upcycling for one-of-a-kind jewelry, cards, gift bags, wall art, and more. Mahe sends out free ideas and how-to videos in her email newsletter as well, such as how to make a beautiful card from a dinner napkin, old dictionary page, leftover ribbon, and glue! Mahe writes in a friendly, conversational style as if she’s sitting right beside you, includes what worked and DIDN’T work for her, and supports her ideas with step-by-step directions, photographs, and alternatives. You can get your copy by clicking on the link in this post or any time from my Shop Love! page above. Thank you, Mahe! ♥
 My blogging friend Sheri of Awesome Sauce and Asshattery was kind enough to send me a complimentary copy of her new book Confessions of a Refashionista: Life on the Zig Zag. Sheri autographs the books AND includes an item to refashion to get you started! My gift was a beautiful thrifted scarf, which Sheri suggested making into a scarfigan (page 6), crisscross vest (page 63), infinity scarf (page 64), or even a new neckline or sleeves for a shirt (pages 44 and 58). How cool is THAT??? You can read all about her book (and see fun photos of Sheri!) in this post . . . but here are some of my favorite parts:
You can read a review of Sheri’s book at Designers Against AIDS (where Sheri donates a portion of each sale) and purchase Sheri’s book at Sew Much Fun or Dawanda. Oh, and Sheri has another store, too: Mensch T’s. And remember that you can find Sheri’s book anytime in my Shop Love! page above. THANK YOU, Sheri! ♥

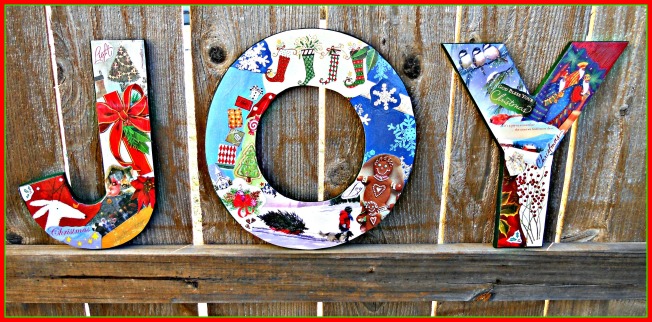
Welcome to the “JOYFUL” edition of Collectively Creative, hosted by Kelly of Cobwebs, Cupcakes & Crayons! My project is easy and fun . . . similar to the Instagram collage letters I made this summer. . . . and I love how it turned out!
(1) Purchase some wooden letters at a craft store. Mine are 12 inches tall and were on sale for around $2 each.
(2) Optional: Paint the letters and let them thoroughly dry. I spray painted these with the green paint left over from my antique milk bottle project.
(3) Get out Christmas cards you received and saved from last year and cut out pictures and words to fit the shapes of the letters, overlapping them as in a collage. Attach these bits with Mod Podge. Or, if you don’t have cards available, use images and words from holiday magazines.
(4) When each surface is covered to your satisfaction, coat the entire letter with Mod Podge and let it thoroughly dry.
(5) Display your letters on a shelf or drill small holes or attach hanging hardware to the backs and hang them on the wall. Mine are now over the stairs along with my peppermint wreath where they’ll greet our Christmas Day guests at the front door. ♥
P.S. Before I link to our other Collectively Creative posts, I’d like to give a shout out to some other amazing bloggers who have shared their J-O-Y this season. Thank you to ALL of you for your inspiration!
Made in a Day (and here!)
![]() COLLECTIVELY CREATIVE:
COLLECTIVELY CREATIVE:
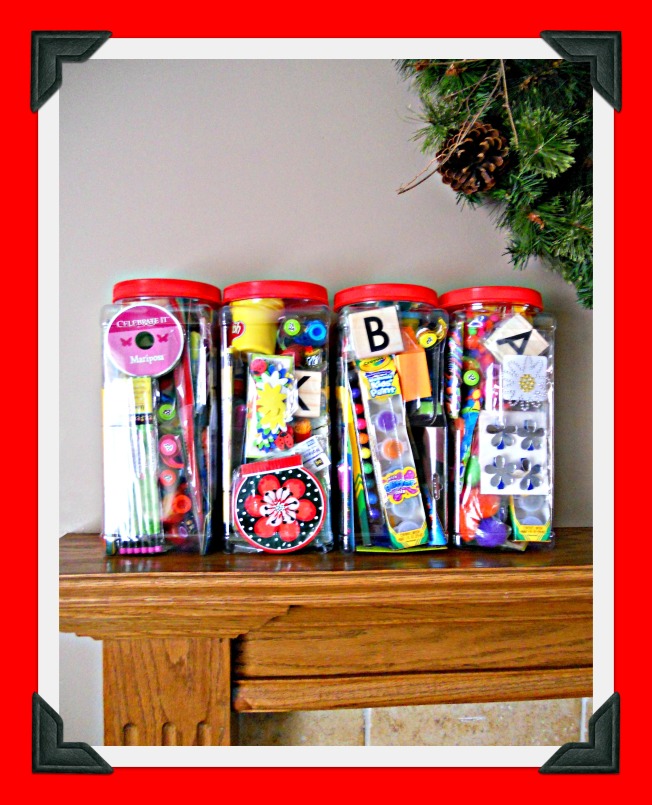
A couple of years ago I saw a kids’ art jar online and thought it would be the perfect gift for a special little girl’s birthday. It was so colorful and intriguing . . . but when we dumped everything out, I found LOTS of pretty raffia filling and WAY too few actual art supplies. Live and learn, right? So, when my dad was preparing for a recent move and asked if I’d like to have some empty plastic snack containers, I immediately thought, “ART JARS!” I began collecting artsy/crafty items from the dollar bins at Michaels and Target, plus hitting the dollar stores, and soon had a huge bag of fun things to include. These will be under some Christmas trees soon! ♥
 Awhile back I wrote a post about my blogging friend Laura of As Time Goes . . . Buy and how she inspired me to do the Good Neighbor Award project and refashion for my one year blog anniversary. Laura has been traveling, and I’ve been sewing, but she’s home, and I’m finished . . . so today is the reveal! Laura, your coat is now on my “What Can You Make With A . . .” page, and your package is in the mail! I was able to make:

 As you know, I’ve been having tons of fun with my “What Can You Make With A . . .” series (see page in header), so I MUST share who inspired me to offer a “makeover” for my one year blog anniversary prize! Following one of my posts, I had the following comment conversation with my blogging friend Laura of As Time Goes . . . Buy:
Laura: Okay, that’s it. I can’t take it anymore. Either you are going to have to adopt me or I am sending you all my old clothes so you can turn them in to cool new things. Of course you’ll have to send the new things back to me. ![]()
Me: Actually, now I want to do that!!! Because you have such a beautiful wardrobe, I can only imagine what fun I’d have! ![]() Send me an item you no longer wear . . . and I’ll work my magic and mail it back to you, and we can both blog about it. Okay???
Send me an item you no longer wear . . . and I’ll work my magic and mail it back to you, and we can both blog about it. Okay??? ![]()
Laura: Seriously?! That is so cool! Now I will be up all night thinking about what I can send…but I have a thought. I’ll email you tomorrow. I’m soooo excited!! ![]()
Me: Yay!!! Can’t wait! ![]()
So, I thought if Laura would think this was fun, maybe someone else would, too. Thank you, Laura! And check out the A-M-A-Z-I-N-G jacket Laura sent (and click on the photo to see the beautiful embroidery!) . . . all the way from Australia to Kansas, USA! I’ll be posting on it sometime in November . . . stay tuned! ♥

 For my one year blog anniversary, I invited you to nominate people you’ve met through the blogging world whom you would like to have as next-door neighbors . . . and to tell why. It was SO heartwarming to read the lovely comments that came in from all around the world! The blogger with the MOST nominations was then invited to send me a once-loved garment to remake into some fun treasures (a-la “What can you make with a flannel shirt?,” “What can you make with a lace tank?,” and “What can you make with a polo shirt?“) and return. The winner was Kelly of Cobwebs, Cupcakes & Crayons! Kelly said, “After the shock wore off I ran to my closet to decide what I was going to send. I chose a little sundress that has a lot of happy memories attached to it, but now that I’m a mama seems a little, well…SHORT. I know that I will never wear it again, so I am very excited to send it off!” So . . .today is the big reveal! In addition, this project will have a permanent home on the “What Can You Make With A . . .” page on my header.
Done! Kelly . . . your package is in the mail! ♥

 I was rummaging for a frame yesterday and found my long-lost fork easel! I didn’t make it . . . I bought it at a craft show. But I think I could make one now that I know A Ponytail Kind of Day! She has a post here about her fork easels. Plus, if you go to her Category Cloud and click on “silverplate,” you’ll see knives, forks, and spoons made into candleholders, bracelets, necklace pendants, money clips, vases, key chains, and napkin rings! I’ll try it if you will! ♥
P.S. Click here for a tutorial for a rock and wire photo display option . . . another fun upcycle! P.P.S. And now I just discovered this AMAZING silverware starburst mirror! You must check it out! P. P. P. S UPDATE: Spoon rings now on A Ponytail Kind of Day! 🙂

Do you have toy dinosaurs in your toy box? I do! Now one of them is holding my bangle bracelets! He’s so cute . . . and a surprise pop of fun in the room. P.S. Check out these dino ring holders on My So Called Crafty Life, too! ♥

 UPDATE on 9-22-12: Click HERE to read the heartwarming results of this post! ♥
One week from today is the anniversary of my first WordPress blog post! Since I’ve discovered how many people around the world I’d love to have for next-door neighbors, I’d like to celebrate with a new award and giveaway!
AWARD: Please nominate a WordPress blogger (or lots of them!) for the “Good Neighbor Award” in an email to me at k[underscore]scraper@hotmail[dot]com (to keep it a surprise!), including a link to the blog and why you’d like this blogger to live next door. To cook/sew/craft/shop/write together? To learn to do something new? To be inspired? To visit over a cup of tea? Nominees will receive the award button on September 22.
GIVEAWAY: The person with the MOST nominations will be invited to send me a formerly-loved garment that I’ll make into some fun treasures (a-la “What can you make with a flannel shirt?” or “What can you make with a lace tank?” or “What can you make with a polo shirt?“) and return. THANK YOU for reaching out in friendship this past year, and I hope to hear from you soon! ♥
Awhile back I posted photos of some vintage treasures from my dad, including an old kite he’d found in his garage. After being assured that no one had ever been able to get the kite to actually fly, I agreed to take it home to upcycle. When I took it back out to “study,” I noticed that it had two long, skinny pockets, which made me think of the plastic bag holders I’ve seen some other creative bloggers make. (Like you, I really DO try to remember my reusable tote bags for shopping, but . . . ) So, I folded it in half vertically and zigzagged along all the seams, which resulted in three more bag-stuffing spaces. With a piece of pretty rick-rack threaded through the kite string loop for hanging, it’s all ready to go! P.S. I love these upcycled can trash bag containers from Neaten Your Nest, too (and check out Erin’s beautiful new business logo while you’re there!). If you’ve posted a tutorial for bag storage, please send me a note in a comment and I’ll add your link here. Thank you! ♥

 I’m at it again . . . trying to figure out fun ways to repurpose empty mint tins! I’ve already had a chance to try out my mint tin sewing kit, so this time I decided to make one into a game.
(1) Decorate the top with a tic-tac-toe symbol using paint, scrapbook paper, tape, ribbon, or fabric with embroidery (my choice!).
(2) Find five each of two different colors of buttons.
(3) Glue magnets on the buttons.
(4) You’re ready to play . . . perfect for home, the car, or restless little ones at a restaurant or waiting room.
Click the photo for a larger view, here for the super-cute version at Art + Baja that gave me the idea, here for a tic-tac-toe game made of felt, and here for another wonderful mint tin craft by Look What Mommy Made! ♥
Have you checked out the crafting ideas on the Country Living web site? I want to try them ALL! But I started with an easy one . . . frig magnets made from vintage jewels. I don’t have the brooches they suggest, but I have LOTS of clip-on earrings. Simply remove the backings and glue on a magnet . . . easy peasy and SO pretty! P.S. You can also click the blue dot on the CL home page to vote for the Reader’s Choice 2012 Blue Ribbon Blogger Award. It was really fun to check out all the finalists! ♥


 Nothing is more relaxing than breakfast on the porch on a late summer morning. Of course, this requires a serving tray, such as this wire beauty I got
 for $24.99 at the local home goods store free from the garage! Yes, we have a floor fan in which the motor burned up after years of service, and I haven’t been able to throw it away. I knew the front came off, so that’s the first piece I salvaged. I can use it to serve a meal, display fun items, or as a seasonal centerpiece with the addition of a liner cushion I made from a remnant and quilt batting. Now, what to do with the rest of the fan . . . P.S. If you haven’t made these cinnamon roll-ups yet, you must try them! Click here for the recipe! ♥

 Remember the placemat pouches I made earlier this year? Today I turned one of them into a gift for a new mom by:
(1) making a super thin, soft, washable changing pad from a $1.99 child’s paint apron from Michaels (with enough fabric left over for one more pad and some other projects, too!)
(2) adding a small package of wipes and a diaper, and
(3) composing this poem (click to enlarge) to pin to the clutch.
Super fun, super easy . . . and I think she’ll like it! ♥


When I made the tablecloth + napkin curtains for the bedroom, they replaced two valences which are now pillows! To make the necktie flower a-la-mode:
I’d like to thank . . . in training for the inspiration and for suggesting that I try using neckties for flowers! ♥


Sometimes the pillow stuffing I buy has wooden chopstick-like instruments packed inside to help poke the fluffy stuff into tight corners. I’ve been collecting them in my desk drawer knowing that someday a light bulb would go on and I’d think of a creative way to use them. It did! 🙂 I wrapped embroidery floss around each grooved end to create a “stop,” slipped my thread over the sticks, and stood them up in a parfait bowl to display on a shelf. Now, instead of hiding away in a tote bag, the colorful spools are an easily-accessible part of my sewing room decor. I love it! ♥

I just finished six new necktie wristlets . . . so easy and fun! The only thing I changed from the original tutorial was to sew the decorative button on the front flap and use a snap closure rather a button/buttonhole. Now I can’t wait to give them to some special girls in the family! ♥

I’ve missed making pillows, so after church and lunch out with Dave on Sunday I spent a happy afternoon at my sewing machine. And, since my creative blogging friends suggested using some of my road trip flowers as pillow adornment, I did just that . . . adding in one sweater flower as well. All of the fabrics are remnants or upcycled curtains, and all of the pillows are 14 x 14 inches. I can’t wait to start giving them to my family and friends! ♥


 This was a quick and easy T-shirt-to-pillow upcycle, but it was extra fun because the person who gave up the T-shirt (my mother-in-law!) thought that one of her favorite items of clothing was heading for the rag bag due to some spots and tears (luckily not on the parts I wanted to use!) and was SO surprised (and happy!) to see it return in its new form. This pretty design, a combination of applique and embroidery, appeared on the front of the T-shirt. A smaller version appeared on one sleeve, which I cut off and stitched to the corner. Oh, and at the last minute I decided to a-la-mode it a bit with some different sizes and shapes of pastel buttons in the centers of the flowers. Now Vida has a little garden blooming on her sofa! ♥

 I posted one of these placemat tote bags awhile back (click here for tutorial), and now I’ve finished the last two. It was fun choosing lining fabrics, and I think they make a great set! I may even do something decorating-wise with them . . . we’ll see! ♥

 After using the short end of a tie to a-la-mode a onesie I still had the rest of it left, so my next project was a necktie wristlet. I’ve seen some fun photos of these on Pinterest but didn’t have a tutorial, so I made one up as I went along. It turned out great, and I think it will make a fun girly present . . . perhaps with a gift card tucked inside. ♥
NOTE: The numbers on the directions match the numbers on the pictures in the gallery below. Click on a photo for a larger view.
(1) Cut the necktie 16 inches from the large end.
(2) Unsew the tie a bit in order to cut off about two inches of the lining so it doesn’t get too bulky when you turn the end under.
(3) Make square corners at the end, turn under, and hand stitch in place.
(4) Cut 13 inches from the middle (skinniest) part of the tie. Unsew it and remove the lining.
(5) Fold this piece in half the long way, pin it, and stitch the sides together to form the wristlet’s strap.
(6) Fold up and pin 4 ½ inches of the bottom part of the tie with wrong sides together, tucking the raw edges of the strap into the side. Because of the tie’s shape, the sides won’t line up perfectly, but that’s okay. Simply stitch along the edge of the skinnier part, backstitching at the top and bottom of each seam for extra sturdiness.
(7) After selecting a button, make a buttonhole in the top flap.
(8) Sew on the button, being careful to only go through the top layer of fabric so you don’t close up the pocket. I love this feminine button from my grandmother’s collection.
(9) Gather the items you want to carry.
(10) Tuck them inside the two pockets, and you’re ready to go!
P.S. Awesomesauce later made a variation on this tutorial that I LOVE! Go check it out! ♥


 I previously posted about the easy, fun roll-up pencil kits (upcycled from placemats) that I learned how to make using this Martha Stewart tutorial. Here’s my newest one! I love using mats that are patterned on one side and plain on the other . . . perfect for showing off the pretty pencil colors. ♥

A good way to preserve a favorite item of clothing from a child’s preschool years is to upcycle it into a pillow. For example, with just a bit of embroidery, snipping, stuffing, and stitching, this hoodie turned into something new to cuddle and treasure. ♥


 As you know, I’m fond of making things out of placemats I find in the clearance bins at World Market, Bed/Bath/Beyond, and Target. This time I decided to try making a tote bag. It turned out great . . . and it’s even tangerine! Here are the directions:
Materials:

The "insides" before attaching the lining . . .
Directions:
1. With right sides of the fabric facing, stitch the sides and bottom of the placemats.
2. Hand stitch the strap inside the two side seams with embroidery floss for sturdiness.
3. Turn the bag right side out and press if needed.
4. Use the bag as a pattern to cut two pieces of the remnant, leaving a little around the edges for the seams.
5. With right sides of the fabric facing, stitch the sides and bottom of the lining. DON’T turn right side out, but do press.
6. Slip the lining inside the bag. Fold it under at the top and pin it along the top edge of the bag, bunching a bit at the straps if needed.
7. Use a slip stitch or decorative embroidery stitch to attach the lining to the bag. You’re done! ♥
Other placemat projects:
While organizing my remnants, I found just enough left from a favorite old blue sweater to make one last pillow. It’s long and skinny (8 x 22 inches) and super-soft. I’ll definitely keep this one since the sweater belonged to someone special! ♥


 As you know, I love to upcycle old clothing, which is why this “sweater with issues” is now a cushy 10 x 15 inch pillow. Although the built-in smocking added a nice bit of texture, I decided to up the a-la-mode by making a flower out of the same fabric. With the gold floss and button in the center, it even harmonizes with my sunflower paintings . . . a surprise bonus! ♥
No, I’m not depressed! 🙂 I’m just using the words of my favorite slow-dancing song from eighth grade to describe my latest project . . . actually, my first “commission” for a group of decorative pillows to set atop a young family’s new subtly-striped blue bedspread. We decided that the pillows should all be soft enough to plop down on for an impromptu nap or lean against to read books with the children, so I didn’t add any button a-la-mode. We also decided to go green with our blue by only using remnants and upcycled clothing (like a pair of old flannel PJ pants and an old sweater) and curtains (like a tie-dyed valance that no one seems to remember owning!) for the fabrics. Oh, and the man of the house also requested that I go easy on the flower prints.♥ Here are the finished pillows posed on my guest bed for a photo shoot before heading to their new home.

 Dave decided to clean out his closet and ran across a pair of KU shorts made out of sweatshirt fabric that were a wee bit small. However, since he’d owned them even longer than he’s known me, they were a prize possession and not something to part with lightly. My solution? Turn them into a pillow! He’s quite happy with the result, and it might come in handy for clenching and/or throwing at the TV in the upcoming NCAA games. ♥

 As you know, I love to make pillows from cloth napkins I find in the bargain aisle of various home and department stores. My latest find was a loner for 48¢. Once I got home, I discovered four tiny, perfectly-centered holes which were were easily camouflaged by some burgundy-bead alamode that matches the remnant I used for the back. I love the rich colors and design of this finished 16 x 16 pillow!
 I needed to pick up an item at Bed, Bath, and Beyond on Saturday, and after the success of my last “napkin pillow,” I decided to browse the clearance aisle for potential fabrics. To my delight, I found these reversible napkins for 99¢ apiece. By getting two of each, I could use the floral sides for the pillow fronts and the striped sides for the backs. I also added some vintage buttons from my grandmother’s collection for a little a-la-mode. The finished pillows are 16 x 18. ♥


 I made a sweater pillow last fall, but lately I’ve seen lots of pretty ones in magazines and on Pinterest so I was in the mood to make another. Lucky for me, I had a vintage sweater-poncho my mother-in-law had tossed out with enough “good parts” left to cut out two perfect rectangles with cabling on the side. I added my favorite metal buttons from my grandmother’s button box (I called them the “bumblebee buttons” when I was little!) and came up with this soft, smooshy, 16 x 20 pillow that will have a home on my sofa the rest of the winter. ♥

 I don’t know if you can read the price tag on this gorgeous cloth napkin I found in the clearance corner at World Market, but it’s $1.48! So, of course, I immediately snatched it up for a pillow. The back of the finished 19 x 19 inch pillow was a curtain in its previous life, and I added a little a-la-mode in the form of a shiny, marbled, 2 x 2 inch vintage button from my grandmother’s collection. So far I’ve given all my pillows away, but this one looks right at home on my sofa, so it may be here to stay. ♥

