Category Archives: Art

Love My Singer!

Standard

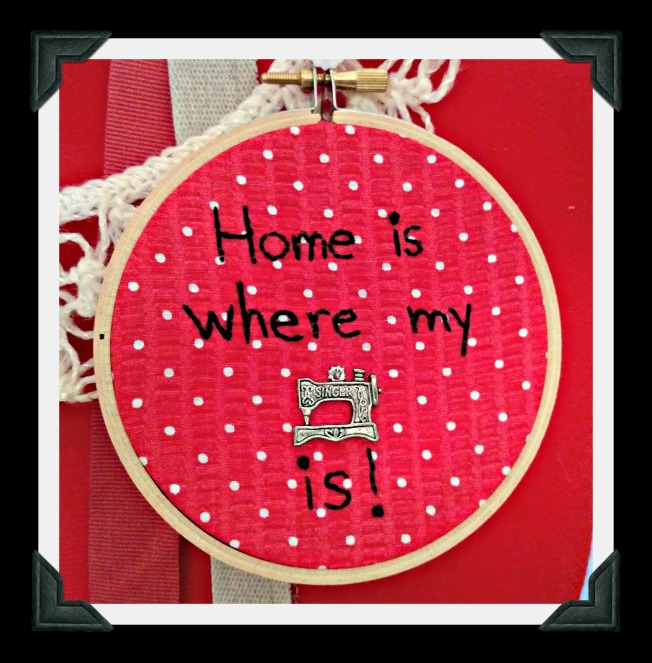
I won this charm in a blog giveaway a few years ago. I saw its twin on a cute card on the Facebook page of Michelle of SewMichelle . . . AND I have a Singer that my parents gave me in high school that I still use . . . so I just had to turn the saying into an embroidery project. ♥

Singer

Believe It!

Standard

I have a little poster on my office bulletin board that says, “She believed she could, so she did.” That’s so empowering! It also matches my latest embroidery project, a reverse of the common pessimistic declaration “I’ll believe it when I see it.” It makes you think for a moment, but it’s true! ♥

BelieveIt

Do What You Love . . .

Standard

I’ve been embroidering lately since it fits in my here-and-there creative moments. This quote seemed the perfect choice when I found enough heart fabric to fit these two little hoops. After embroidering, I wrapped the outer hoops in red polka-dot fabric strips for a bit of extra color, and then I gathered the backs and covered them with circles of the same fabric to finish them off. I’m going to take this message to heart! ♥

DoWhatYouLove

Wallies

Standard

Since my refrigerator door is already full of grandchildren art attached by magnets, I decided to start an art wall down the hall for new creations. I tried Wallies, and I LOVE them! They stick easily to the wall, hold the projects firmly, and remove without a trace. I got the binder clip design, but the company also sells versions that look like paper clips, push pins, and clothespins, as well as many other types of wall decals and murals. The Wallies company doesn’t  know I’m promoting them, but they deserve it! ♥

Wall

Handmade Treasures

Standard

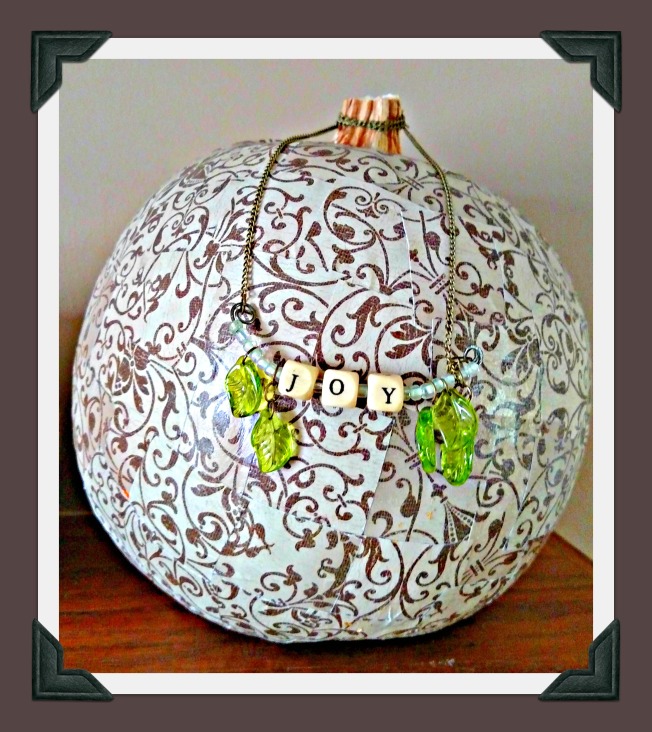
I’ve never won anything at the aforementioned benefit auction, but this year I did! I came home with this beautiful decoupaged pumpkin made by an artist name Alyson who is also in my writing group and this gorgeous handmade necklace made by a busy mom, teacher, and grad student named Linda. I decided that the pumpkin could wear the necklace for the rest of the autumn season, because “Joy” and “Thanksgiving” go hand-in-hand, right? ♥

Pumpkin_Necklace

Red, White, and Blue

Standard

In the U.S.A., Memorial Day is today, June 14 is Flag Day, and July 4 is Independence Day, so you can’t go wrong with a bit of patriotic decor this time of year. Here is my restyled Shantilly frame, a free art print on a hand-quilted table runner my daughter-in-law Tiffany gave me for my birthday, the 1776 pillow I made last summer, and a pinwheel bouquet (also a free printable!). Happy summer! ♥

Collage

Zentangle Art Book . . . FREE!

Standard

Our friend Mahe of Altered Upcycling is offering her newest Kindle book, Zentangle Inspired Art: A Beginners Guide to Zentangle Art and Zentangle Inspired Art and Craft Projects, to all of us for FREE from Monday, May 19 through Friday, May 23! The book is full of projects and worksheets to facilitate both the beginner and experienced artist. Mahe says, “Even if you have never tried doodling before, this guide will walk you through the entire process of Zentangle art in a step-by-step manner supported by numerous pictures and examples.” Thank you, Mahe! ♥  P.S. Remember . . . if you don’t have a Kindle, you can get a free app for your phone, tablet, or computer to read Kindle books!

Zentangle

You’re My Type

Standard
The lovely Courtney of Make All Things New recently had a contest for one of her fun graphic design prints, and I won! I love old typewriters, so I did a little play on words and chose “You’re my type” for the text. I’ve already hung a full-size copy in my office and printed smaller versions to make note cards. Thank you, Courtney! TO MY OTHER BLOGGY FRIENDS: Will you please take a minute to visit, like, comment, and even follow Courtney’s blog today? She is one AMAZING lady! She has two six-year-old girls with enormous personalities.  She loves to sew, craft, draw, and paint. She teaches library, gives art lessons, and creates custom quilts, prints, and invitations. She is also painting a mural for her church nursery and sets for a play, mentors teens, and makes movies for a youth service—all on top of keeping her home running. She and her youth pastor husband feel that God may be calling them to Romania full time to work with orphans and the Roma people and are traveling there this summer to get a feel for what the future may hold. Oh, and Courtney has an Etsy shop, too! Please read these posts about the causes her shop supports . . . but you might want to grab a hankie first! Courtney, you put your heart and soul into making the world a better place. I’m so happy to have met you! ♥
You're my type

Happy Hearts!

Standard

Do you have hearts all over your home these days? My favorite new display is the clay heart my granddaughter Ally made, my collection of heart necklaces, and the beautiful mixed-media canvas Shannon of Shantilly made for my birthday. From my heart to yours . . . have a happy Valentine’s Day! ♥

MixedMediaValentine

February!

Standard

My Shantilly frame got a makeover for February! The inspiration was this fun suit-on-a-hangar bookmark from my BFF Susan, and the words are letters snipped from alphabet fabric glued onto rectangles cut from last year’s February calendar paper. Here are the ones for November, December, and January. Happy new month! ♥ February

Sneaky Art!

Standard

I’m a lucky crafter . . . I won this fun Sneaky Art book and Rainy Day Art Pack, both by Marthe Jocelyn, from Robyn of Museiddity‘s recent giveaway! I’m happily set for my next little visitors! Please click here to learn more about the book and here to learn more about Robyn and and begin exploring her Museiddity creations. Thank you, Robyn! ♥

Sneaky Art_Rainy Day Art

Let It Snow!

Standard

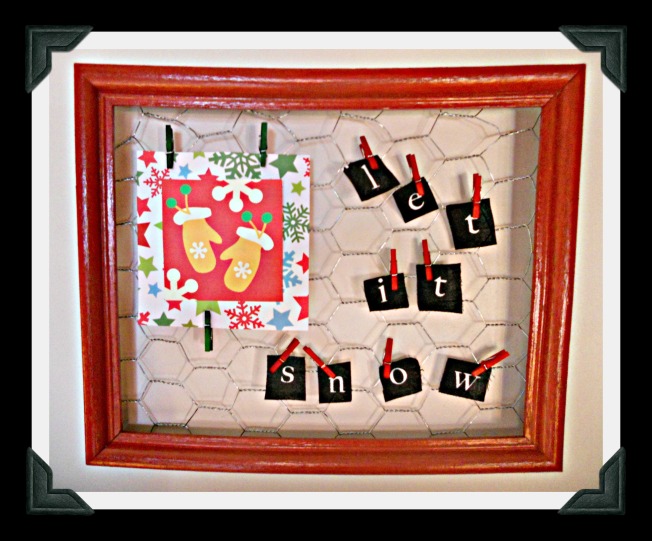
In autumn I bought a fun chicken-wire frame at a craft show from Shantilly, and since then I’ve had fun restyling it for different holidays and seasons.  November’s design reminded us to give thanks, December’s spoke of joy, and January’s is all about snow . . . a clip-art mitten illustration mounted on scrapbook paper, letters snipped from alphabet fabric, and tiny clothespins to hold everything in place. ♥

January_letitsnow

Merry Christmas!

Standard

Look at the lovely ornament my sweet art-teacher-writer-friend Ginger gave me at church on Sunday! She twisted and turned a piece of wire into a heart surrounding my L-O-N-G name . . . thoughtfulness and handcrafting at its finest. And now, with Christmas Eve just one week away, I’m off to finish my end-of-year writing assignments, bake, and celebrate with my family. I wish you and yours a very merry Christmas and happy, happy New Year, and I’ll see you in 2014! ♥

KatherineWireOrnament

Fa la la la . . .

Standard

Since I have so many colorful red and green decorations and busy prints up for Christmas (like here, here, here, here, herehere, and here!) I decided to go completely the other way on my newest idea . . . somewhat of a visual trick since “Deck the Halls” is such a cheerful song! I used turquoise chevron flannel with the same color embroidery floss, then I played around with the size and placement of the words to replicate the chorus’s inflection, pauses, and pitch. I love the way it makes your eyes say, “Ahhhhh . . . ” Oh, and the embroidery hoops were hand-me-downs and I already had the fabric and floss in my stash, so this was a “free” project. I love those, don’t you? ♥

Display

J-O-Y

Standard

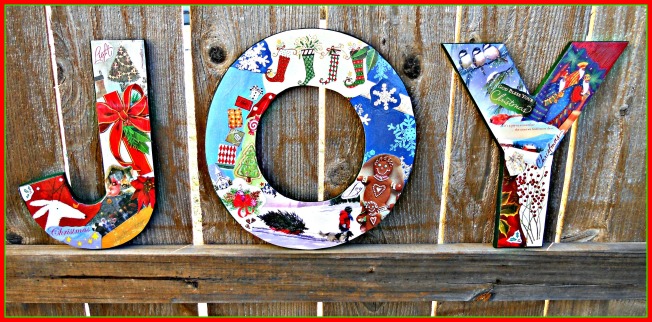
Besides my felt peppermint wreath, another favorite decoration at our home is this set of decoupaged J-O-Y letters . . . I made them from upcycled Christmas cards! Click here for complete instructions as well as links to lots of other fun, crafty Christmas projects. ♥

j-o-y

Deck the Walls!

Standard

Ever since I found the perfect giant sunflower paintings by a local artist at one of my favorite little shops, I’ve enjoyed them in spring, summer, and fall. However, when December rolls around, they become Christmas decor! In the past, I’ve always wrapped them in Christmas paper, but this year I purchased some pretty $1/yard cotton fabric that I can use year after year for a little more Earth-friendly approach. Click here and here for the 2011 and 2012 versions! ♥

Wall

I love my all-holiday frame!

Standard

Remember the chicken-wire frame I bought at the craft show from Shantilly? And how I decorated it for Thanksgiving with cut out burlap letters and a fabric flower? My granddaughter Miranda helped me restyle it for Christmas with new letters, then we added the scrapbook paper ornament my friend Debbie taught me how to make. Perfect . . . and I’ve already got ideas for when Valentine’s Day rolls around! ♥

Christmas Wire Frame

The Green Crafts Lifestyle

Standard

The Green Crafts Lifestyle - Christmas EditionFirst of all, THANK YOU for all the lovely comments, good wishes,  and over 100 LIKES on my Christmas Bunting post! I met my writing deadline for work and had an extra-special time with our Thanksgiving guests. Before I straighten the house and start decorating for Christmas, I want to make sure you’ve heard about our friend Mahe’s newest “green crafting” e-book that you can get TODAY through DECEMBER 4 for FREE by clicking here! (If you don’t have a Kindle, you can get a Kindle app for your computer—also for free—right here.) The book includes step-by-step photos and directions for a Christmas tree, snowman, package toppers and tags, ornaments, placecards, a mobile, bunting, cards, envelopes, gift bags, and LOTS of fun handmade gifts. Most of the projects are designed by Mahe herself but (as always!) Mahe welcomes guest artists, such as:

You can read about the rest of Mahe’s books here, here, here, and here. Enjoy the rest of your weekend, and I’ll be back with new posts starting Monday! ♥  

What can you make with a sentimental dress?

Standard

DRESSFor my two year blog anniversary,  I invited you to nominate people you’ve met through the blogging world who you would like to have as next-door neighbors. It was SO heartwarming to read the lovely comments that came from around the world! The blogger with the most nominations was then invited to send me a once-loved garment to remake into some new treasures and return. This year’s winner was Staci of Crafty Staci, who decided to send her going-away dress from her wedding 22 years ago! She said, “It’s been stored under my bed ever since.  I’d love to have it made into some things I could actually have out to enjoy, and red is still my favorite color, so that’s what I’ll be shipping to you.” I was so excited, and when this exquisite handmade dress arrived, my mind started spinning! So . . .today is the reveal! Here we go!

(1) I always like to start with a pillow, and the bodice of this dress was the perfect size to make a pillow cover for a 12 x 16 cushion. After detaching it from the skirt and shoulder straps and removing the boning, I traced and embroidered the logo from Staci’s blog and Etsy shop. Next, I put the pillow inside and nipped and tucked and pinned until I had a perfect fit, then took in the seams and stitched across the bottom. (The zipper is still in the back, just shortened a bit.) To fill in the armholes at the top, I made a lining with a coordinating floral fabric that could peek out at the corners, checked the fit again, pinned, then stitched the top closed. Then all I had to do was trim the seams, turn, press, and zip the pillow inside.  I love that I got to showcase the lovely lace on both the front and back of the pillow!

PILLOW

(2) Next, I wanted to use part of the still-gathered skirt to make something to wear and decided on an apron! I found my inspiration on page 40 of my A is for Apron book by Nathalie Mornu which had a short skirt over a longer one. I used pieces from several different apron patterns along with some of my own ideas and two fun fabrics from my stash, and it came together perfectly.  Here it is blowing in the wind on photo shoot day!
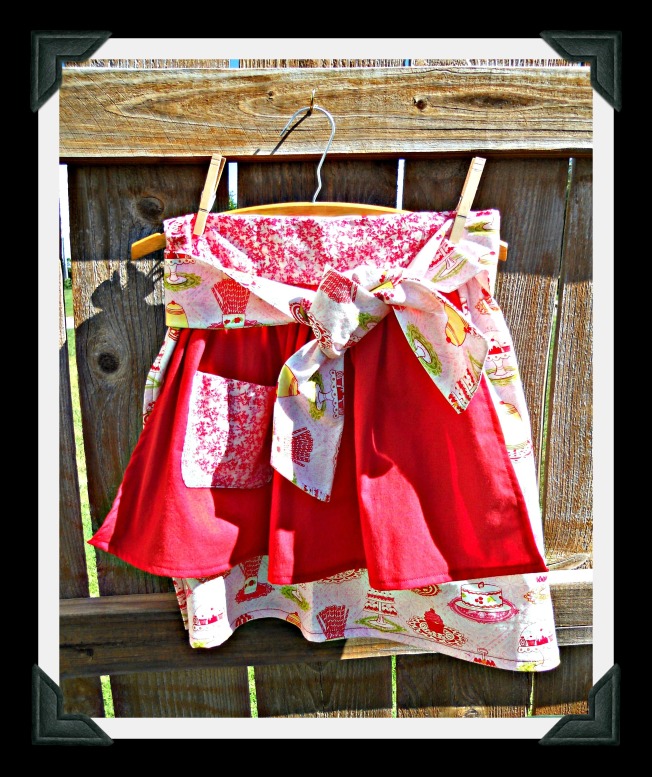
APRON

(3) When I saw the size and shape of the shoulder straps, I immediately thought of a bow clutch–one strap for the bag and one for the bow. However, this project turned out to be a little more challenging! I opened up one of the straps for the bag, made a lining from a coordinating fabric in my stash, and attempted to put in a zipper. Since the bottom was already closed up, that was a total fail! So I carefully removed the crooked zipper and simply blanket stitched the top and lining together, then added a button hole and vintage button for the closure. Next, I opened up the side seams and handstitched the other shoulder strap in on both sides, being careful not to catch the lining since I probably should have done this step first! (Since both pieces are padded, the seam was too thick for my machine.) Finally, I used another strip of the lining fabric to cinch the middle of the outer piece to form the bow. So . . . it’s not as perfect as I had envisioned . . . but maybe it will be cute for an evening event where the lights are low??? ♥
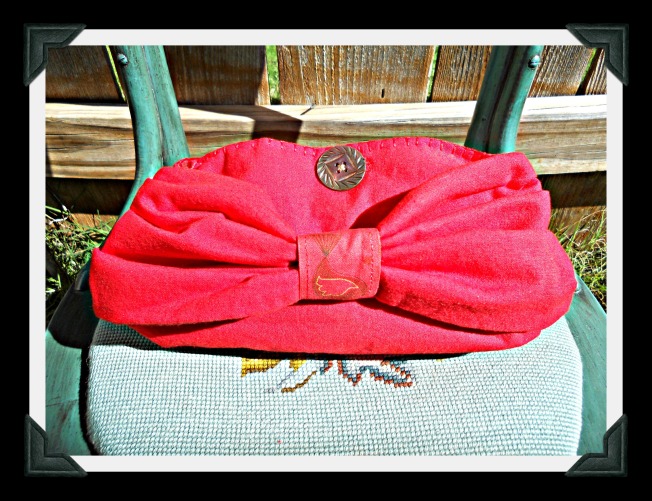
BAG

(4) The next step was to trim the hem from the skirt. With it, I made three of those fun  “twist, coil, and stitch” flowers. I had a straw wreath and some red and green ribbon in my craft stash, so I wrapped the wreath, added green vintage buttons to the flowers, stitched the flowers onto the wreath, and added a coordinating green ribbon for hanging.

WREATH

(5) Last but not least, I decided to make something kind of artsy and festive with a remaining piece of skirt fabric. I cut it into one-inch strips and made a pom-pom, then I hung it from ribbon on a gold wooden frame from my stash. I hope it will inspire the idea of “celebrating the everyday” as Staci lives her very creative life with her loved family and friends.
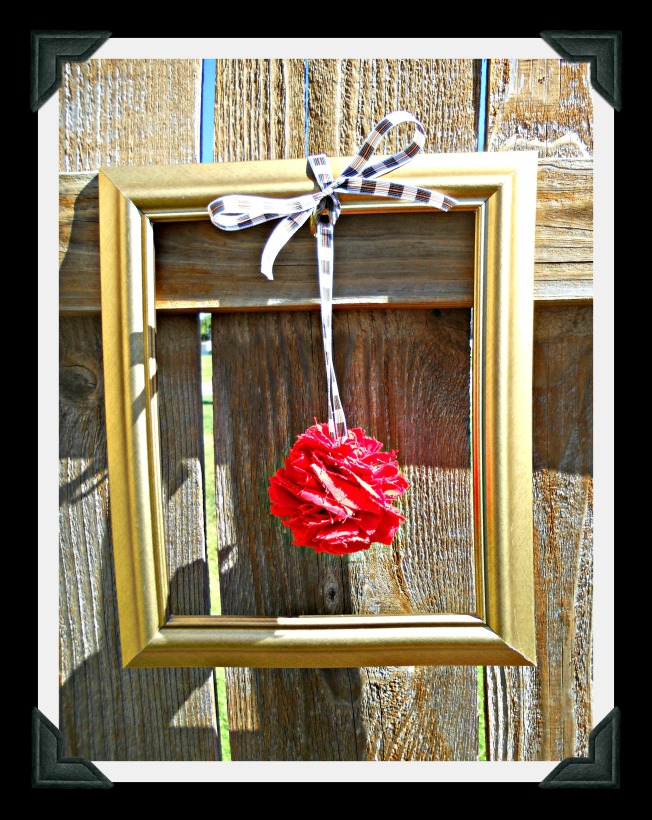
FRAME

Thank you for being our good neighbor, dear Staci . . . and your package is in the mail! ♥
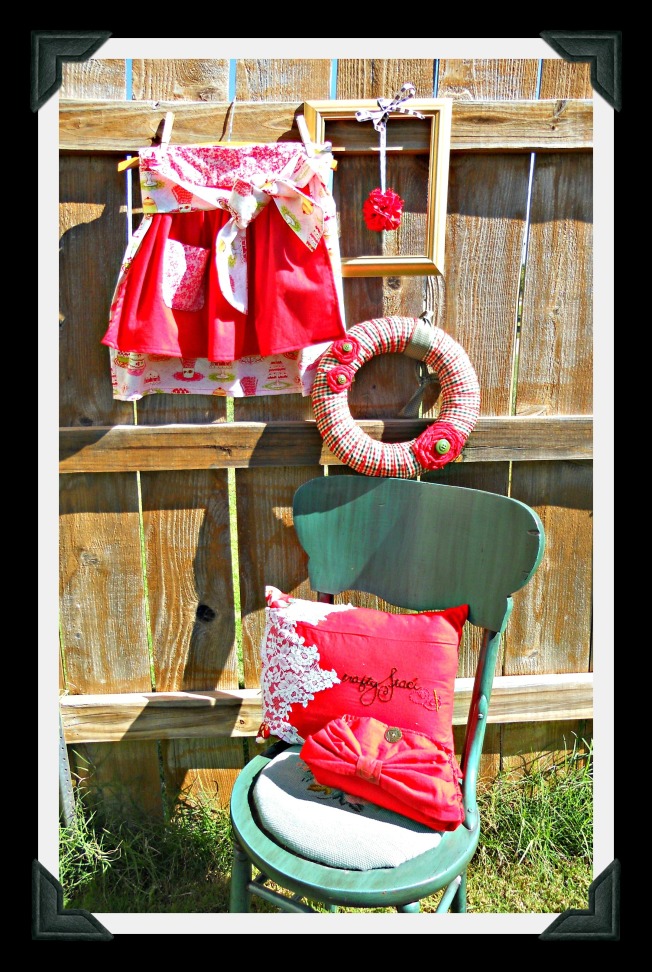
ALL

I Love Pink!

Standard

Kansas Barn Sale by Beki and StaceeI had so much fun on Saturday at the Kansas Barn Sale! (See FB photos here.) We drove out to a beautiful farm near Hesston, Kansas where the organizers, Beki and Stacee, offered dozens of  amazing art and vintage booths as well as live music and all kinds of delicious food. I made a purchase . . . a gorgeous pink hand-crocheted scarf made by one of the vendors, my friend Tamara of Crochet with Tamara (click here to see her posting about it on her blog) . . . aaaaaaaaand the pattern was designed by my friend Jill of Nice Piece of Work (click here to see some other versions)! How cool is THAT??? It was chilly enough to wear it around at the sale, and I got lots of lovely compliments on it. Thank you, Tamara and Jill! ♥

Scarf

5-Minute Gift Bag Updo

Standard

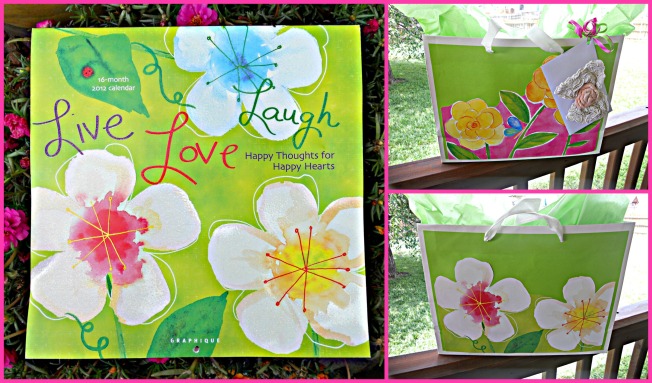
I got a lovely gift in a pretty lime green Coldwater Creek shopping bag that had the store name written across both sides, but I wanted to reuse the bag for a homemade gift. So, I cut out some flowers from last year’s calendar and glued them on the sides . . . perfect!   P.S. The lace hairbow on the card is from my recent vintage dress upcycle . . . a little extra gift to go with what’s inside. ♥

Collage

Craft Camp!

Standard

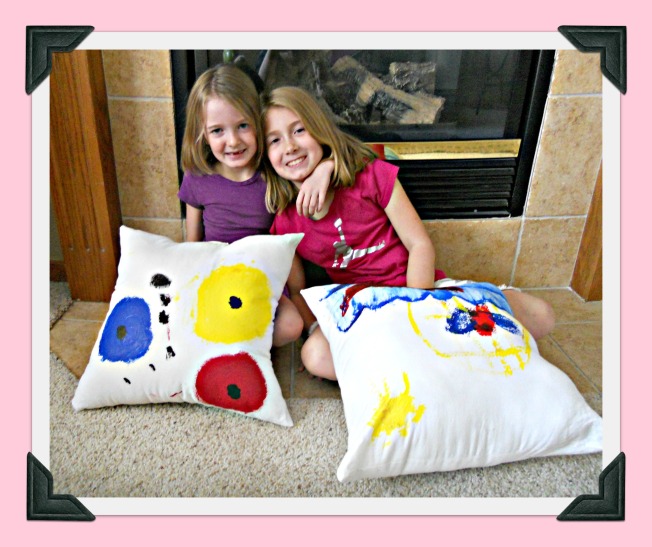
CollageOur granddaughters Ally and Kira requested an overnighter before going back to school last week, so we decided to call it “Craft Camp.” We sewed pillowcase nightgowns and made painted fabric pillows. Ally made a mini-pillow with embroidery, and Kira made a button headband. We also enjoyed our usual play-dough, Bendaroos, Tinker toys, and fingerprint art projects, played outside, read books, cooked, and had lunch with the girls’ great-grandparents. I think we may have started a new tradition! ♥

NightgownsPainted Pillows

The Green Crafts Lifestyle (and their special promotion starting this Friday . . . and a new call for submissions!)

Standard

Book CoverIn June, I wrote in this post about our crafty upcycling friend Mahe (aka MZ) that included a call for submissions for her new upcycled craft book. The Green Crafts Lifestyle is now out, and it’s amazing! It includes sections on paper, plastic, wood, metal, and fabric and has projects from 20 artists around the world, including four of my bloggy friends:

Along with 35 projects detailed on nearly 200 pages of photographs and step-by-step directions, you’ll find author bios and photos with links to their blogs, websites, and other online contacts.

Now for the promotion! To provide all crafters with a chance to learn from these techniques, Mahe’s Altered Upcycling business will provide unlimited FREE Kindle copies of The Green Crafts Lifestyle this Friday, August 16 through Sunday, August 18! Kindle doesn’t restrict you to its device; you can read the book on any PC machine or tablet with the free Kindle App. Simply click HERE for your free copy.

AND . . . drum roll . . . MZ is looking for MORE submissions from MORE of you! In her words: “We need talented artists, crafters, and upcyclists to provide projects and tutorials based on upcycling and green crafting. Altered Upcycling will take submissions for Part 2 of “The Green Crafts Lifestyle” series, and the project submission deadline is August 31, 2013. Please make sure you send tutorials that upcycle wood, plastic, paper, glass, or fabric. The tutorials must be in MS Word format with the pictures embedded in the doc file. I will also need a photo of you as well as an artist bio and links to your blogs, Etsy shops, etc. Please email tutorials to thecraftycan@gmail.com. Let’s save the world one craft project at a time!”

Thank you, Mahe! ♥  P.S. If you haven’t entered my “Catch-up Giveaway,” please click HERE!  
Our Family Art Project

Standard

Painting

When our family was all together in June, we created an art project that Dave and I will cherish forever! When I say “we,” I admit that all I did was pin the original idea (click here . . . it’s REALLY cute!) on Pinterest and send it to our seven amazing daughters-in-law. They took it from there! Shannon is our mixed media artist, so she prepared the canvas. Then she wrote a tutorial! (See links below.) When everyone arrived, Jen took charge of the grandchildren handprints. Being a kindergarten teacher and mother of toddlers, she’s a pro! Tiffany, Mary Ann, Vickie, Danielle, and Christin all helped with the painting, holding, and cleaning up of little hands. Our work of art is now hanging over our staircase so it will be the first thing guests see when they enter our home. HAPPY SIGH . . .

SHANNON’S TUTORIAL:

Click Mixed Media Canvas for a word document.

Click Mixed Media Canvas for a pdf.

Names

Retro Oven Cupcake Box Party Favors

Standard

Fronts

CupcakesHow cute are THESE???

They were SO much fun to make, and they’ll be even more fun to give away as gifts . . . with a cupcake or muffin tucked inside!

I first saw them on Pinterest, which led to the amazing Amy Powers’ Inspire Co. blog, which led to the Etsy shop of Claudine Hellmuth.

The downloadable kit includes all five oven colors, a removable cupcake tray, cupcake flags (on which you can type your OWN message!), and adorable oven mitt gift tags.

You can read about Claudine here . . . what an IMPRESSIVE resume! And check out her other fun downloadable kits, too!

I invite you to click on Claudine’s shop from this post or anytime from my Shop Love! page above. Thank you for the lovely find, Amy and Claudine! ♥
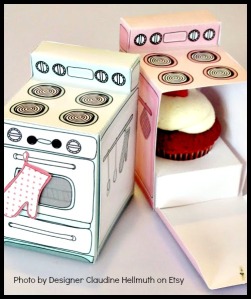
Backs

The Upcyling Queen Returns!

Standard

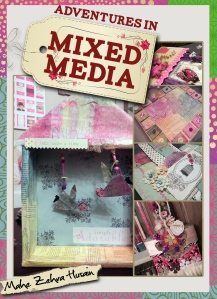
Adventures.Mixed.Media.CoverIn the past, I’ve shared reviews of two of Mahe Zehra Husain’s fabulous upcycling books, The Ultimate Guide to Upcycling and Make a Card Awesome. So, when she asked if she could send a preview copy of her newest publication, I was more than happy to agree! This one is called Adventures in Mixed Media: A Step-by-Step Guide to Creating Beautiful Pieces of Art. It includes chapters on:

  • Materials (Paper, Coloring Mediums, Found Items, and Art Stores)
  • Techniques (Making Mixed Media Art Paper and Making Mixed Media Collage Paper)
  • Projects (A House Journal, Altered Art Organizer, Paintbrush Book, Mixed Media Canvas, The Earth Without Art, Idea Journal, Mixed Media Memories, Art Around your Neck, . . . And Now ‘Round your Wrist, Birds, My Imaginary Flight, and Believe)

I love the way Mahe describes how she organizes her craft room to store “found” items, and the sections on “7 Unusual Sources of Paper” and “Let’s Go On a Treasure Hunt” had my creative juices flowing! Mahe includes YouTube videos for each of her techniques, as well as complete written directions and photographs of all papers and projects. You’ll love Mahe’s friendly, conversational writing style, too! You can get your copy by clicking here at Amazon.com or any time from my Shop Love! page above.

Oh, and remember that Mahe’s first book is ALWAYS available for FREE at her web site, Altered Upcycling. Thank you for all you do to care for Earth as you create, Mahe! ♥

“Two Bits!”

Standard

Music

SignDo you recognize this little riff? These famous seven beats have been used for over a century to end a song or joke or as a call-and-response . . . the first person sings, hums, or taps out the first five beats (“Shave and a hair cut . . .”) and the other person supplies the ending (” . . . two bits!”).

Since I decided I needed ONE more piece of whimsical (and QUICK! and FREE!) art in my my guest bathroom, I used the words to create a 5 x  7 sign with a fun font and the (clipart!) music notes.

I already had the frame, which fits perfectly in the room’s black/white/lime green/silver color palette.

Click the link below for a (word document) copy of your own! ♥

Shave and a Haircut

Rubber Ducky Art

Standard

After updating the guest bathroom with a painted and decoupaged kids’ stepstool and a few other decorative touches, I decided to finish it off with a piece of fabric art.  First I “shopped my house” and came up with a 17 x 21 black poster frame and a remnant of black/white/lime green fabric (from this crib skirt) that perfectly matches the colors of the room. Then I . . .

  • cut the fabric,
  • sketched and embroidered a rubber ducky in the middle,
  • stretched and taped the fabric over a piece of cardboard cut to size,
  • and popped it behind the glass in the frame.

Perfect! Now . . . bring on those guests!  P.S. I laid the picture on one of my mother-in-law’s quilts to take this photo . . . such beautiful handiwork! ♥

5

DIY Poppy Sugar Bowl and Creamer

Standard

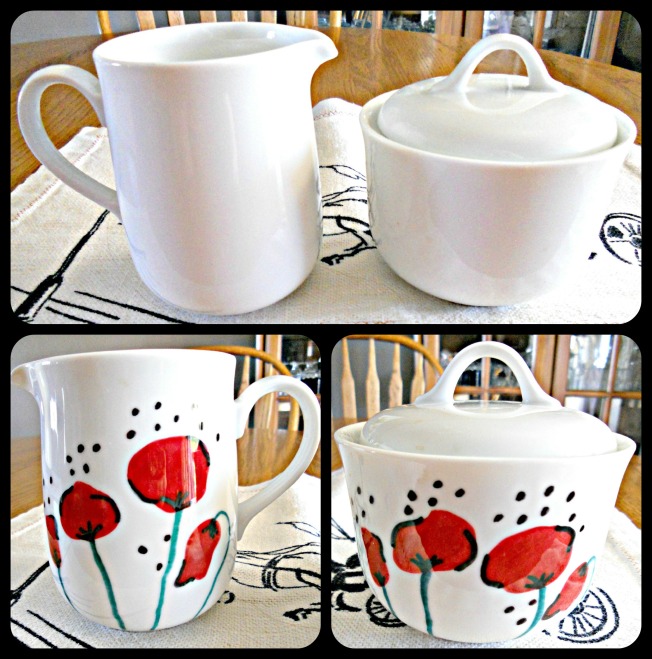
After

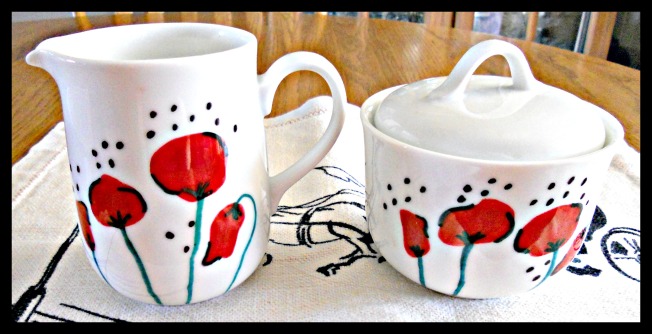
Do you ever squeal with delight when you see a blog post? Of course you do! 🙂 That’s what happened when I saw the DIY Poppy Teapot from the lovely Natalie of La gang à Nat. Seriously, go look at it now right HERE. Isn’t it gorgeous??? And all I could think of was that I had a plain white sugar bowl and creamer that I’ve used for YEARS, and wouldn’t they look LOVELY with Natalie’s poppy a-la-mode? So I emailed her to make sure I could copy her design and post it here, and she said YES! (She’s VERY nice!) The only difference is that I used Sharpies since I already had them on hand and then baked the items in the oven at 350 degrees for 30 minutes to set the color. I just LOVE them . . . thank you, dear Natalie! ♥

Collage

T-Shirt Garland Kit

Standard

TopWhen our whole family gathers in over Father’s Day weekend, I want to have some fun crafts that work for *kids* from pre- schoolers to 80+. My latest idea is a decoration that everyone helps create—T-shirt garland! To keep everything handy, I decided to make a kit with all the necessary materials. Then I can simply hang some baker’s twine across the windows and we can pin on our paper T-shirts as we “customize” them.

Box GluedTo make the kit, I first found an empty box that was just the right size. (This one once held a chocolate cake that came in an order one of our kids sent us from Omaha Steaks . . . yum!!!) I cut off the lid and then cut, folded, and glued the lid cardboard to divide the box into four compartments. Here it is with clips holding everything in place while it dried. When the inside was ready, I traced around the outsides and covered them with scrapbook paper, then made a simple word-processed label for the front using clip art and a text box.

Pins and ShirtsNext, I googled “printable t-shirt template” to find a pattern I like and watched a couple of movies while I traced and cut them out on light-colored paper. I also shopped for tiny clothespins and found these at Amazon.com. They’re REALLY tiny—about one inch long—but perfect for hanging paper items. I also found a small empty jar in the pantry to store them in since we’ll need to keep them safely away from the babies and toddlers. (I later glued three of the pins to the lid for a-la-mode.)

Finally, I added markers, crayons, and colored pencils for creating the T-shirt designs. Since I already had these and the paper on hand, my only expense was the clothespins—and they’re so cute I probably would have bought them anyway. 🙂 I’ll be sure to show you a photo of our garland after everyone is here!   P.S. I think this would be a fun way to commemorate family activities over the summer, too . . . books the kids read, trips to the beach and zoo, special treats they get to eat, and that sort of thing. If only I’d thought of that when MY kids were little! ♥

Kit

Global Girlfriend Love

Standard

Have you discovered Global Girlfriend yet? Besides my friends’ shops, it’s my favorite shopping spot EVER! This fair-trade boutique sells handmade clothes, jewelry, handbags, accessories, bath and body products, and paper goods from all over the world, and the money goes to help craftswomen make a living to feed their families. They also have gift certificates, which the special girls in my family LOVE to get for their birthdays . . . even though it can literally take hours to decide which gorgeous items to spend them on!  Right now, in honor of Earth Day, Global Girlfriend is offering FREE SHIPPING for $25 U.S. orders (code: FREE25) and $50 international orders (code: FREE50). Please check them out if you get a chance . . . it will definitely brighten your day! They’re also on Facebook here  and my Shop Love! page here. P.S.  Below is one of my favorite GG purchases, a set of inspirational cards made from handmade paper. I love them so much that I’ve also displayed them on my office wall! ♥

start small dream big change the world

The “Mix Things Up” Apron

Standard

ApronHere’s my latest apron . . . and I must say, I had LOTS of help! Here’s the scoop:

  • The adorable design on the bib came from my blogging friend Megan of A Kitschy Kitchen. Click here, and this original drawing can be yours, too, as a gift from Megan! Since I used a heavy muslin (a remnant I had on hand) for the bib, I was able to simply trace the design. Then I embroidered it while watching TV when we were snowed in. 🙂 Megan has an Etsy shop, too . . . here’s a post about it!
  • The skirt, bib ruffle, and neck and waist ties are made from this fabric I bought from Karen of KRS Designs. The cute baking motif was perfect for this project! You can find links to all of Karen’s shops on her blog.
  • And now for the ruffles. The blue one was from a gift of fat quarters I got for my birthday. It has a seam in the middle, but it’s pretty well hidden. The fabric for the pink and brown ruffles came from Laura of LC’s Cottage. Click here for Laura’s blog, here for her Etsy store, and here for a previous post I wrote about her shop.

Details about the design are available on my Wonder Woman Retro Apron post . . . a free tutorial from the Jo-Ann web site along with a few tweaks of my own. The only thing I changed on this one was to line the bib to hide the back of my embroidery and make the top ruffle smaller so as not to hide the mixer.

I had SO much fun making this, and thank you to my friends for your lovely contributions! ♥

Embroidery

Art Apron

Standard

ApronRecently I shared “Another Wonder Woman Apron”  (a version of the Wonder Woman Retro Apron) that I made using a denim apron body from a sack of remnants a family member gave me.

A little more digging uncovered another one—a light blue this time—but again just the body and a bib pocket with no straps.

So . . . I decided to make another art apron!

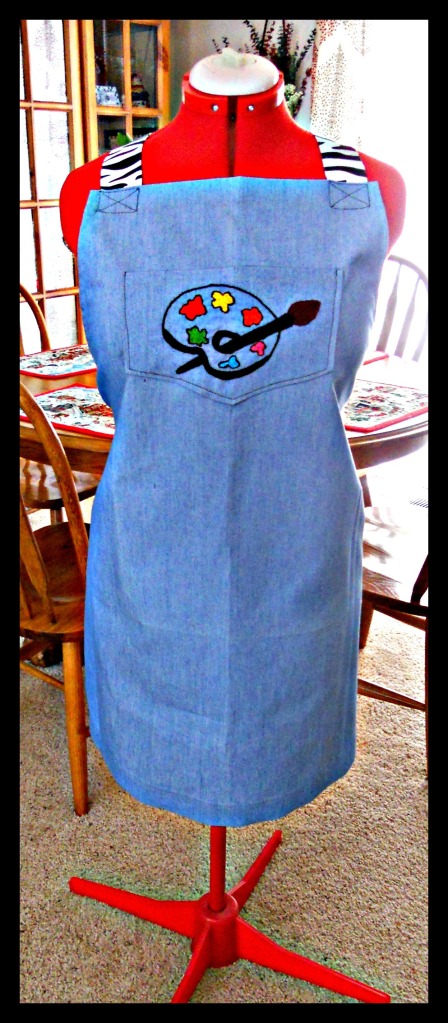
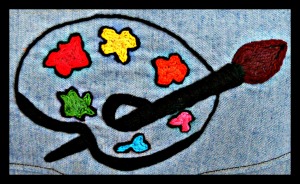
First, I removed the pocket, googled a clip art picture of a paint palette, penciled it onto the pocket, embroidered it, and stitched the pocket back on.

Then I used the zebra fabric you’ve seen on some of my other projects (originally a set of sheets from Target!) for the neck and waist ties.

Ta-da! ♥

Palette

FREEBIE ALERT: The Upcycling Queen Strikes Again!

Standard

Book CoverIn my “Meet an Upcycling Queen” post last month, I introduced Mahe of Altered Upcycling. Many of you picked up the free ebook she offers from her blog and loved it! Now Mahe has another free offer starting TOMORROW, February 23 and running through Wednesday, February 27—a card-making ebook available here on Amazon.com.  (If you don’t have a Kindle, you can download “Kindle for PC” from Amazon.com here, also for free.)  Mahe was kind enough to send me a preview copy, and I found:

  • cards featuring paint chips along with items many of us already have around the house,
  • cards for lots of different holidays, seasons, and occasions,
  • step-by-step directions and photographs,
  • links to youtube video demonstrations,
  • and much, much more!

Please take a moment to help yourself to this lovely gift which is regularly $2.99 but ours for free for the next five days. Thank you, Mahe! ♥

Crafters With Heart

Standard

In honor of Valentine’s Day, I have a little story to share. For me, it started with this sweet post from Claire of The Penguin Theory about an amazing artist from Portugal named Sandra. When the Etsy community learned that Sandra had faced a great loss, they banded together for a fundraiser sponsored by Esther and Estella of Star of the East (with an Etsy shop here) who invited fellow artists to make a donation toward a raffle with more than 50 Etsy items as prizes. The response was overwhelming, and I know all the winners are just ecstatic! Others have ordered items from Sandra’s own Etsy shop called Azulado, where I found this gorgeous ceramic heart. It arrived this week just in time for the holiday, beautifully wrapped in a handmade box tied with ribbon.  Please visit Azulado when you get a chance (and also Etsy angels The Penguin Theory and Star of the East) from this post or anytime from my Shop Love! page above. Love and prayers to you and your family, Sandra! ♥

Collage

Another Wonder Woman Apron!

Standard

Work ApronRemember my Wonder Woman retro apron? (You can take a quick peek here!) I’ve made and given away three so far and have more in the works, but I wanted to make a simpler, non-ruffly version for art teacher Tiffany (one of the beautiful brides on my mantel!) who wears fun aprons at work in her job as a middle school art teacher. Then I received a bag of sewing hand-me-downs, and tucked between some fabric remnants was a denim work apron—just the body with a pocket on the bib, no neck or waist ties . . . perfect! To WW-ize it, I:

  • removed the pocket,
  • appliqued one of my WW bibs right over the top of the denim,
  • used the pocket I removed for the inside of a new WW star fabric pocket and sewed it on the skirt, and
  • made and attached star-fabric neck and waist ties.  Done! ♥

P.S.  Click here for the heart-to-heart garland and here for the red sweater heart pillow.

Red Sweater Heart Pillow

Standard

Scene FramedRemember the little hearts I sewed on my recent travels—upcycled from a sleeve of a cozy old red sweater?

I used two of them for little-girl barrettes with pink button a-la-mode and all but four for my heart-to-heart garland.

Then I looked at the sweater again and decided that the body had to become a BIG red Valentine pillow, like this:

  • Fold the sweater in half lengthwise and, starting at the fold, cut a large half-valentine from the front and back. Unfold.
  • Pin and stitch strips of the sweater’s hem and sleeve binding across the pillow front for a-la-mode.
  • Pin and stitch the pillow front to the pillow back, right sides together, leaving about three inches unsewn.
  • Trim the seam, then turn the pillow rightside-out, stuff, and handstitch the opening.

It’s the softest pillow ever! ♥

P.S. The drawing in my office is a print of I’m Into Art by Elizabeth “Grandma” Layton of Wellsville, Kansas.  You can read a biographical sketch of Mrs. Layton’s life and see close-ups of her drawings here.  She’s one AMAZING lady!

Le Trango

Standard

I’ve been following Christina at Le Trango: An Illustrated Accessories Company for quite awhile and always get a smile when I see her adorable illustrations coming through my WordPress reader. So I decided to check out her Etsy Shop and found this sweet set of notecards I can send to my friends and family. The shop also features Christina’s whimsical creatures on canvas tote bags, pocket mirrors, and stuffed toys. Click here for Le Trango’s blog, here for the Etsy Shop, and here for the FB page from this post or anytime from my Shop Love! page above. Thank  you, Christina! ♥

Cards

Nicky Grace

Standard

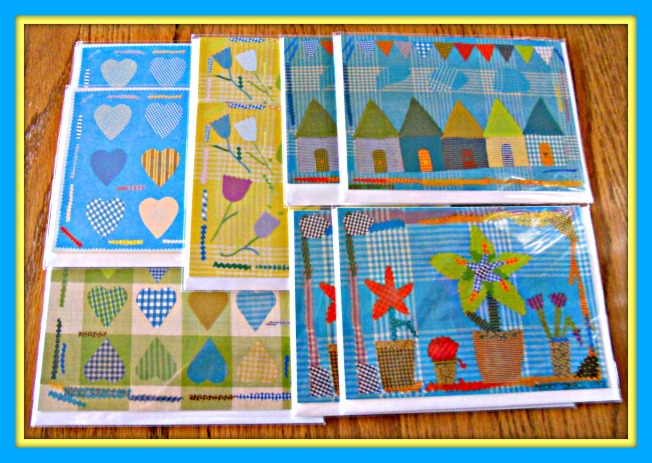
Have you discovered the Nicky Grace Vintage Fabric & Gorgeous Things blog? It’s a feast for the eyes! And when I checked out Nicky’s Etsy shop, I just had to buy this beautiful set of 10 fabric collage cards, two each of five designs. Look . . . some of them even have HEARTS on them . . . perfect for Valentine’s Day! Nicky also has other fabric collages, embroidery, hearts, ceramics, paintings, bunting, pillows, bags, dolls, pincushions, and even shapes cut from vintage fabrics for crafting. Click here for Nicky’s blog, here for her FB page, and here for her Etsy shop from this post or anytime from my Shop Love! page above. Oh, and you MUST check out these photos of Nicky’s amazing Pop-Up Shop! Thank you, Nicky! ♥

Cards

Open Hand Creations

Standard

My newest Shop Love! post features my blogging friend Allison of Thoughtful Creations who makes AMAZING handpainted, collaged, and mixed media zipper pouches for her Etsy shop called Open Hand Creations. Allison also included this beautiful bookmark with my purchase, which I’ve tucked into my winter wreath along with my favorite red cardinal ornament. Besides her blog and Etsy shop, you can follow Allison on her FB page as well. Thank you for the lovely purchase and inspirational quote, Allison . . . I can’t wait to gift it to someone I love! ♥

Bag

Charlotte’s Fancy

Standard

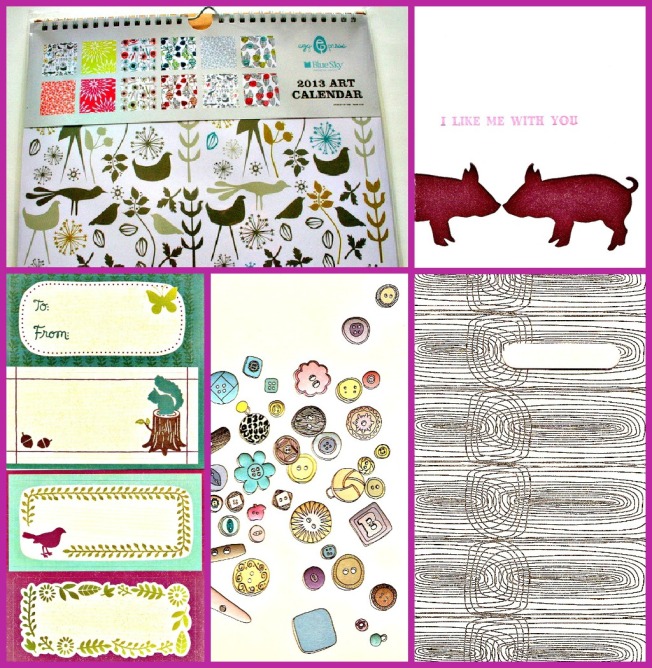
I recently won a 2013 Art Calendar by Blue Sky and Egg Press in a giveaway sponsored by my blogging friend Molly of Charlotte’s Fancy. It’s PERFECT for my home office! Then, generous person that she is, she also added a whole BAG of cards and labels—some artistic, some crafty, and some cute.  I put a few of them in the collage below . . . I just love them all!  If you’re not already acquainted with Molly, please check out her blog, including the “About” page where you can find links to her projects that have been featured on other blogs and even in magazines! Thank you Molly! ♥

Collage

From Scraps to Crafts

Standard

See these beautiful flowers? They’re painted on a vinyl record album!!! I love it! This work of art was created by my friend Kristin and her parents. Kristin was a student teacher in my school and is now a full-fledged teacher, newlywed, and brand-new Etsy shop owner. I’d like to invite you to check out Kristin’s blog here and her shop here—featuring painted glassware, handmade cards, candle holders, and more—or anytime from my Shop Love! page above. Thank you again for the lovely gift, Kristin! ♥

Painting

Clouds of Colour

Standard

As you know, I LOVE writing to people on notecards with original art. My New Zealand blogging friend Bec of Clouds of Colour has gorgeous prints in her Etsy shop, and when I asked her if she could transform this beautiful pink doily crochet watercolor into cards, she jumped right on it! I know you’ll enjoy checking out Bec’s work from the links in this post or anytime from my Shop Love! page above. Thank you for the lovely purchase and customer service across the ocean, Bec!

  • Click here for Bec’s blog.
  • Click here for Bec’s FB page.
  • Click here for Bec’s Etsy shop.

P.S. Please help yourself to Bec’s adorable and FREE downloadable, printable gift cards, perfect for Valentine’s Day and other special occasions. Just lick HERE! I can’t wait to use them . . . thank you again, Bec!  ♥

Collage

1840 Farm

Standard

Basket and noteWhen my blogging friend Judy of Grandparents Plus 2  emailed me about her daughter Jennifer’s small business, I couldn’t wait to check it out!  I purchased this beautiful handmade coiled fabric berry basket from the 1840 Farm Mercantile, and I just LOVE it.  Plus, I found out that Judy and Jennifer use to live in my state (Kansas)!  What a small world!  Besides baskets, Jennifer creates and sells lovely knitted and fabric items.  Please check out her links from this post or anytime from my Shop Love! page above. ♥

Basket

Christina Designs Art

Standard

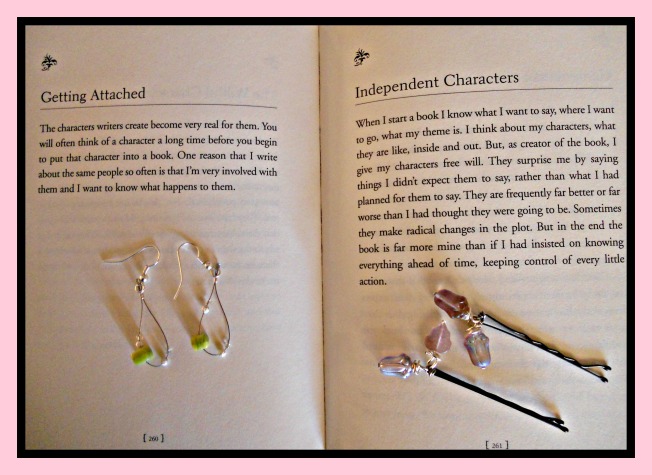
My newest Shop Love! post is for my blogging friend Christina of Christina Designs Art. Just look at these gorgeous handmade earrings and the pretty hairpins-with-a-la-mode! These will make such lovely, welcome gifts for some of the sweet girls in my family this year. Click here for Christina’s blog and here for her Etsy shop, where you’ll find many other styles of earrings and beaded hair pins as well as memory wire bracelets and acrylic paintings. Thank you, Christina!

Earrings and Hair Pins Framed

The backdrop is one of my favorite books: MADELEINE L’ENGLE HERSELF: REFLECTIONS ON A WRITING LIFE compiled by Carole F. Chase

More Art Card Love!

Standard

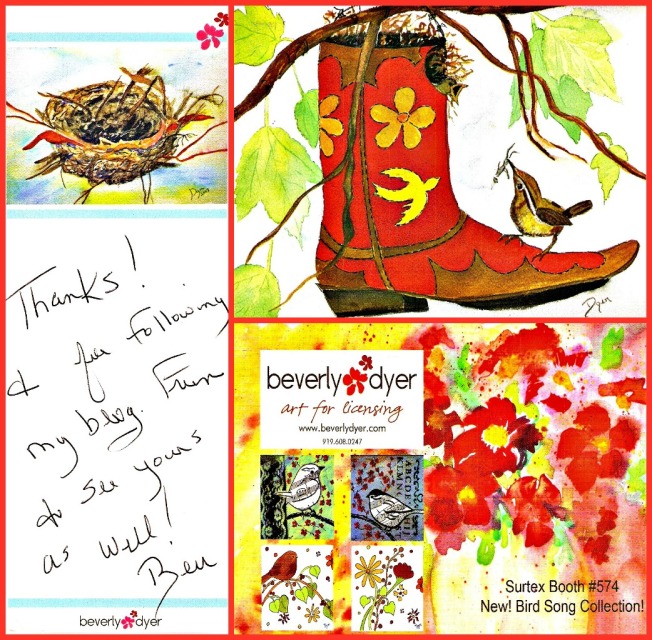
Ooohhh . . . MORE cards with reproductions of original art!  And they’ll be PERFECT for invitations for a big birthday party I’m throwing this summer for the head cowboy in our family, thanks to my blogging friend Beverly of Beverly Dyer Fine Art and Stationery, who also sells her beautiful creations in many stores in the Chapel Hill, North Carolina area.  She even added this beautiful memo pad to my order!  Click here for Beverly’s web site, here for her blog, and here for her Etsy shop featuring painted art prints, cards, pendants, and pillows, or find her links anytime in my Shop Love! page above.  Thank you, Beverly! ♥

Collage

Gone Rustic and Stitched Up Mama

Standard

I absolutely love to send people cards made from original art and photography reproductions, so I was very excited to find these in the Redbubble Shop of my blogging friend Rita from Australia! Rita has her own studio and gallery, teaches classes, hosts exhibitions, and has MANY creative irons in the fire including quilts, fibre and textile art, mixed media, and collectibles. Here are Rita’s links, which you can locate anytime in my Shop Love! page above:

Thank you for the beautiful cards, Rita! ♥

Collage

Photo Star

Standard

Photo StarYes, I’m about to share ANOTHER amazing daughter-in-law craft! We were so excited to get this beautiful star with photos of our dear little ones for Christmas.  Jen was kind enough to send me a tutorial this week . . . and she must have known I’d ask, because she’d even taken a photo of her materials!  Thank you, Jen! ♥

(1) Get a wooden or metal star from a craft store, some scrapbook paper, Mod Podge, a paint brush, scissors, and photos.  Tip: Photos that are further away from the subject work better than close-ups.

Jen's Craft Materials(2) Use a piece of plain paper to cut templates for each side of the star points. Then look at the pictures and decide which ones to put on the star and where they will go based on their sizes and vertical/horizontal positions.

(3) Use your template to cut out the pictures, making sure they are facing the same way as their position will be on the star.

(4) Paint the backs of the photos with Mod Podge and stick them to the star.

(5) Cut scrapbook paper to fit any extra space on each point of the star and Mod Podge it on.

(6) Paint the whole star with Mod Podge and let it dry overnight.

(7) TA-DAH!!!

Meet An Upcycling Queen!

Standard

Free BookDo your New Year’s resolutions include using more of what you already have in your crafting, gift-making, and home decor?  Then you’ll want to meet Mahe at The Altered Upcycling Blog and Altered Upcycling. Mahe explains that she has a Master’s degree in Operations Research, works at a software house, and is an avid altered artist who is constantly looking for ways to make the world greener one small craft project at a time.  And, if you sign up on her blog or web site, you’ll receive her FREE pdf book called The Ultimate Guide to Upcycling  for one-of-a-kind jewelry, cards, gift bags, wall art, and more.  Mahe sends out free ideas and how-to videos in her email newsletter as well, such as how to make a beautiful card from a dinner napkin, old dictionary page, leftover ribbon, and glue!  Mahe writes in a friendly, conversational style as if she’s sitting right beside you, includes what worked and DIDN’T work for her, and supports her ideas with step-by-step directions, photographs, and alternatives.  You can get your copy by clicking on the link in this post or any time from my Shop Love! page above.  Thank you, Mahe! ♥

Zuliganz and Wired for Impact

Standard

ChickenMy newest  Shop Love! artists made two of my Christmas and birthday gifts this year!

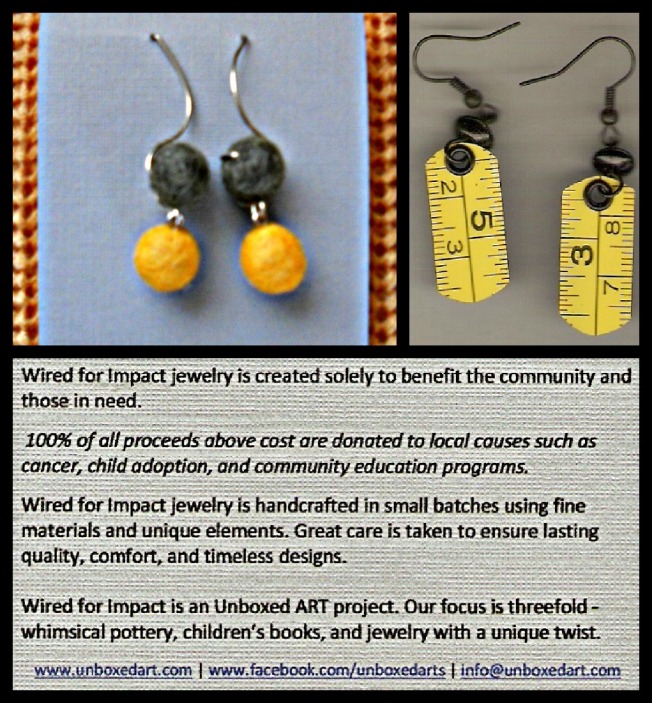
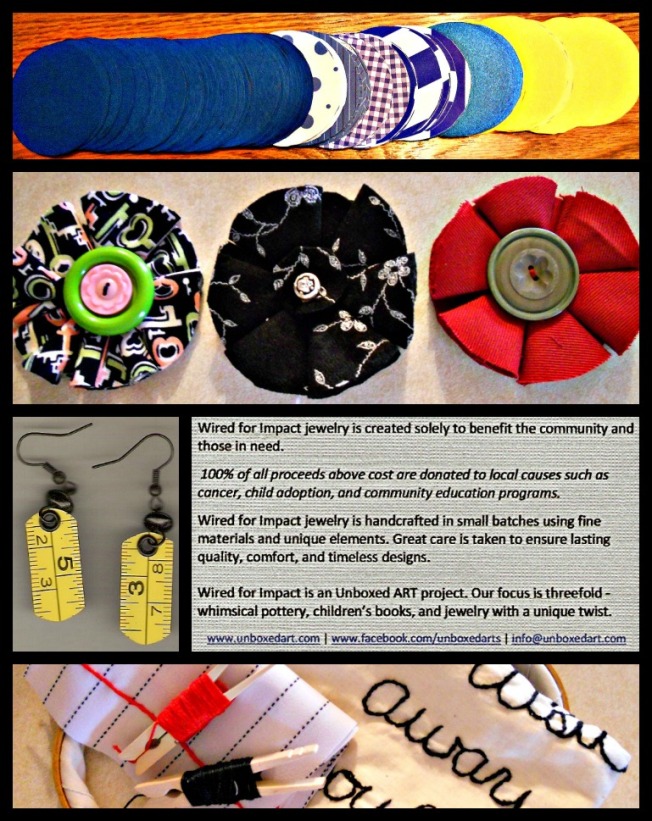
Their friend and colleague (my art teacher daughter-in-law Tiffany!) sent me this adorable chicken from Zuliganz and these gorgeous felt-ball earrings (made by the same artist who created the measuring tape earrings Tiffany gave me last spring) from Wired for Impact.

This husband/wife team sell their creations locally in the St. Louis area and at their Unboxed Art Etsy Shop in support of causes near and dear to their hearts.

I hope you’ll get a chance to check out their web site and store soon . . . and THANK YOU, Tiffany! ♥

Collage

J-O-Y to the World!

Standard

J-O-Y

Welcome to the “JOYFUL” edition of Collectively Creative, hosted by Kelly of Cobwebs, Cupcakes & Crayons! My project is easy and fun . . . similar to the Instagram collage letters I made this summer. . . . and I love how it turned out!

(1) Purchase some wooden letters at a craft store. Mine are 12 inches tall and were on sale for around $2 each.

(2) Optional: Paint the letters and let them thoroughly dry. I spray painted these with the green paint left over from my antique milk bottle project.

(3) Get out Christmas cards you received and saved from last year and cut out pictures and words to fit the shapes of the letters, overlapping them as in a collage. Attach these bits with Mod Podge. Or, if you don’t have cards available, use images and words from holiday magazines.

(4) When each surface is covered to your satisfaction, coat the entire letter with Mod Podge and let it thoroughly dry.

(5) Display your letters on a shelf or drill small holes or attach hanging hardware to the backs and hang them on the wall. Mine are now over the stairs along with my peppermint wreath where they’ll greet our Christmas Day guests at the front door. ♥

P.S. Before I link to our other Collectively Creative posts, I’d like to give a shout out to some other amazing bloggers who have shared their J-O-Y this season. Thank you to ALL of you for your inspiration!

Daisey Jane

Alana Jones-Mann

My Latest Project

Diary of a Mad Crafter

Our Next Great Adventure

Made in a Day (and here!)

The Joyful Edition Logo 2012COLLECTIVELY CREATIVE:

Art Jars

Standard

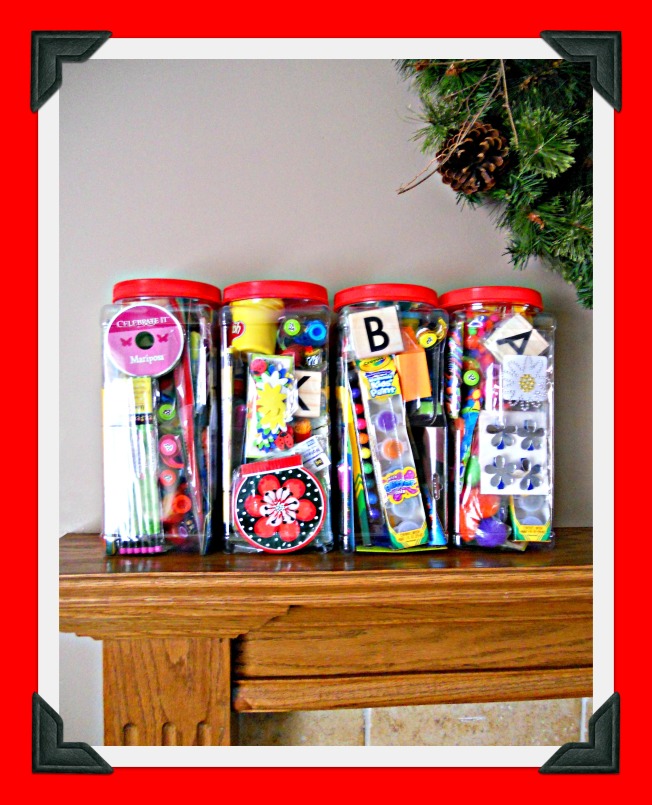
A couple of years ago I saw a kids’ art jar online and thought it would be the perfect gift for a special little girl’s birthday.  It was so colorful and intriguing . . . but when we dumped everything out, I found LOTS of pretty raffia filling and WAY too few actual art supplies.  Live and learn, right? So, when my dad was preparing for a recent move and asked if I’d like to have some empty plastic snack containers, I immediately thought, “ART JARS!”  I began collecting artsy/crafty items from the dollar bins at Michaels and Target, plus hitting the dollar stores, and soon had a huge bag of fun things to include.  These will be under some Christmas trees soon! ♥

Art Jars

Arts and Crafts Mission Market

Standard

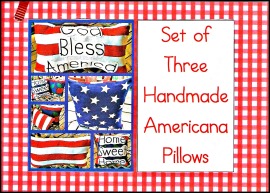
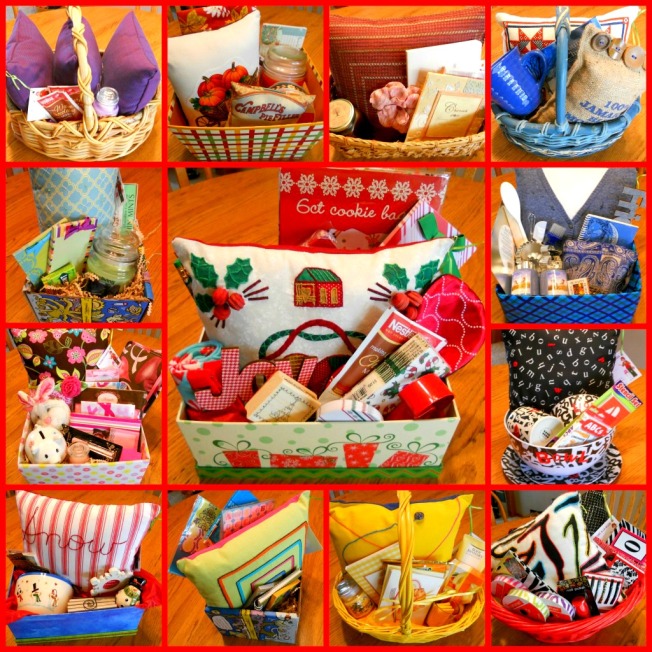
Here are the tags for this year’s donations to the silent auction at the Arts and Crafts Mission Market at my church. It’s such a worthy cause . . . all the money goes to a local daycare center for families in need. Click here to see how to make the Christmas wreath pillow and here to see the Americana pillows.   P.S. Below are my gift baskets from markets past, each based on . . . you guessed it . . . a pillow! ♥

That Kara Lynn is SO Creative!

Standard

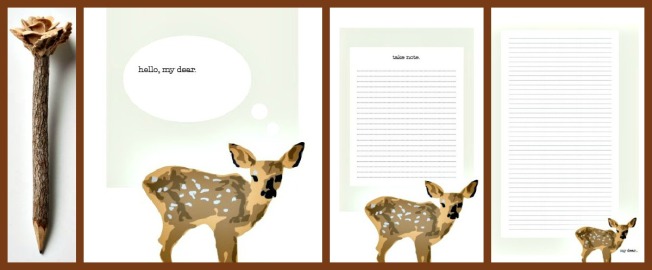
I got the sweetest giveaway gift in the mail today . . . stationery, notecards, and a memo pad designed by the fabulous designer Kara of Karalynn Creative . . . plus, the most amazing pencil I’ve ever seen made by Anthropologie! Besides Kara’s WordPress blog, she has a lovely Etsy shop for you to visit, too. Thank you, Kara! ♥

How Cute Are These???

Standard

I met my super-crafty, super-sweet, and super-pretty daughter-in-law Shannon for coffee, and look what she made for me!  Tiny easels with paint and ribbon a-la-mode and tiny art canvases with paint and paper decoupage (and tiny spools for Frankenstein!) for my Halloween decor!  I LOVE them!  THANK YOU, Shannon! ♥  P.S. Click here to see an example of Shannon’s mixed media “She Art.”

“Start Where You Are . . .”

Standard


Recently I’ve been pondering an intriguing quote I read on Bows, Baubles, and Beliefs, so I decided to make something with it!  I cut the letters for the saying in not-perfect rectangles from a remnant of black and white alphabet print I’ve used for a few pillows and glued them onto the squares of some gingham a friend gave me–a bit of “randomness on order.”  I ran into a little glitch when I discovered that the fabric has no r’s . . . but I took the quote’s advice to “use what you have” and turned some n’s into r’s with a black sharpie, so all is well. ♥   I finished the project the same way I made my fabric memo boards (here and here), by covering a piece of cardboard with quilt batting and then stretching the fabric over it and stitching it together at the back. Finally, I added my biggest black button for a-la-mode. Will it hang on my office wall? Or become a gift? Time will tell! ♥  P.S. THANK YOU to SownInPeace for helping me track down the author of this quote. The original version was “Do what you can, with what you have, where you are.”  (Teddy Roosevelt)

New Books!

Standard

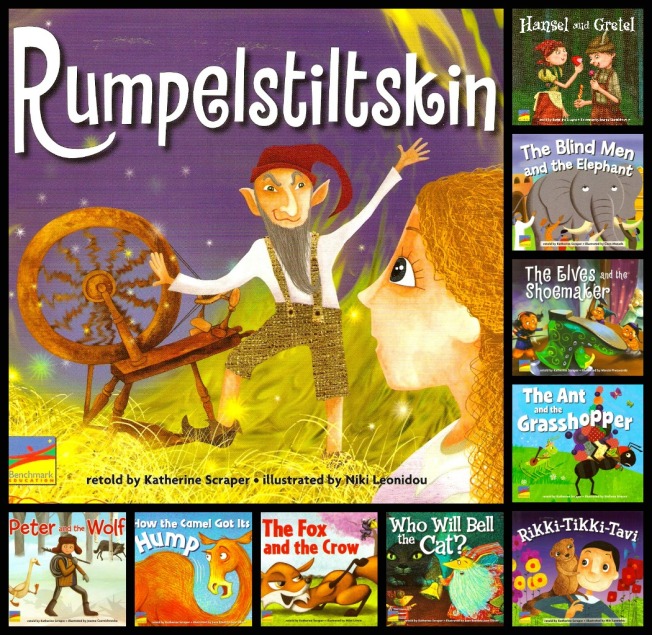
This isn’t my usual sewing or crafting post, but my “real” job is writing education materials for students, teachers, and parents, and . . . my newest books are out!  These 14 books are part of a 60-title Classic Tales series consisting of retellings of short stories, folktales, fairy tales, pourquoi tales, myths, legends, and fables for kindergarten through second-grade readers.  Didn’t the artists do a fabulous job on the covers???  (My earlier books are at www.edwriter.com—click on the BOOKS link and then use the pull-down menu to select “Books for Students” or “Books for Teachers.”) Most of my assignments involve writing or editing teacher’s guides and language arts lessons, prototyping new products, and other non-book tasks, but they’re ALL challenging and fun.  Thank you for letting me share a bit about my other creative ventures today! ♥

Instagram Collage Letters

Standard

I was so intrigued when I saw some wooden letters decoupaged with maps on House of 34 and decided to make a set for a gift. However, the birthday guy is an amazing photographer who creatively explores the city of Philadelphia with all of its amazing architecture, landmarks, murals, and street art. So . . . I printed off some of my favorite Instagram photos he’s shared on FB and cut out different bits to create a “Mod Podge collage” on each letter instead. I love that I can show him how proud I am of him . . . and it was fun, too! ♥  P.S. You can follow on Instagram at mr_fisher. And Ashley Bollinger has some other fun Instagram art projects here.

FREE Owl Art Print!

Standard

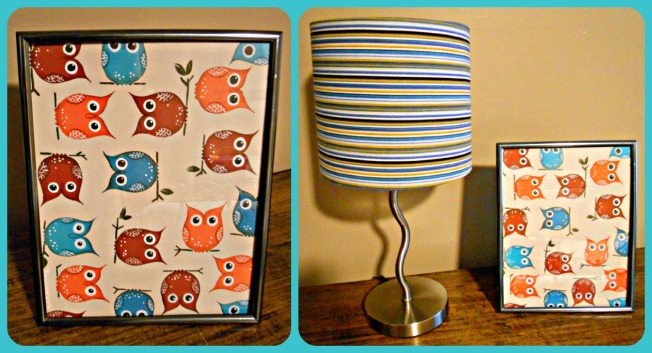
I was SO excited that the October issue of HGTV magazine has a tear-out print of a new painting by designer David Bromstad! Click here to see a 30-second video about his creative process via Pier I Imports. But guess what . . . you don’t even have to buy the magazine to get it! Simply click here and scroll to the bottom of the page to download a pdf you can print at home! I think it would be lovely as fall decor or in a nursery. At our home, it’s the perfect guest room dresser buddy for this fun lamp. ♥  P.S. Click here for more fun and free autumn prints!

Fork Easel

Standard

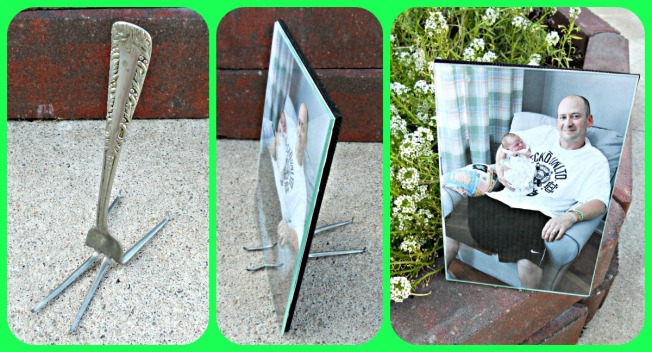
I was rummaging for a frame yesterday and found my long-lost fork easel! I didn’t make it . . . I bought it at a craft show. But I think I could make one now that I know A Ponytail Kind of Day! She has a post here about her fork easels. Plus, if you go to her Category Cloud and click on “silverplate,” you’ll see knives, forks, and spoons made into candleholders, bracelets, necklace pendants, money clips, vases, key chains, and napkin rings! I’ll try it if you will! ♥

P.S. Click here for a tutorial for a rock and wire photo display option . . . another fun upcycle! P.P.S. And now I just discovered this AMAZING silverware starburst mirror! You must check it out! P. P. P. S UPDATE: Spoon rings now on A Ponytail Kind of Day! 🙂
Fall Art Print

Standard

If you haven’t already visited the 9-15-12 post at We Don’t Need Sleep, you MUST take the next 60 seconds to do so . . . and download your beautiful FREE seasonal art print! I so love this gift, and it’s available to EVERYONE! Thank you, Kristin and Callie!   UPDATE on 9-24-12: I just got a tip that we can find 12 more free fall printables at My Blessed Life! Thank you, Myra! ♥

Artists I Admired On Our Trip

Standard

On our recent trip to visit Baby Katy, I saw some adorable creations in her nursery! I also discovered the most amazing fabric art at the Philadelphia International Airport—Kay Healy’s “Coming Homelife-sized fabric mural in Terminal E. (Click on photo above for a larger view).  I couldn’t stop looking at all the intricate details!

Now for those fun nursery ideas . . .

(1) The top picture is “She Art” lovingly created by Katy’s Aunt Shannon. Visit Christy Tomlinson’s blog (the founder of She Art) to learn more about this art form.

(2) The owl and flower paper collages are by a lovely interior designer and friend of Katy’s mom and dad. Please check out her web site at Ashley Heath Design. (And we loved how the flowers coordinate with Katy’s new mobile!)

(3) Katy’s mommy, author of the delicious cooking blog Consumed: My Culinary Adventure, made this beautiful curtain “gift-wrapped” with ties sewn from a coordinating fabric. I love it! ♥

That Nellie is So Craftie! :)

Standard

When I began blogging, I didn’t know about GIVE-AWAYS! What fun! And I was recently the lucky recipient of an adorable fabric bag, bookmark, and set of  vintage photo notecards handmade by Kim from Craftie Nellie. Thank you, Kim! ♥  P.S. Click here for Kim’s Etsy shop!

Road Trip Projects

Standard

We spent fifteen hours in the car this weekend for a fun trip to see family. In my project bag I brought along . . .

(1) blue and gold scrapbook paper to cut into circles for garland for my class reunion next weekend,

(2) fabric and buttons to make flowers, and

(3) two embroidery projects to finish (posts to come!).

I also received these adorable earrings as a surprise gift from our hostess! They’re created by a nonprofit called Unboxed Art . . . please check out their website when you get a chance, and have a lovely week! ♥


More Vintage Treasures!

Standard

Thank you for all the WONDERFUL ideas I’ve received so far for my vintage bow ties! With a super-busy week ahead (in a good way! :)) sewing isn’t on the agenda, but as soon as I get back to my machine I’ll be trying them out!  In the meantime, I thought I’d share the other goodies Dad gave me this weekend. My mom won these ribbons for her paintings at county and state fair competitions . . . she was so amazing! I have a bunch of these stashed away from my 4-H days, too. I also have a class reunion coming up during fair weekend in August, and I offered to make the decorations, and wouldn’t the ribbons make a festive bunting??? My other newest treasures include  (1) a “VOTE!” necktie from a 1972 election, (2) some hand-embroidered and crocheted linens, (3) a hand-sewn and crocheted baby dress, cap, sweater, and booties, and (4) a colorful nylon kite that no longer flies. I’m going to have so much fun with these! And if you have suggestions for projects for any of them, please feel free to share here, too. I never cease to be amazed at all the creativity out there! ♥

New Roll-Up Pencil Kit

Standard

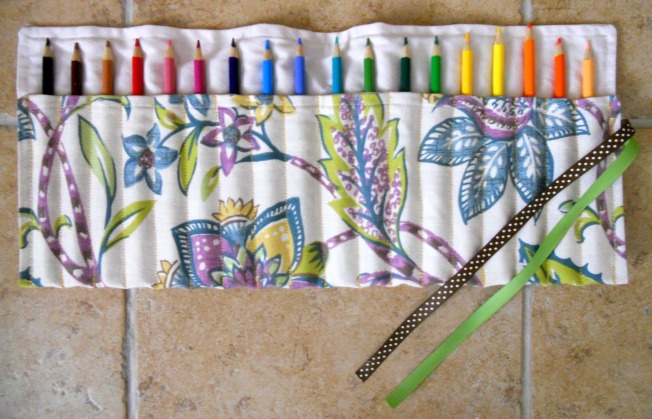
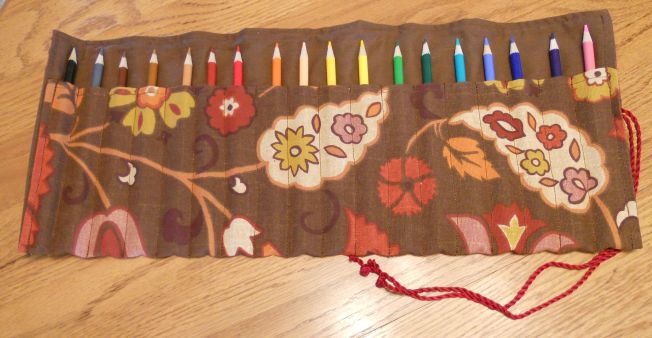
I previously posted about the easy, fun roll-up pencil kits (upcycled from placemats) that I learned how to make using this Martha Stewart tutorial. Here’s my newest one! I love using mats that are patterned on one side and plain on the other . . . perfect for showing off the pretty pencil colors. ♥

Roll-Up Pencil Kit

Standard

As you know, I’ve been exploring projects I can make with those beautiful placemats from World Market. The latest idea came from the queen of crafts herself, Martha Stewart. Although I generally view her projects with considerable trepidation, I love this one ! Here’s the link, and here’s the result! ♥

Tangerine!

Standard

Design-her Gals is the best web site ever for creating business cards and other personalized products. I’ve used it for several years for my Edwriter cards, and I’ve never been disappointed. Plus, it’s fun designing your “gal,” they have lots of great sales, and a portion of every purchase goes to the Gal to Gal Foundation for Stage IV breast cancer research. I was intrigued by a recent email from Design-her Gals about the “color of the year” . . . tangerine:

Tangerine combines the energy of red and the happiness of yellow. Associated with joy, sunshine, and the tropics, it represents enthusiasm, creativity, determination, and success. Add a little tangerine to your life this year!

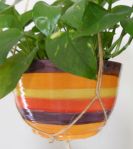
Since this was my new favorite color last spring, I took my camera to my living/dining/kitchen space to see just how many shots of orange I could find. ♥